
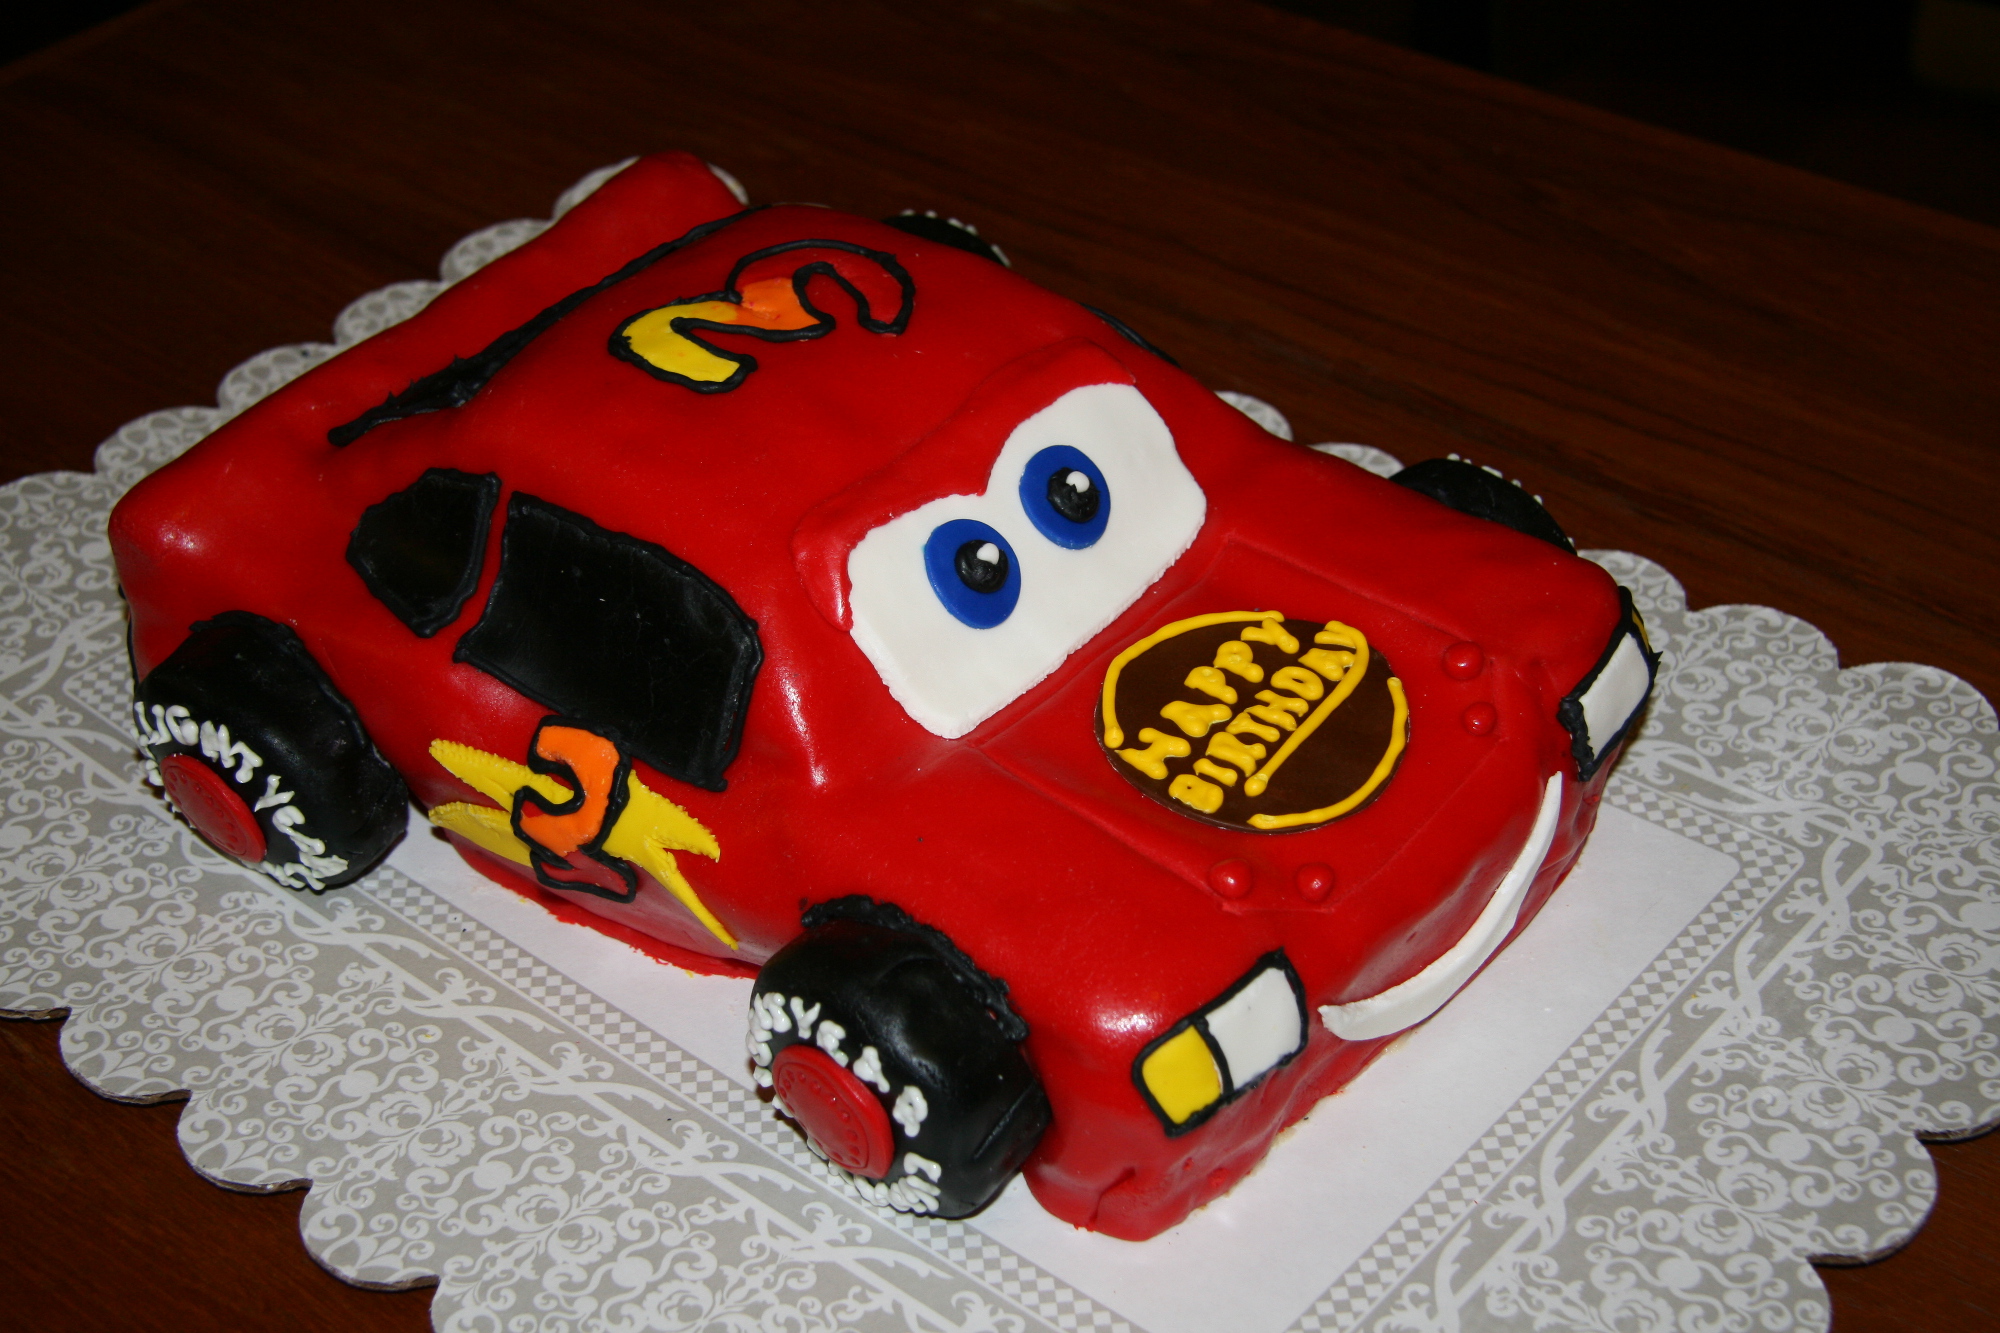
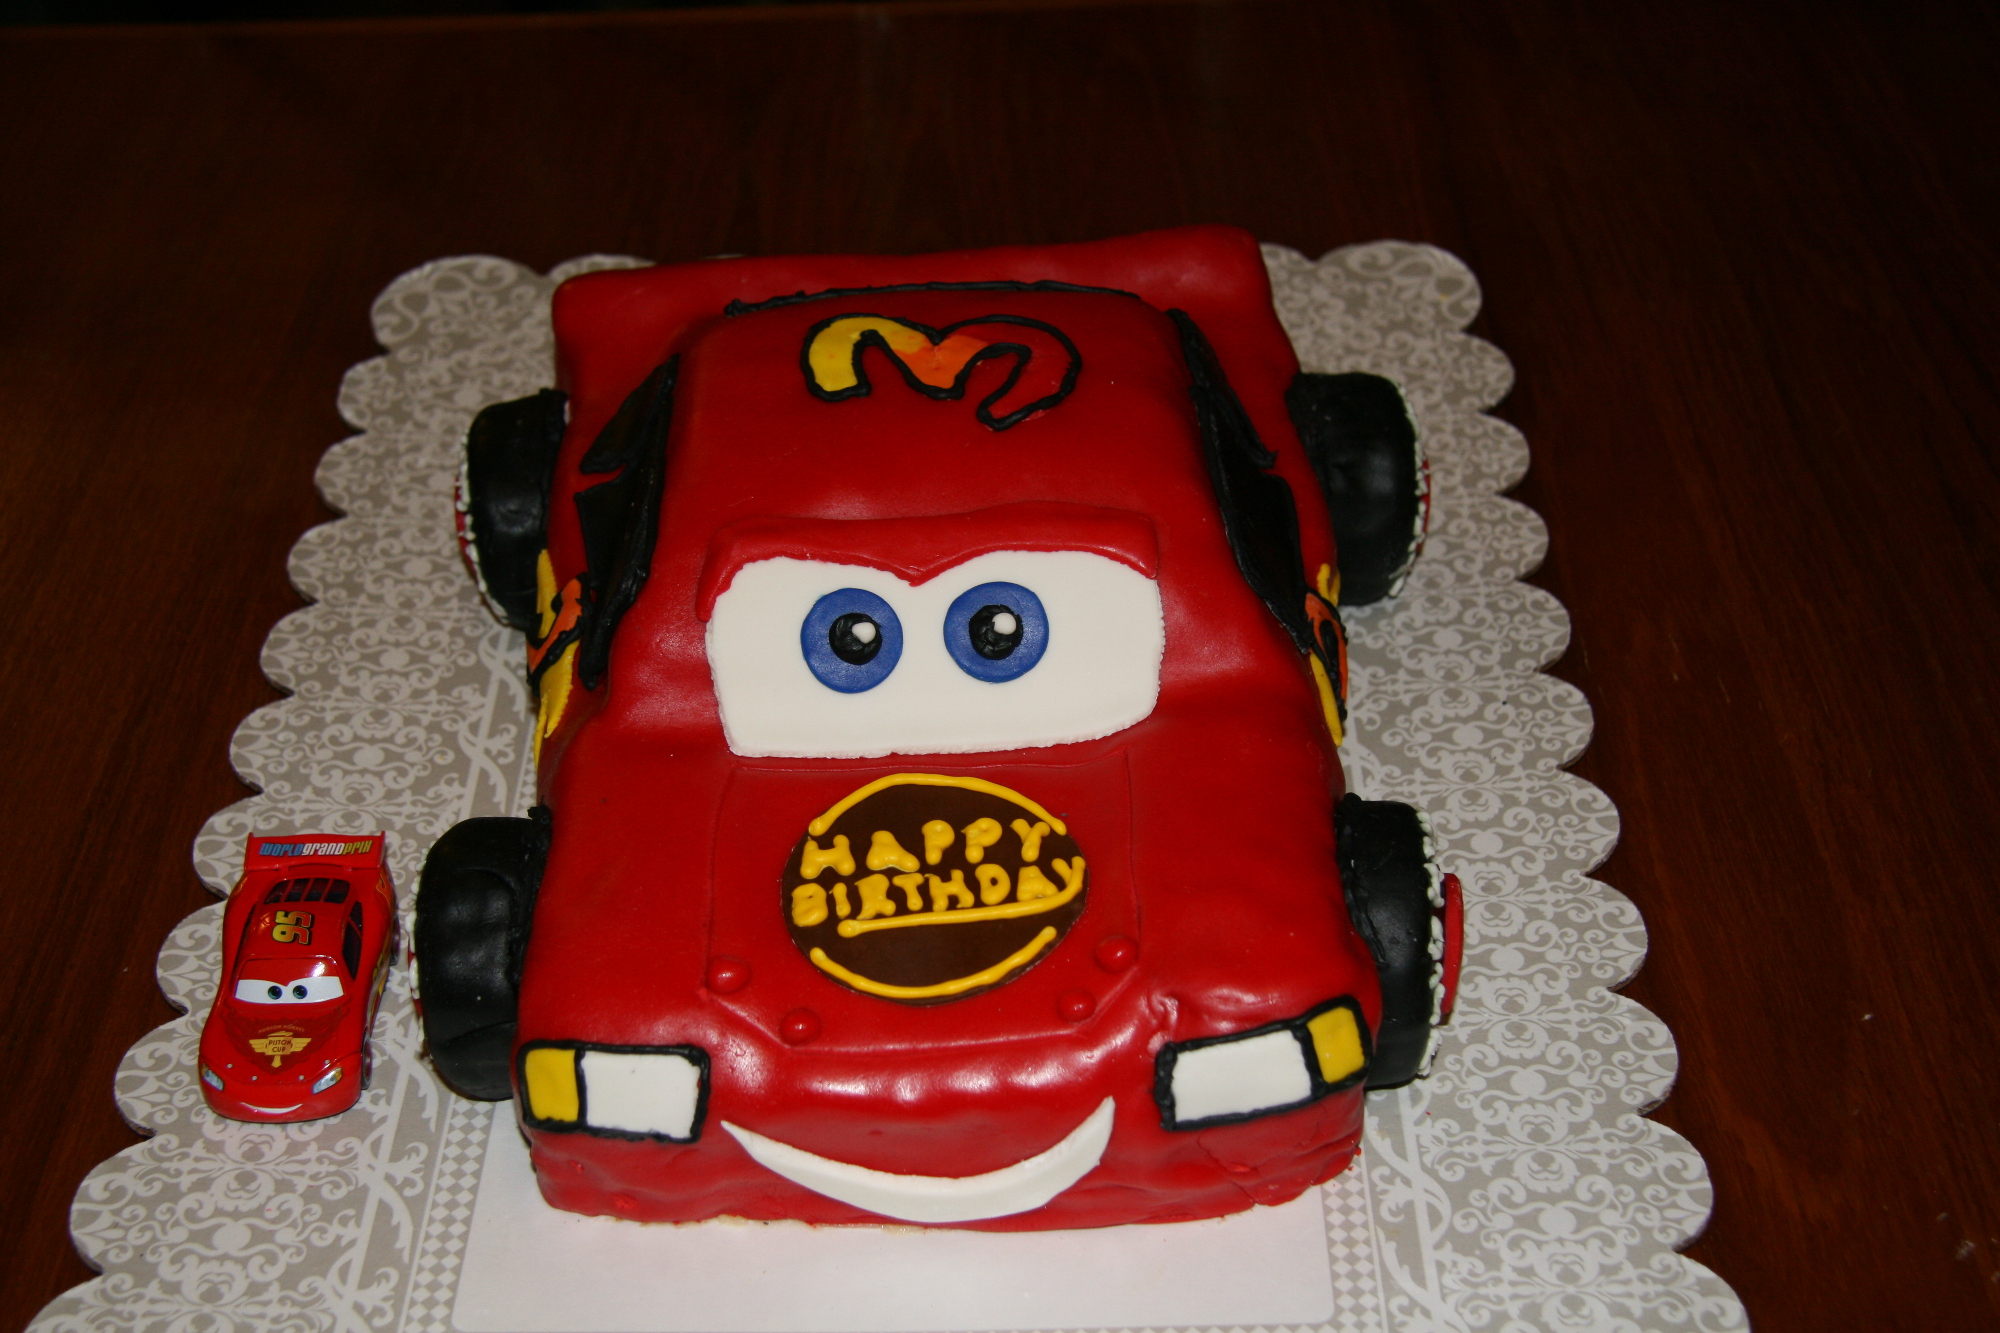
This past weekend was my cousin’s 3rd birthday. He is obsessed with Disney Cars (especially Lightning McQueen!). He had a Cars-themed birthday party, and of course I decided to make him a McQueen cake. This is the first car cake I have ever made, and I have to say it was a very fun project. I went out and bought a McQueen car to serve as a model, and this little guy became my buddy all week. He helped me with the fondant coloring, details on the car body, and most importantly, the car shape. I gave him to my cousin at the party, but I have to admit that I miss having McQueen around.
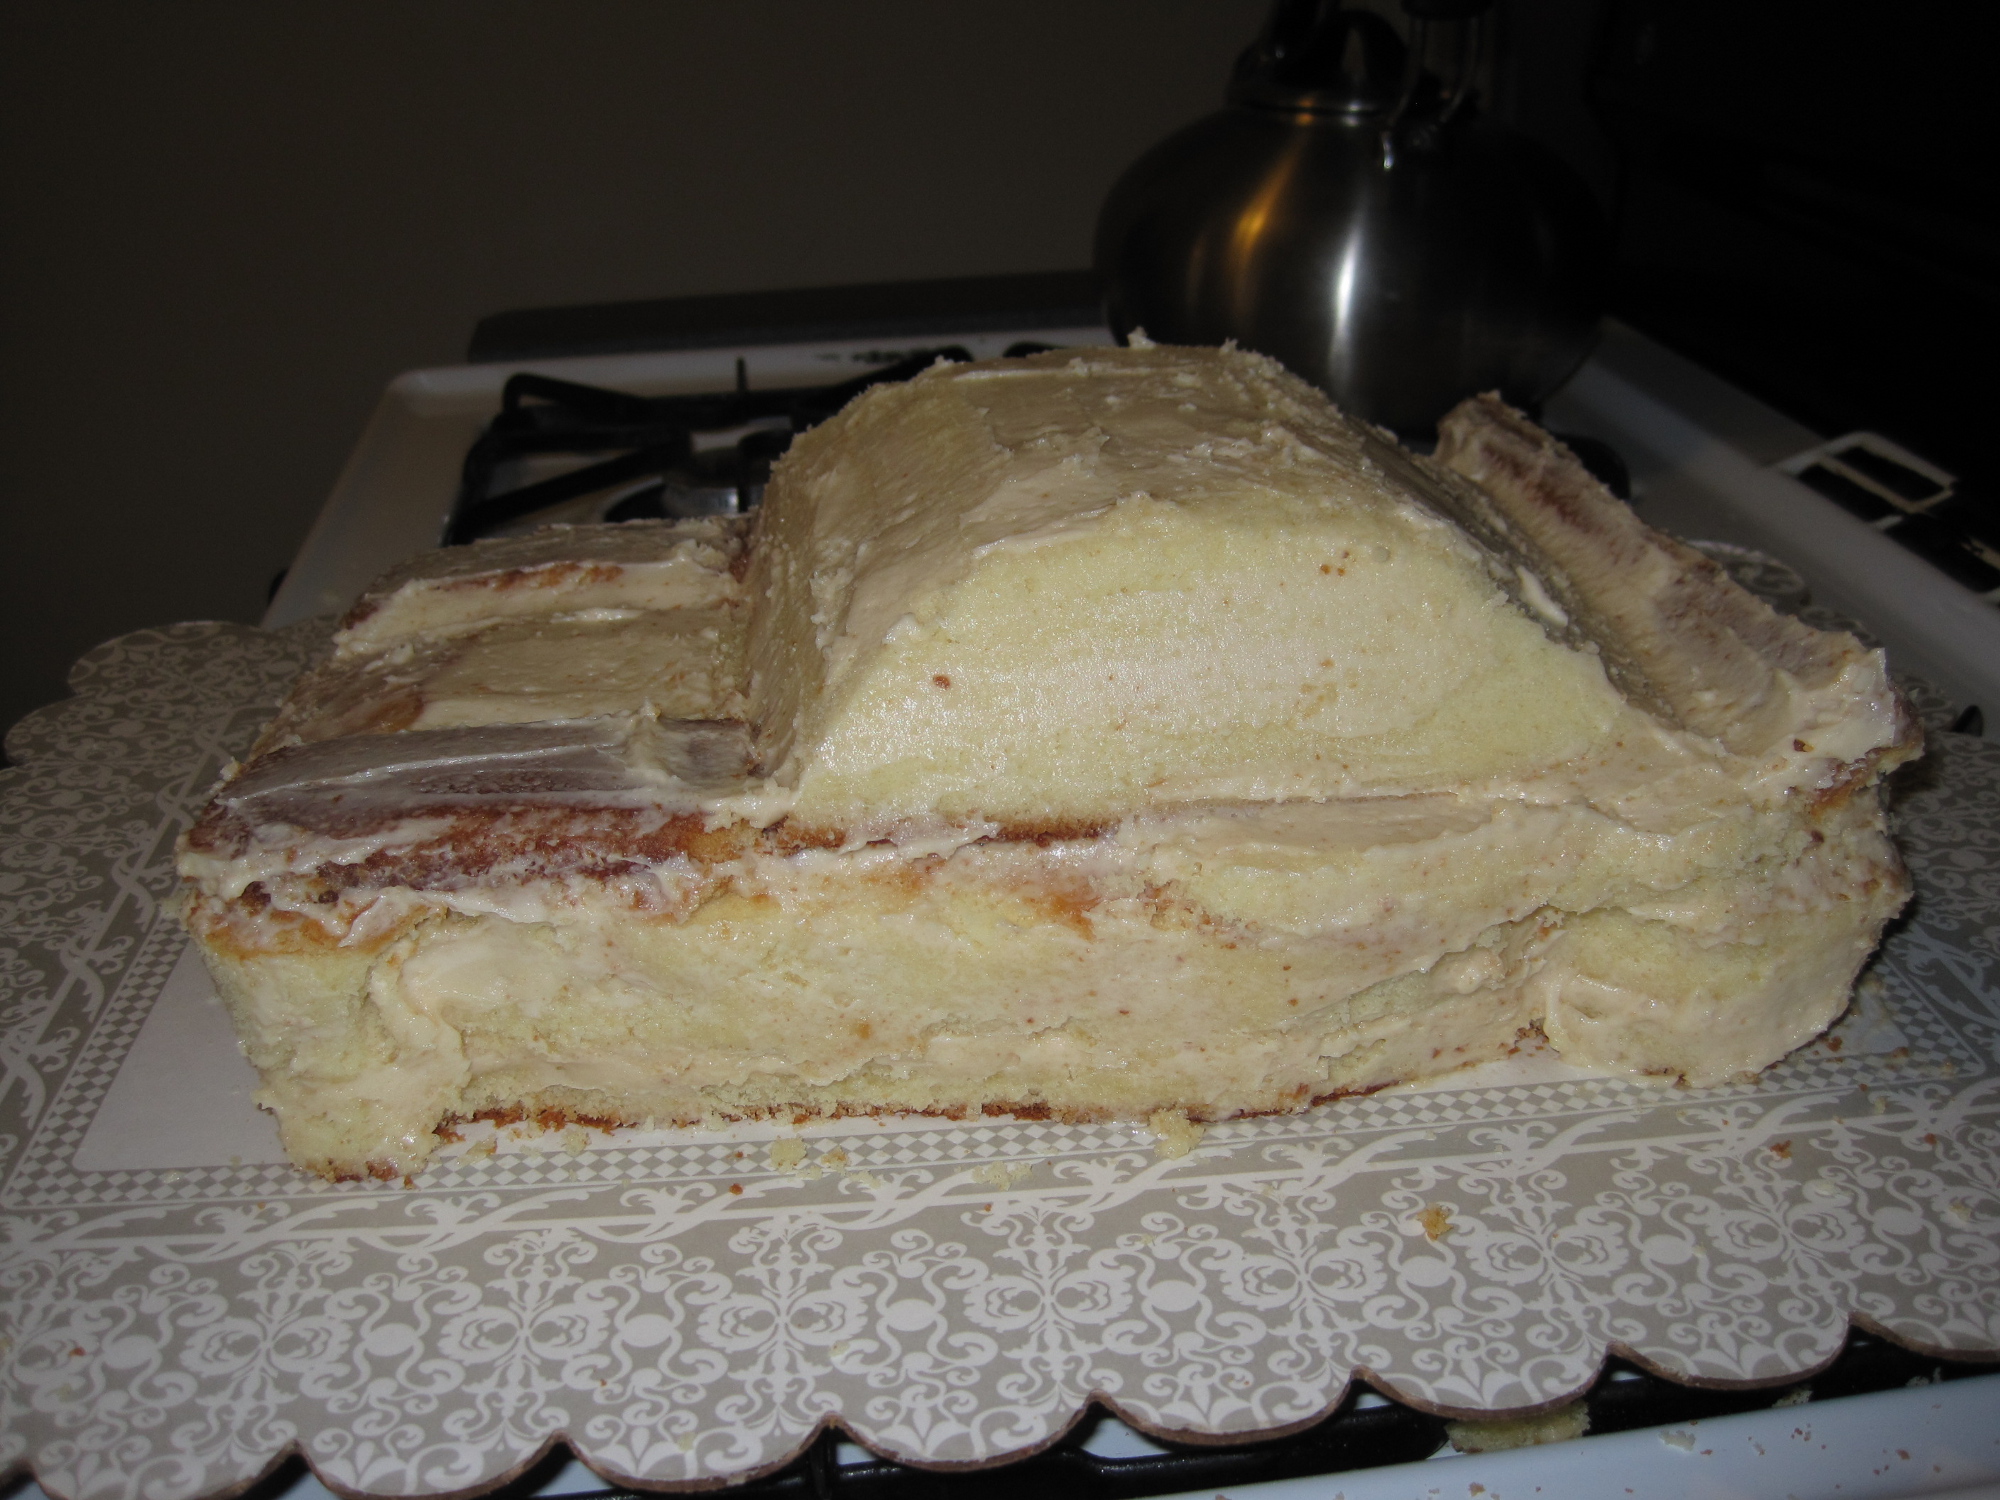
I did a lot of research online and found this great tutorial on how to make a car cake. I just followed the instructions, and put my own finishing touches on the cake. Since this cake requires a lot of carving, I made it out of the Perfect Pound Cake. The dense texture of the cake really helps to hold it together while you shave off pieces and cut the contours of the car. More about this later.
I decided to do a different flavor buttercream frosting, and tried a salted caramel buttercream. I had seen the recipe for the sauce on Brown Eyed Baker, thinking it sounded fabulous. The next day, she posted a recipe for a salted buttercream frosting. With Michelle’s help, I modified the recipe to omit the cream cheese, since the cake had to sit out a long time while being decorated. The combination of the caramel buttercream and pound cake was great. I highly recommend it.
- 2 cups white sugar
- 12 TBSP unsalted butter, room temperature and cut into pieces
- 1 cup heavy cream, room temperature
- 1 TBSP of sea salt
- Add the sugar to a large sauce pan and cook over medium to high heat until melted. Whisk constantly so that you do not burn the sugar. I started whisking immediately, even before the sugar melted. It will take a while to melt.
- Once the sugar is melted, continue to cook until it has become an amber color, almost reddish brown. It will have a slightly toasted aroma. Do not let it get too dark, or it will burn. You will definitely know if you burned it, because it will go from that nice aroma to smelling burnt. Once the sugar is the correct color (or 350 degrees on a candy thermometer) add the butter and whisk until it is fully incorporated. Be careful, because adding the butter to the hot sugar will cause vigorous bubbling.
- Once the butter is added, remove from heat and add the heavy cream slowly, whisking constantly. Again, the addition of the cream will cause bubbling, so be careful. When the cream is mixed in, add the sea salt.
- Let sit for 15 minutes and then pour into a glass mason jar and allow to cool to room temperature. The sauce can last 2 weeks in the refrigerator, but I bet that it won’t even be there that long because it is so yummy!
- 4 sticks of butter (32 TBSP)
- 1/2 cup salted caramel sauce
- 4 cups confectioners sugar
- Beat the butter in your Kitchenaid mixer for 5 minutes and add caramel sauce. Once this is mixed together, gradually add the confectioners sugar until the mixture is uniform and creamy.
To make the car cake:
I made 5 batches of the perfect pound cake. I poured 3 batches in a 9×13 cake pan. For the remaining 2 batches, I made 4 cupcakes (for the wheels), and poured the remaining batter in an 8×8 cake pan. I torted the 9×13 cake and filled with the caramel buttercream. Then I placed the 8×8 cake on top the 9×13 cake, towards the back.
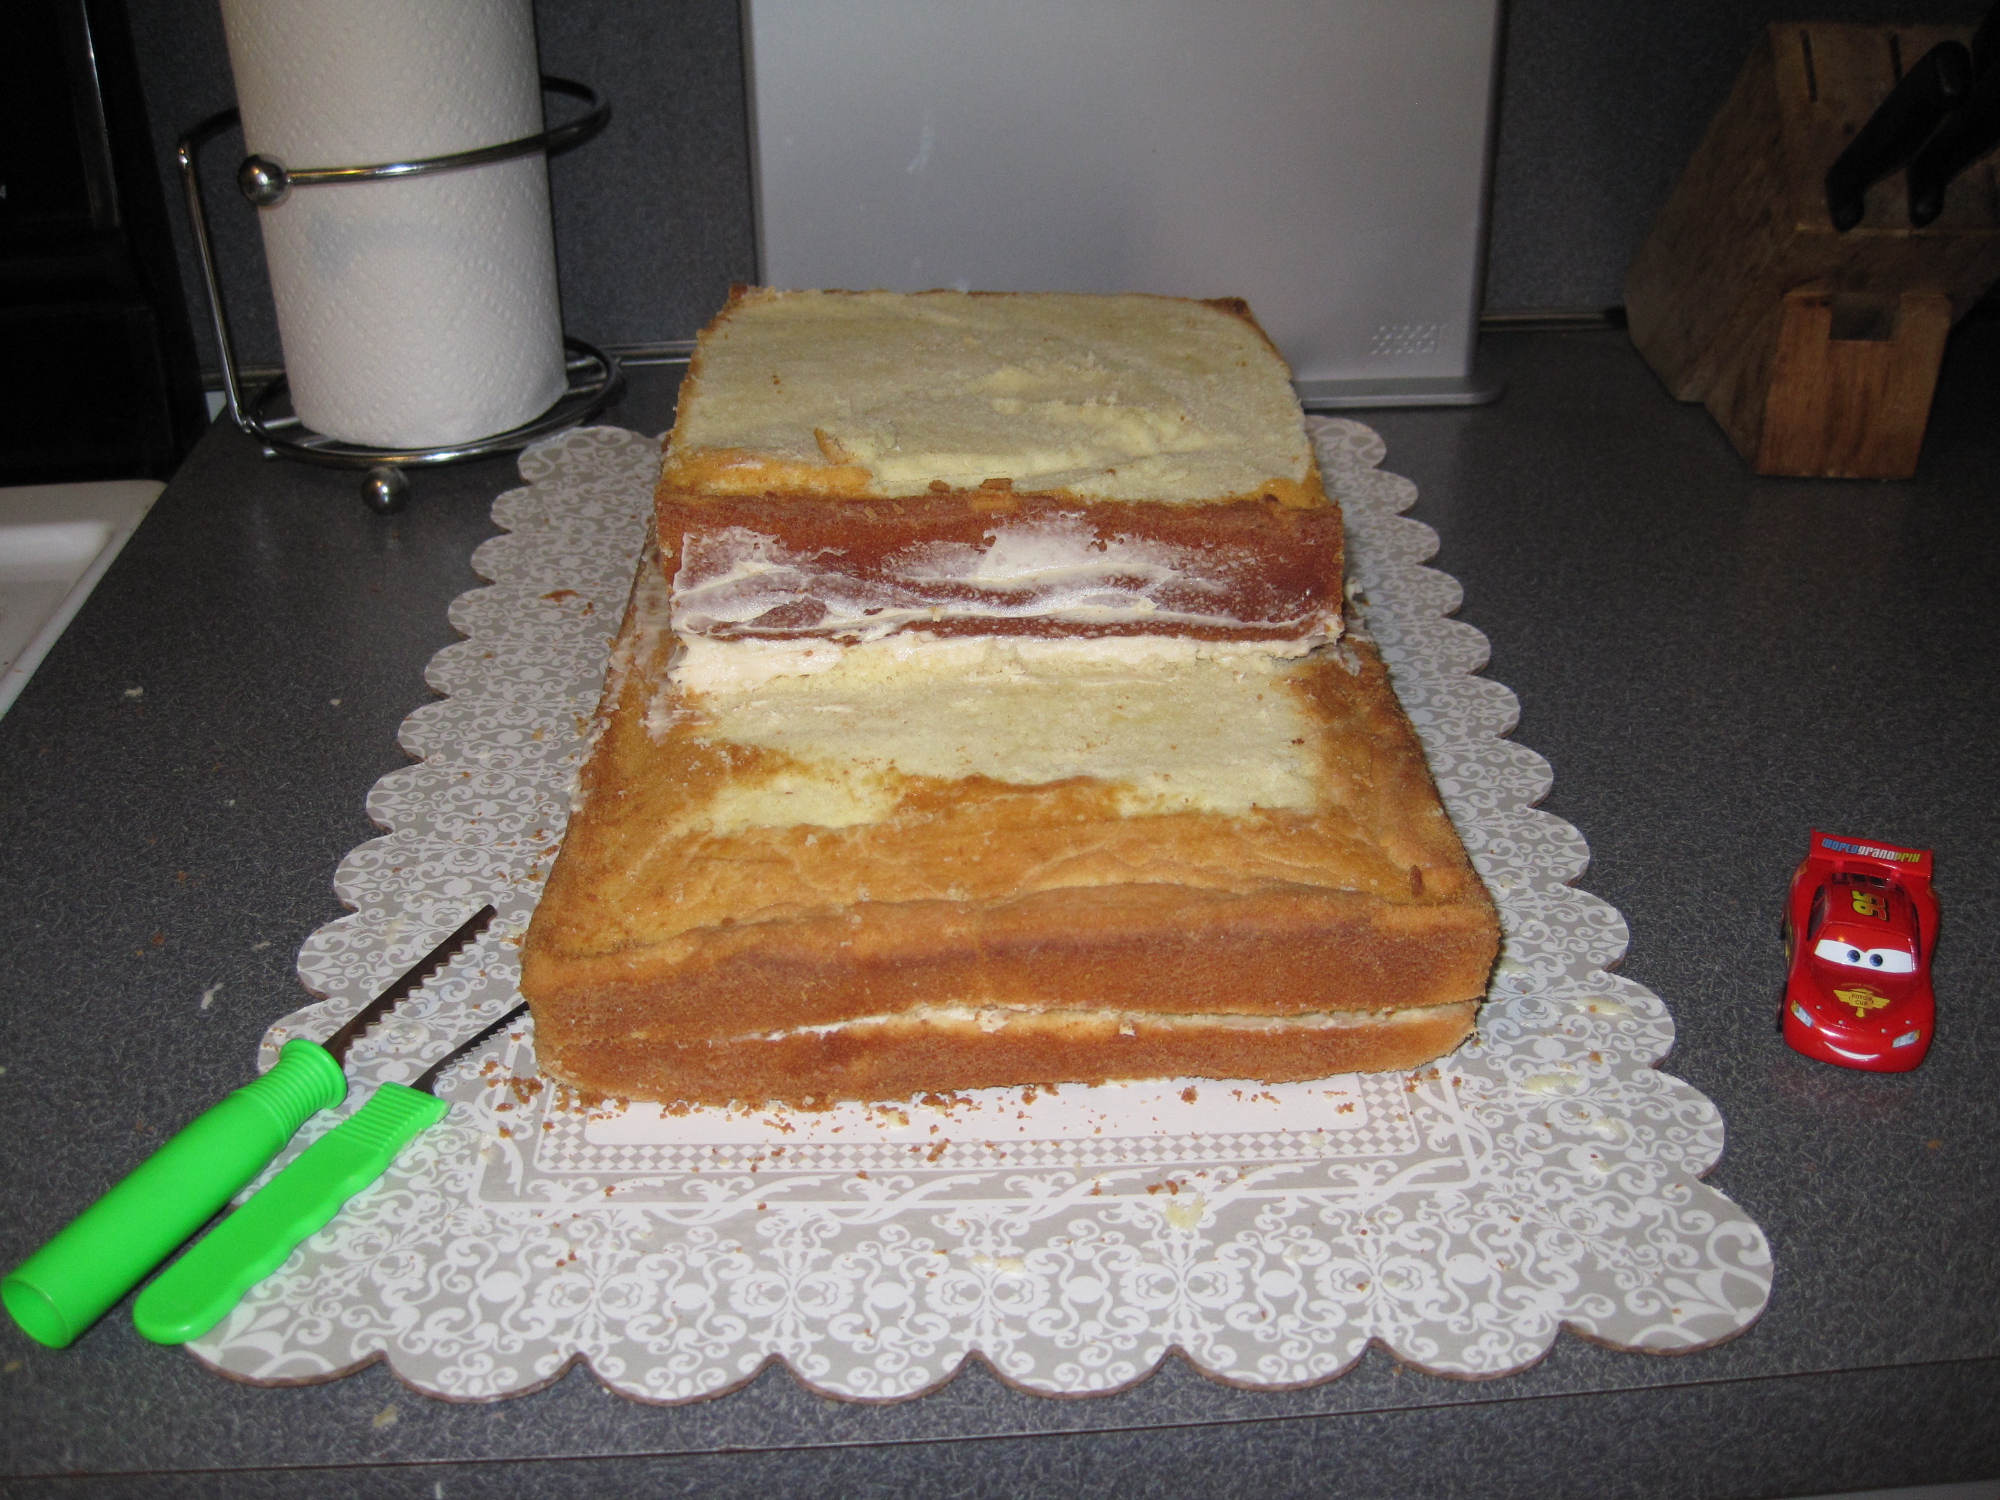
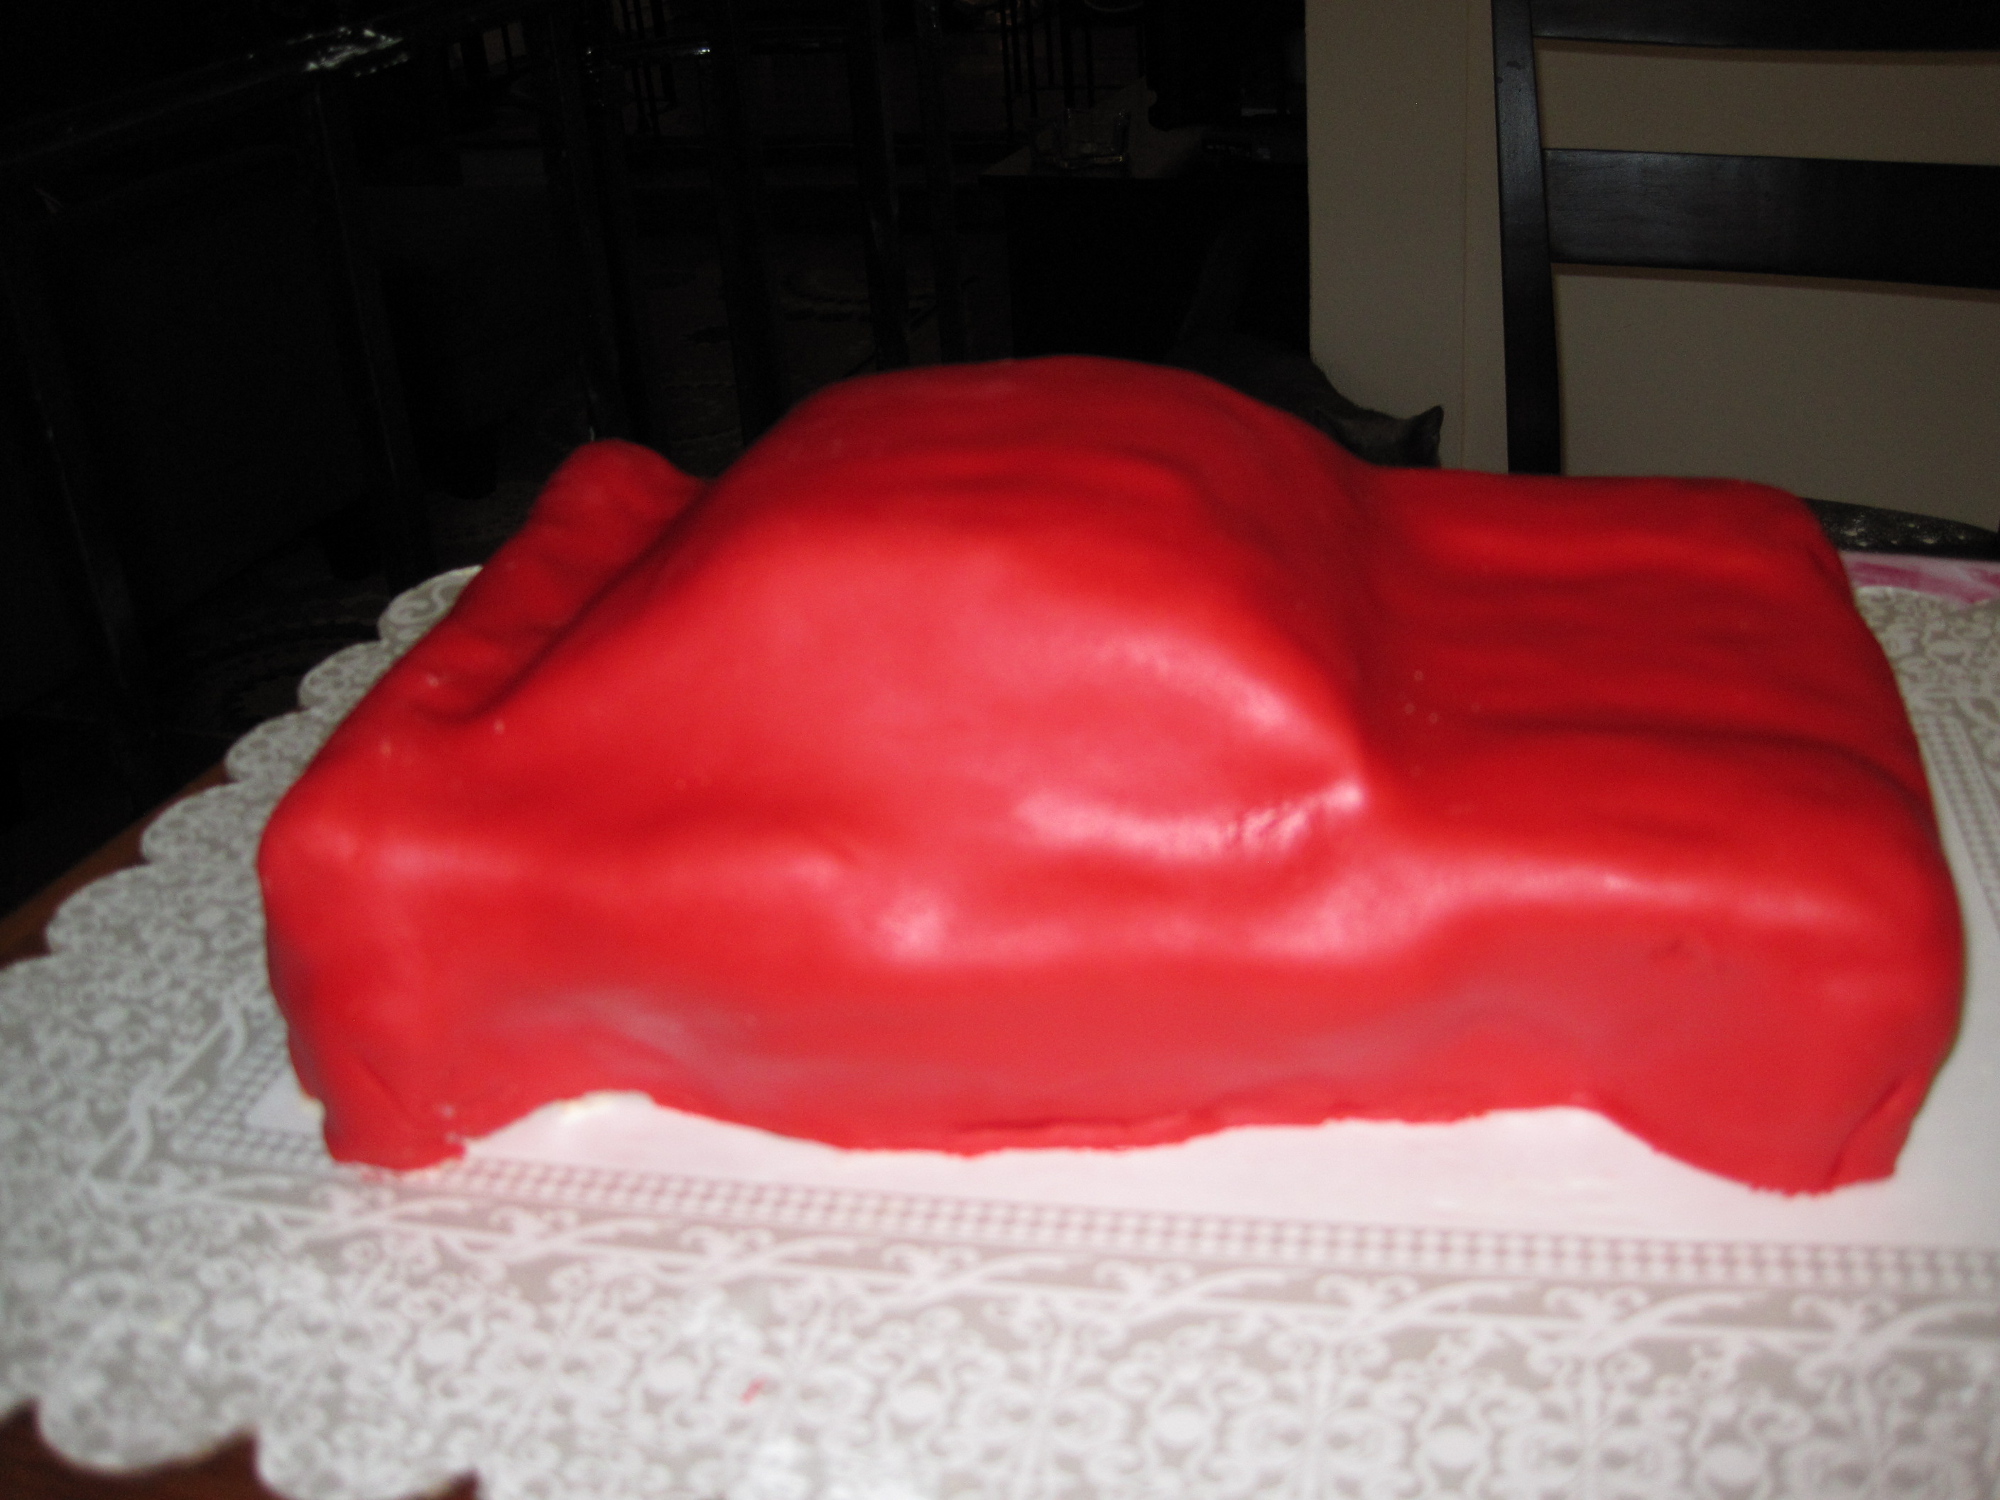
Perhaps the most useful tool I used in making this cake was a jack-o-lantern carving set that I happen to keep in my kitchen drawer. This was especially useful for cutting the contours of the car body, and making minor changes to the roof of the car. For the actual carving of the roof, I used a knife, since I had to cut the angles of the windshield and back window.
I started with the body and rounded the front to make the hood of the car. Then I cut the back of the car also rounded, but slightly wider than the front. I took some excess cake pieces and put them on the hood of the car to make the left and right sides slightly higher than the middle. I also took some extra pieces and put them on the back of the car to get the sporty shape. Next I cut the front windshield at an angle, making sure it was big enough for McQueen’s eyes. If you cut it too steep, the surface area is too small. I cut the back window less steep than the windshield, to get a big surface area for that window. I cut the side windows at a slight angle, but mainly straight.
I cut out spaces for the wheels using a 2-inch cookie cutter. I scooped out the cake with a cake decorating spatula. Lastly, I took some extra cake and added it to the back for the spoiler. It took me about an hour and a half before I was happy with the shape. The best advice I can give is to go slowly and keep going until you are happy with your car shape. If you find that you cut off too much, you can always add it back with extra cake.
Once you are done, crumb coat it and let it sit for 30 minutes in the fridge. I added a second coat of frosting after that, to really get the caramel flavor in the cake.
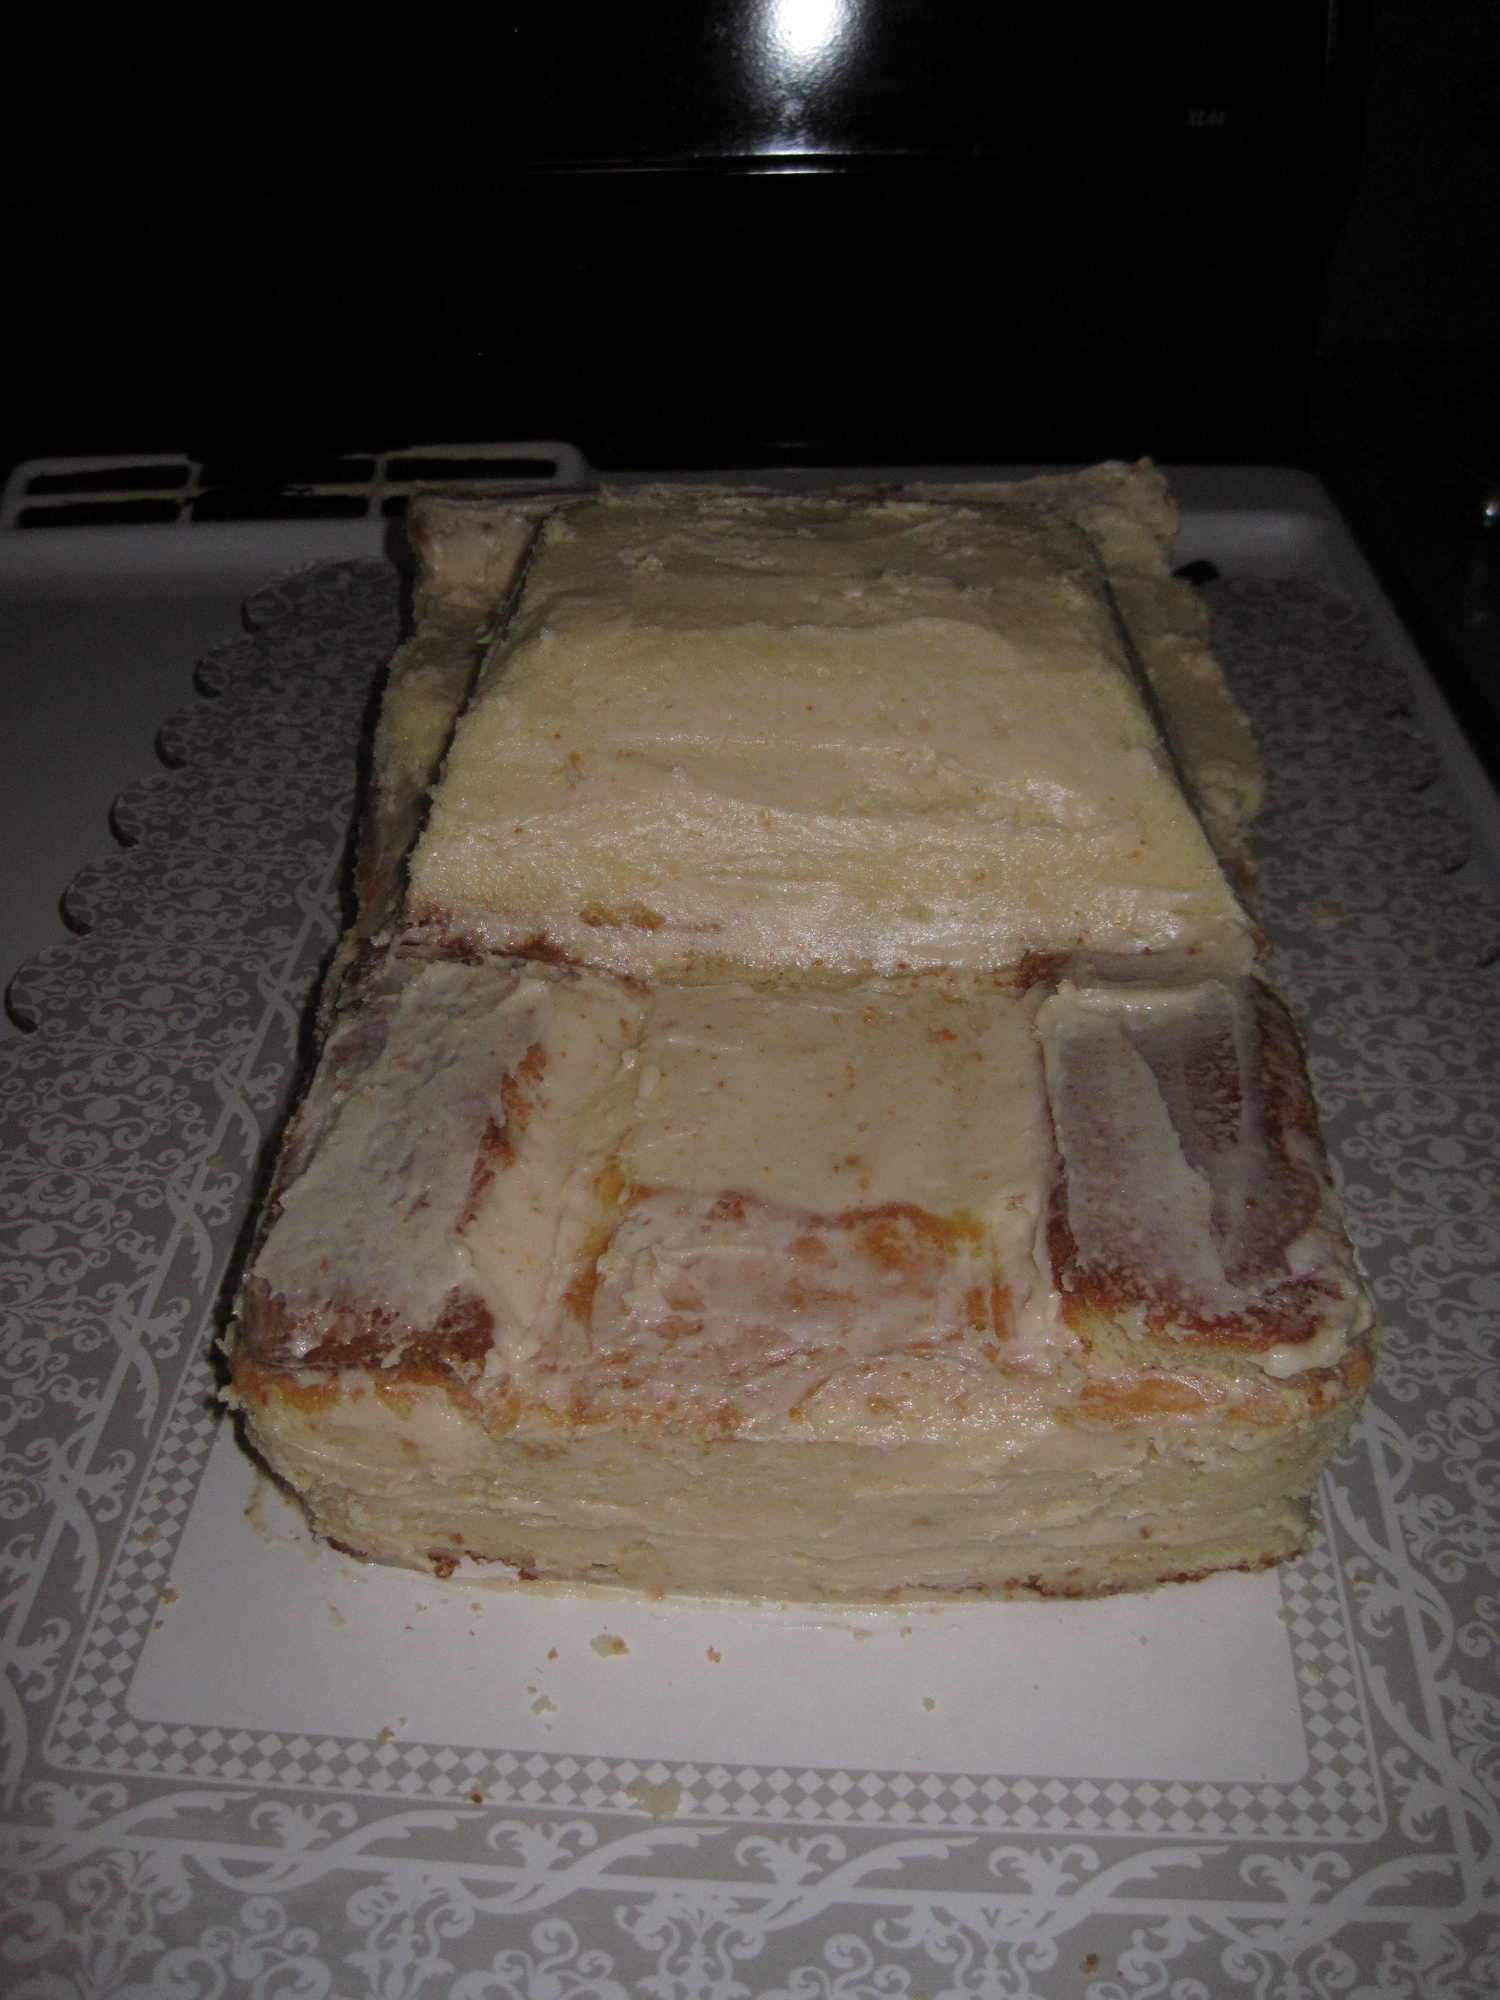
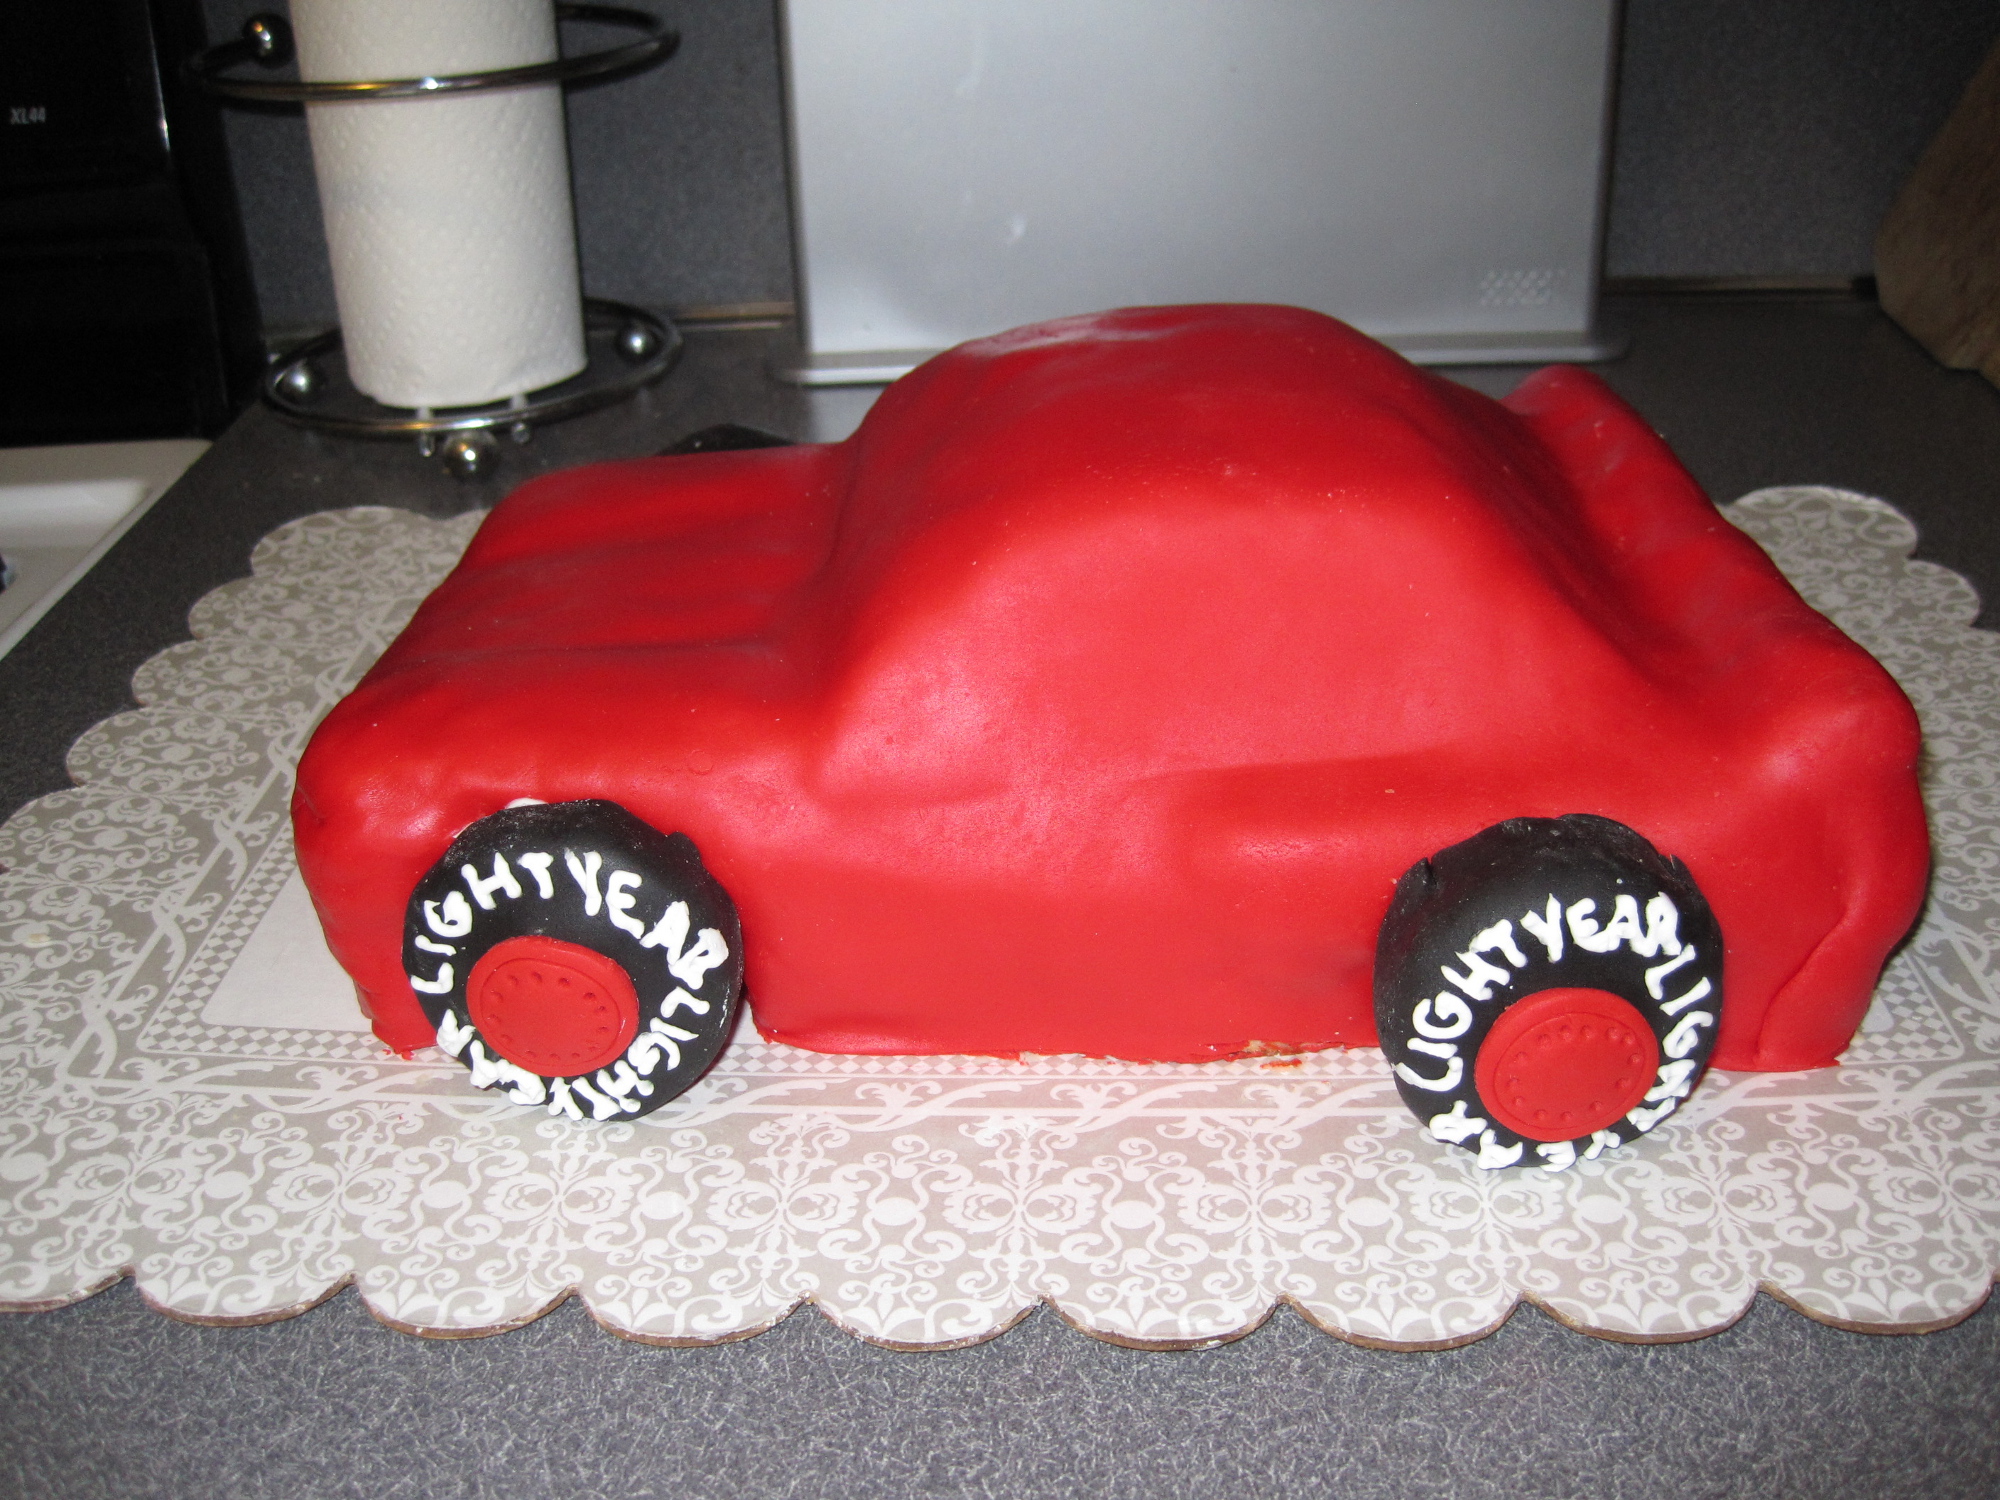
After that, you cover with marshmallow fondant. I used one full batch for the car body, and another full batch for the remaining colors.
For the wheels, I crumb coated the cupcakes, and covered with black fondant. I made the hubcaps out of red fondant, and wrote the lettering with white royal icing.
Next I added the details. I found this fondant took kit so helpful in making the various shapes for McQueen’s car body, especially the rotary cutter:

I started with the front, and did the eyes, smile, headlights, and the brown circle for the Rust-eze symbol.
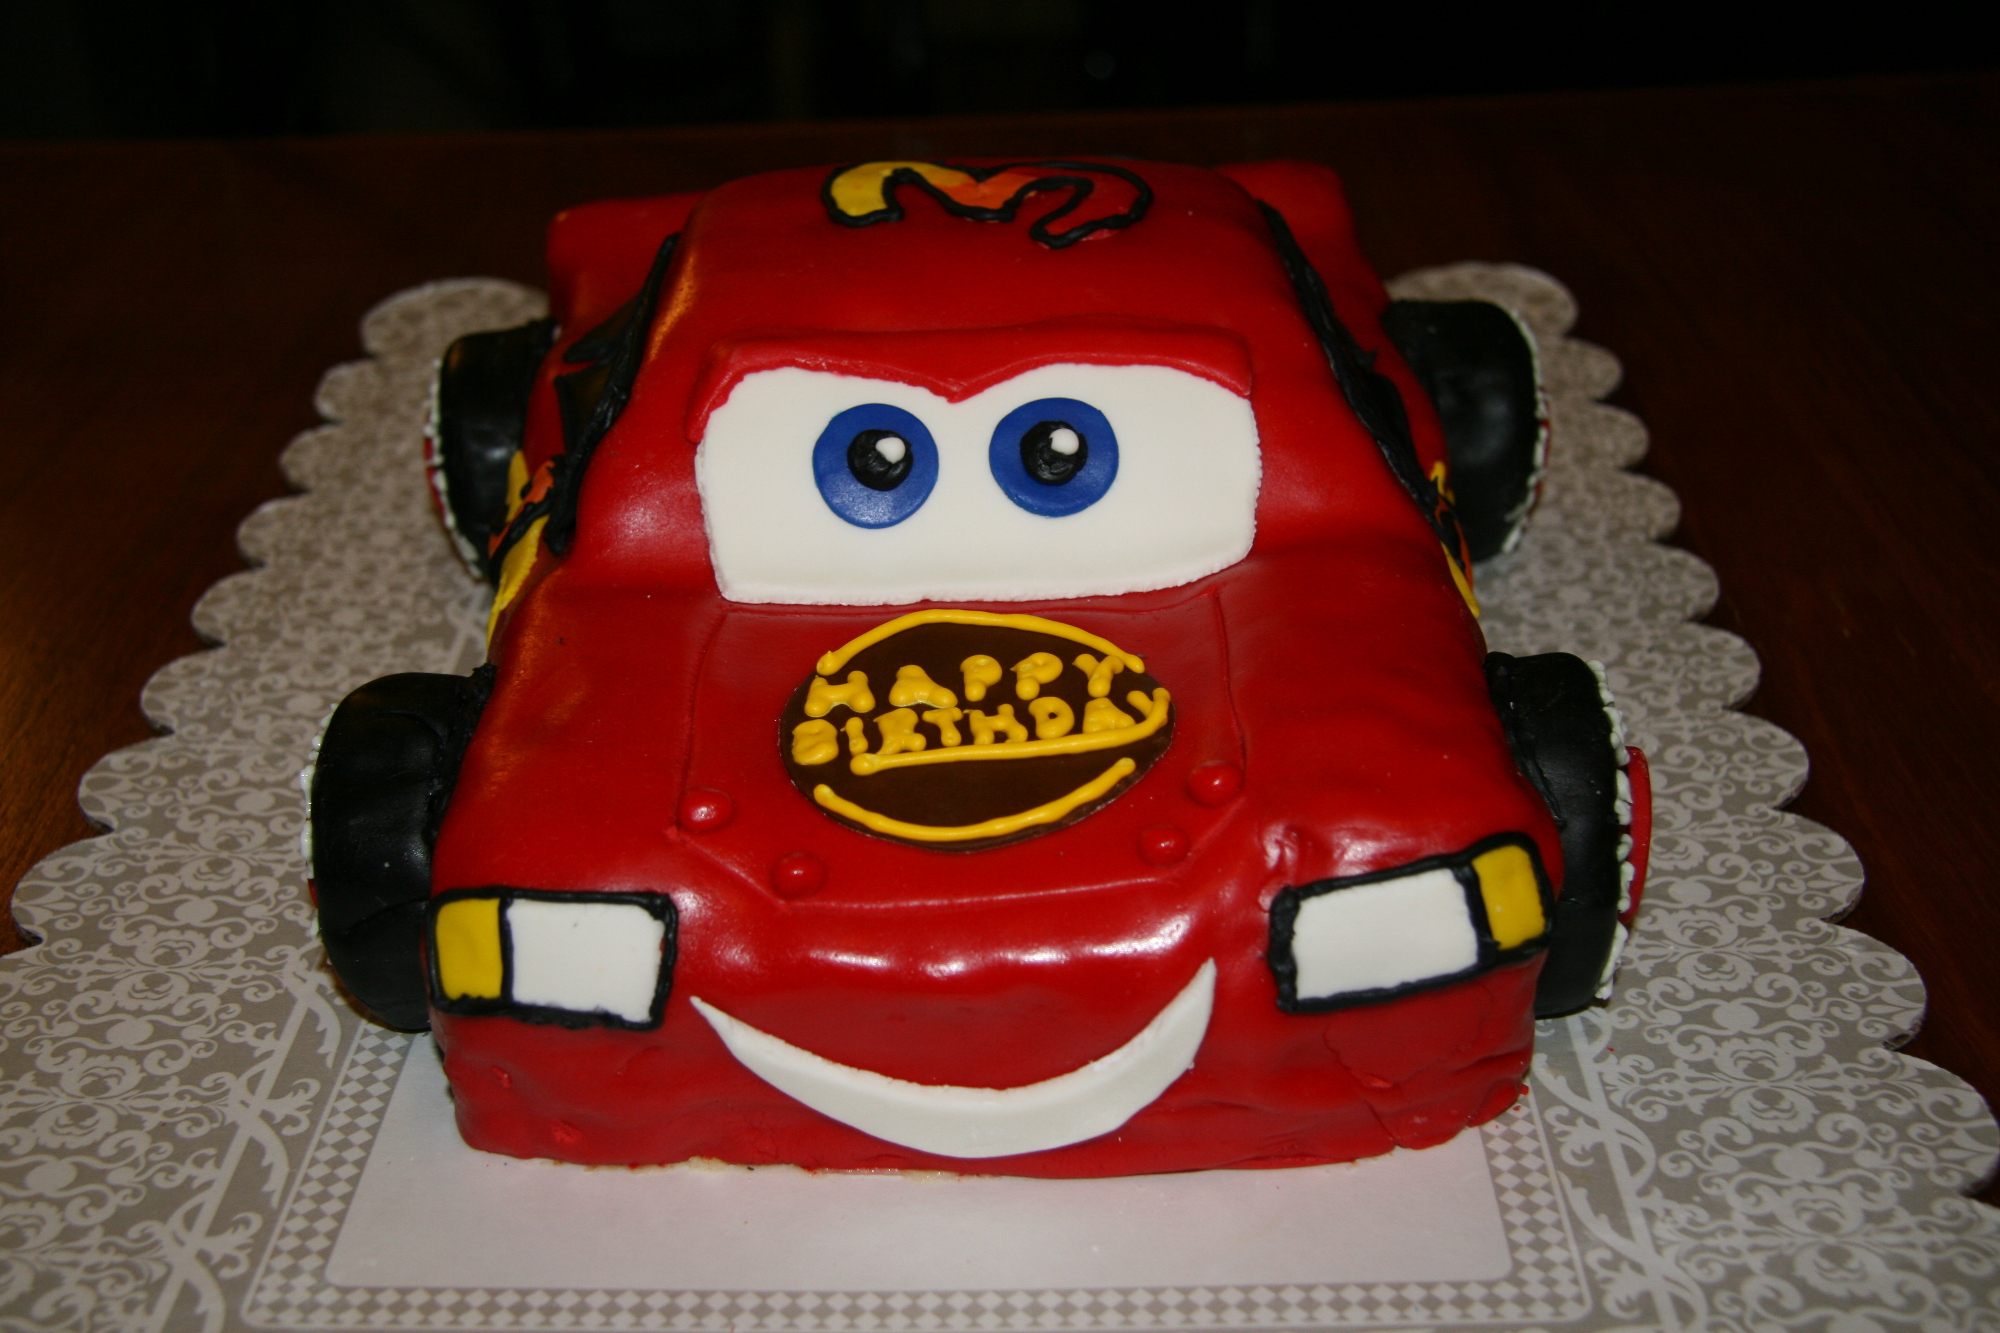
Next I did the sides and roof, making a #3 instead of #95, since it was his 3rd birthday. I used black fondant for the tinted windows. I’ve seen some people use white, but the black makes it more like a race car.
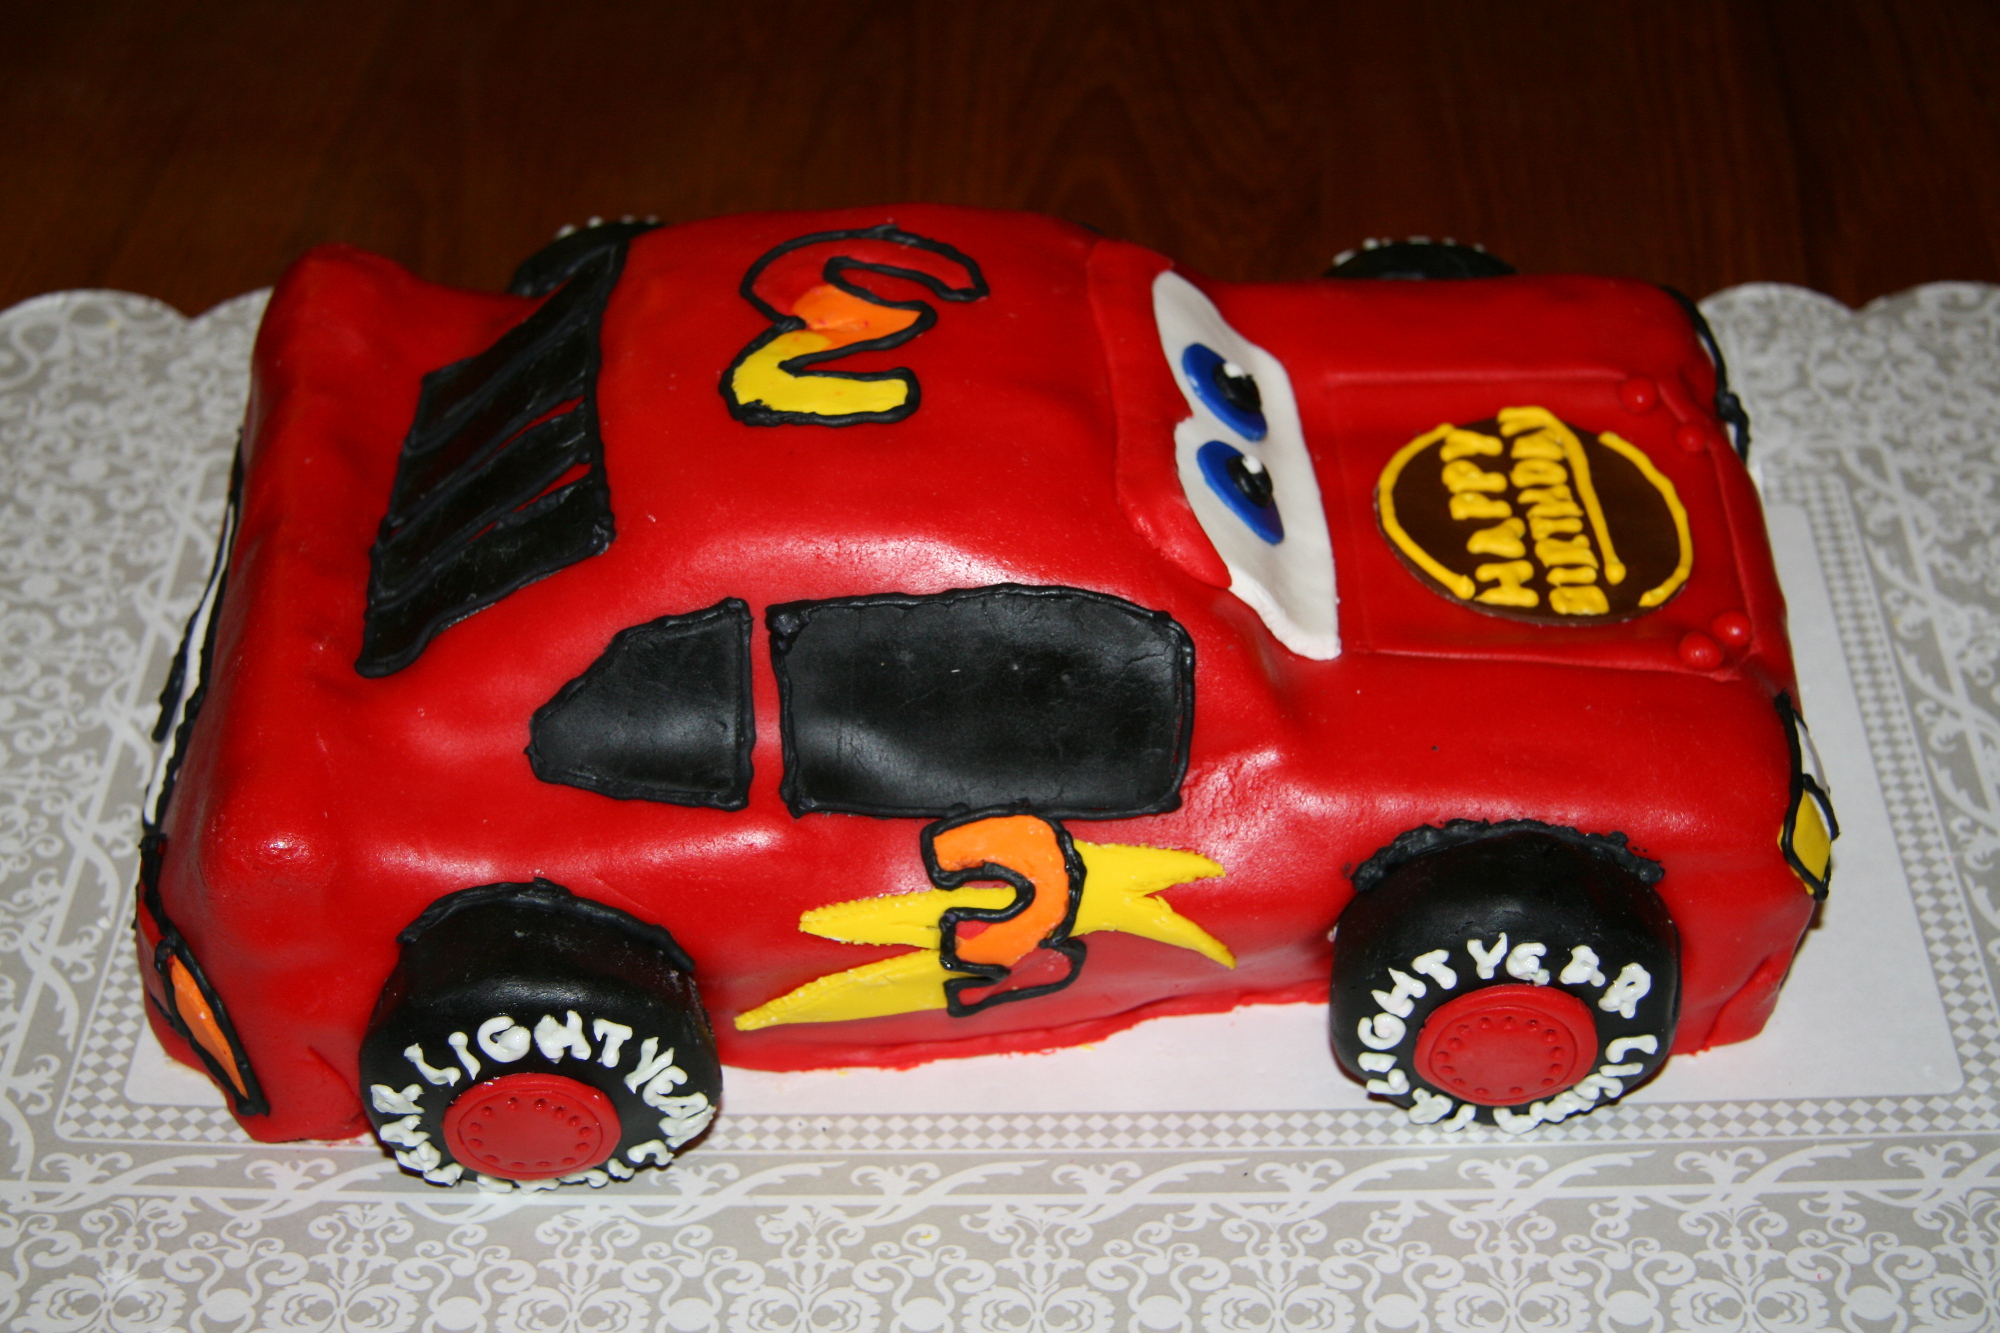
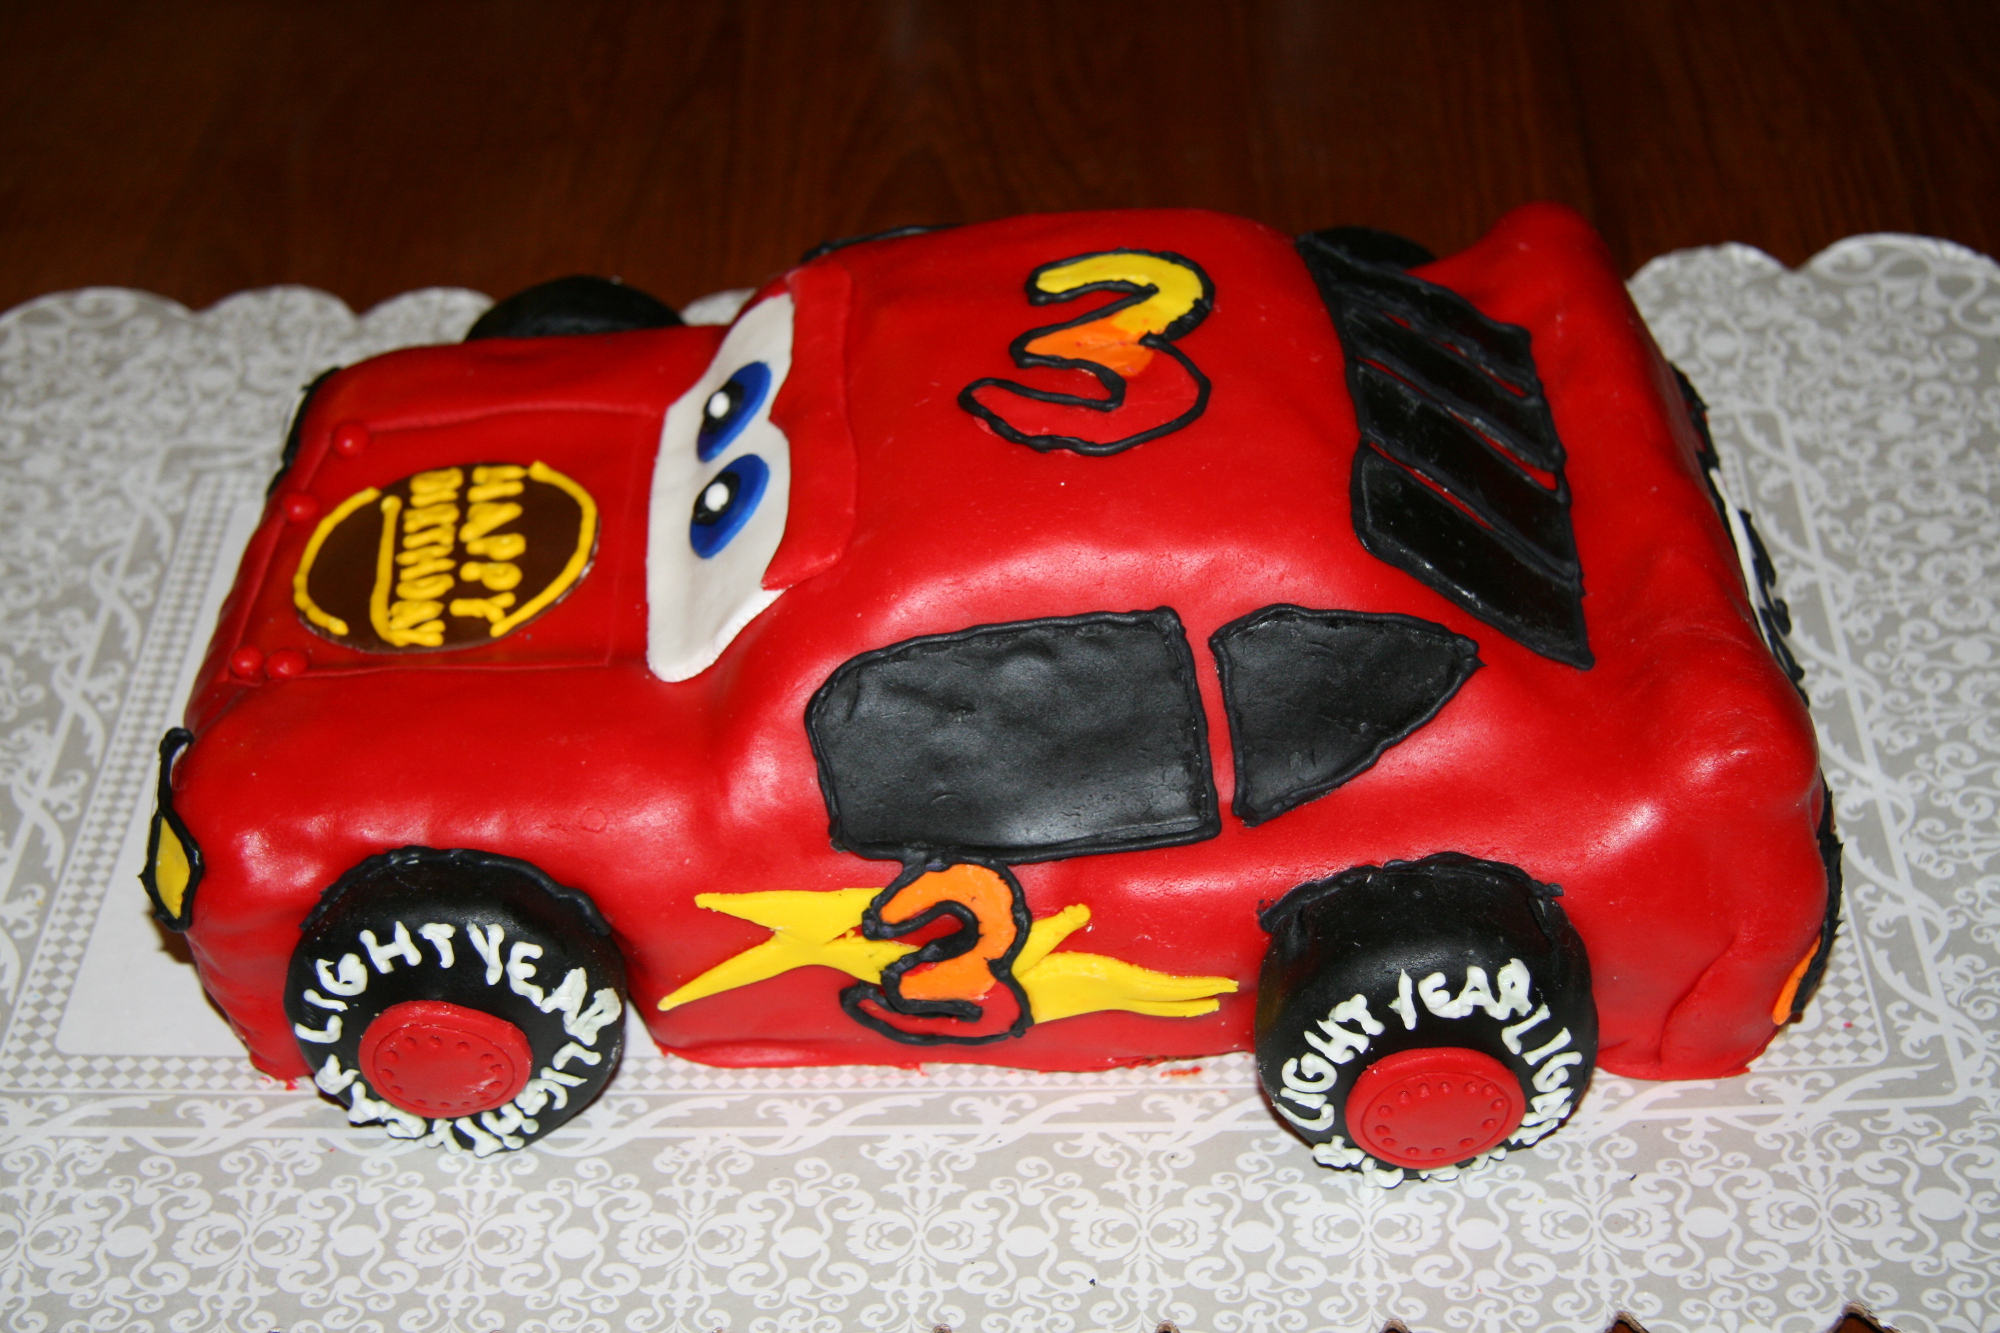
Then I did the back window, tail lights, and license plate.
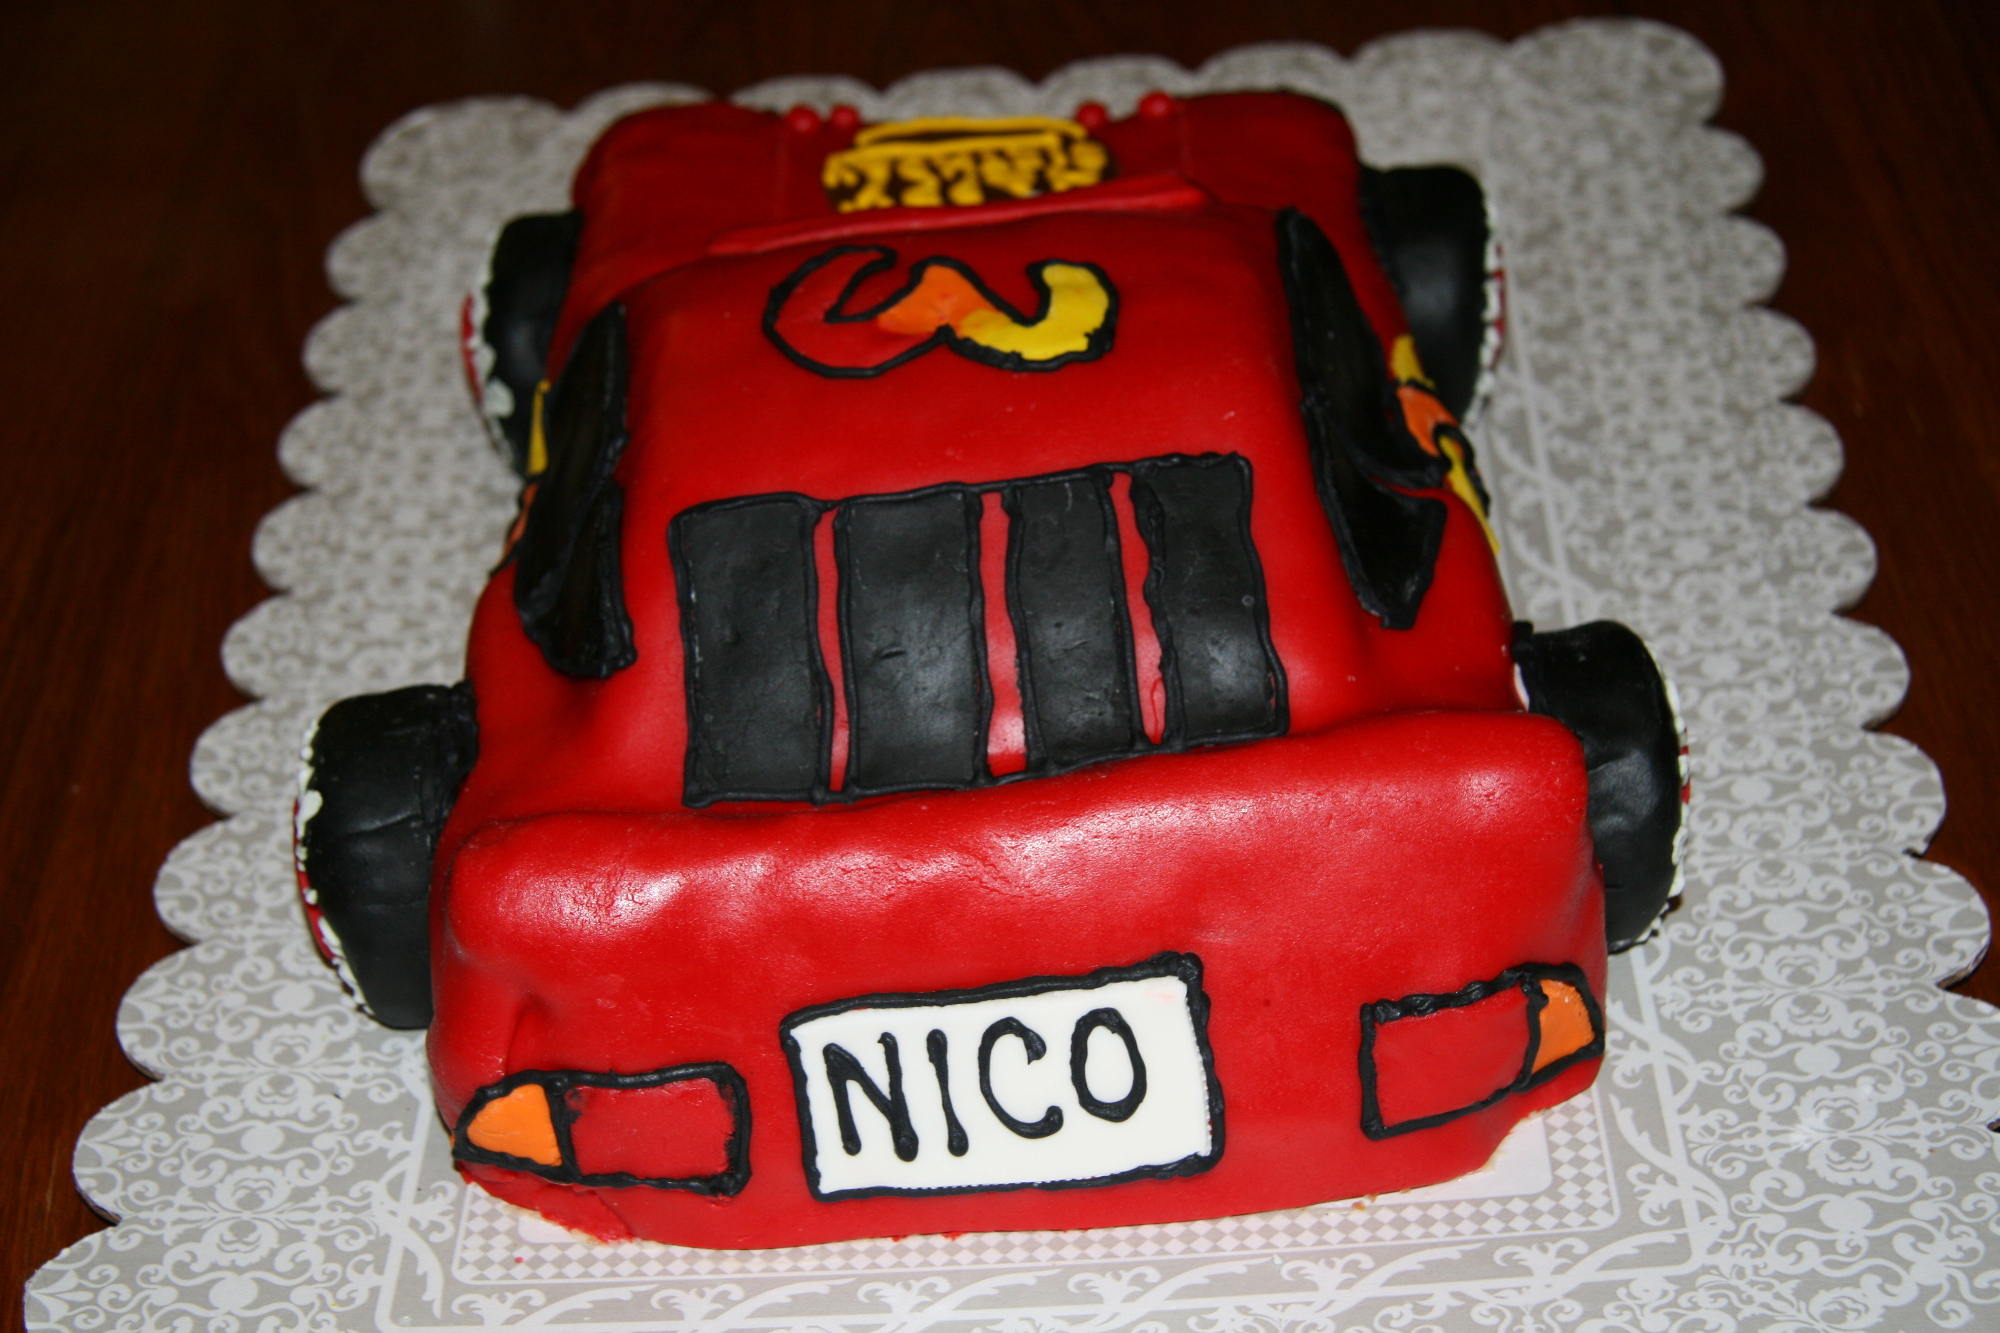
Lastly, I outlined everything with black royal icing, wrote the birthday boy’s name on the license plate, and wrote the Happy Birthday in yellow royal icing (in place of the Rust-eze logo).
The coolest part was seeing Nico’s face when it was time for him to blow out the candles!

Great job!
Thanks! I had fun with this cake!
that is so awesome! my son is in love with lightning and mater!! great job.
Thank you! All this time I thought I knew you, but the only Diana I know does not have any kids! So I looked you up. You have a very cool business! You must have a lot of fun.