![]()
My sister-in-law is a bridesmaid in her friend’s wedding, and she hired me to make a cake for the bachelorette party. Since this is a family-friendly blog, let’s just say the cake was in the shape of the male anatomy, and that it was VERY realistic. While I can’t show you the details of the actual cake, there are still some things about the cake that I want to share with you.
My new cake pans:
To make the er, back end of the cake…I needed a circular pan. I have my Betty Crocker bake ‘n fill pan, but that one is too big, especially since the cake only needed to feed 20 people! So I finally invested in the Wilton Sports Ball Pan Set, which makes two half spheres, that can be put together to make a 6-inch sphere.

A lot of cake designs require spherical shapes, so I figured this would be a great investment. I already have some ideas for cakes to make with my new pans. Stay tuned!!
The filling:
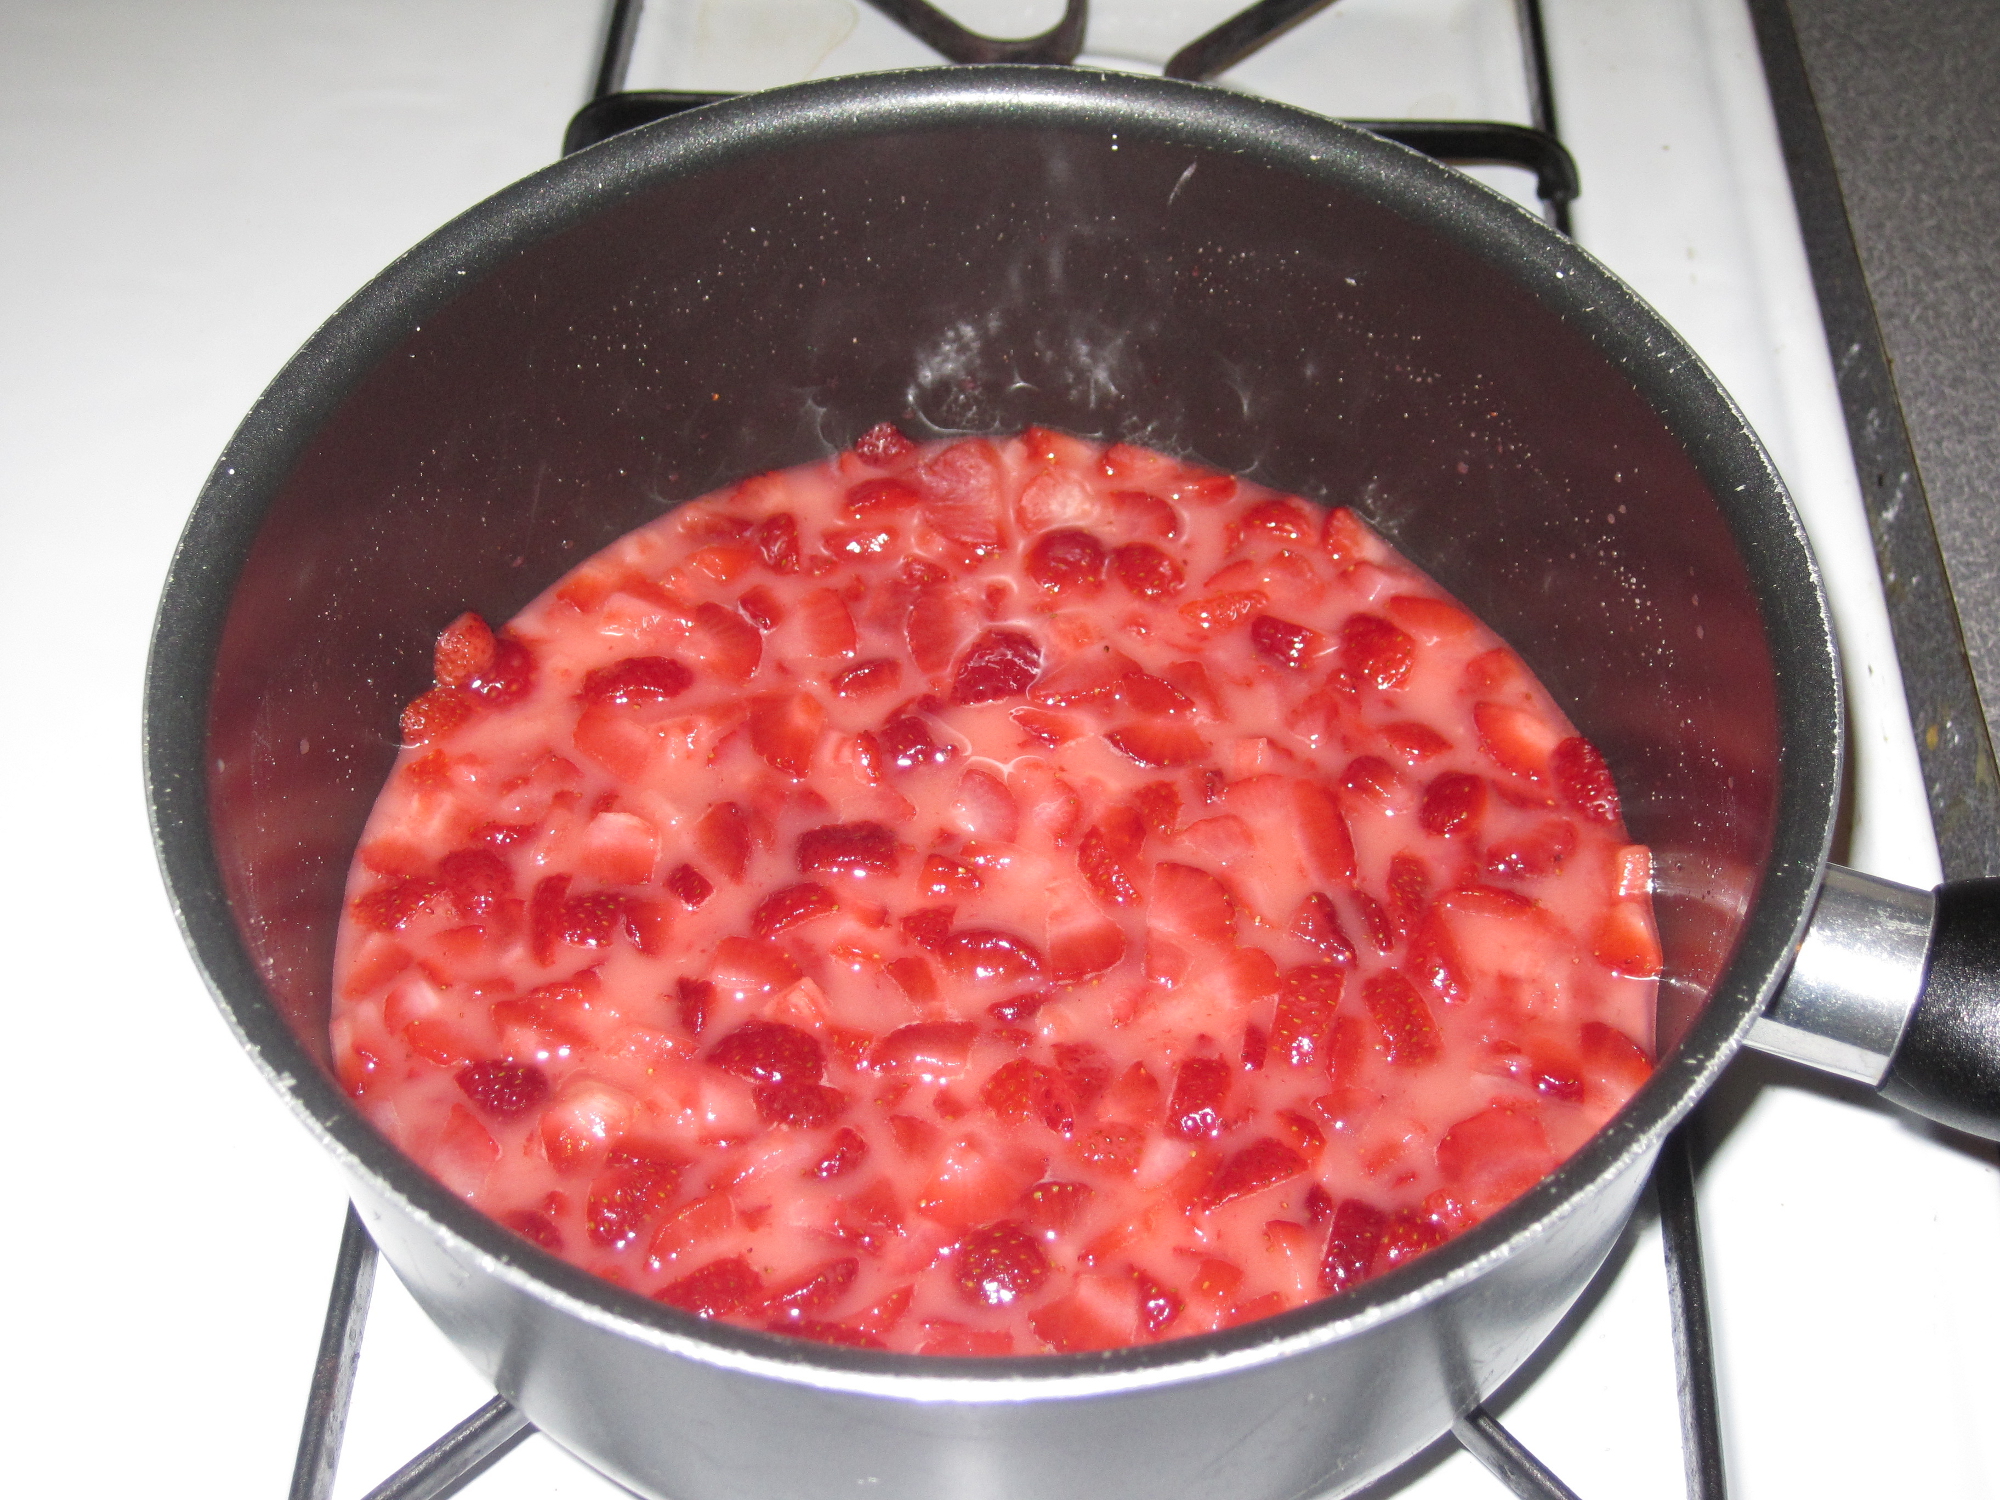
The bride’s favorite cake filling is strawberry, so I found a recipe to make homemade filling. It was delicious and very easy to make. It starts out very liquid on the stove top, but after 10 minutes of cooking becomes a nice, thick gel.
Before cooking:
After cooking:
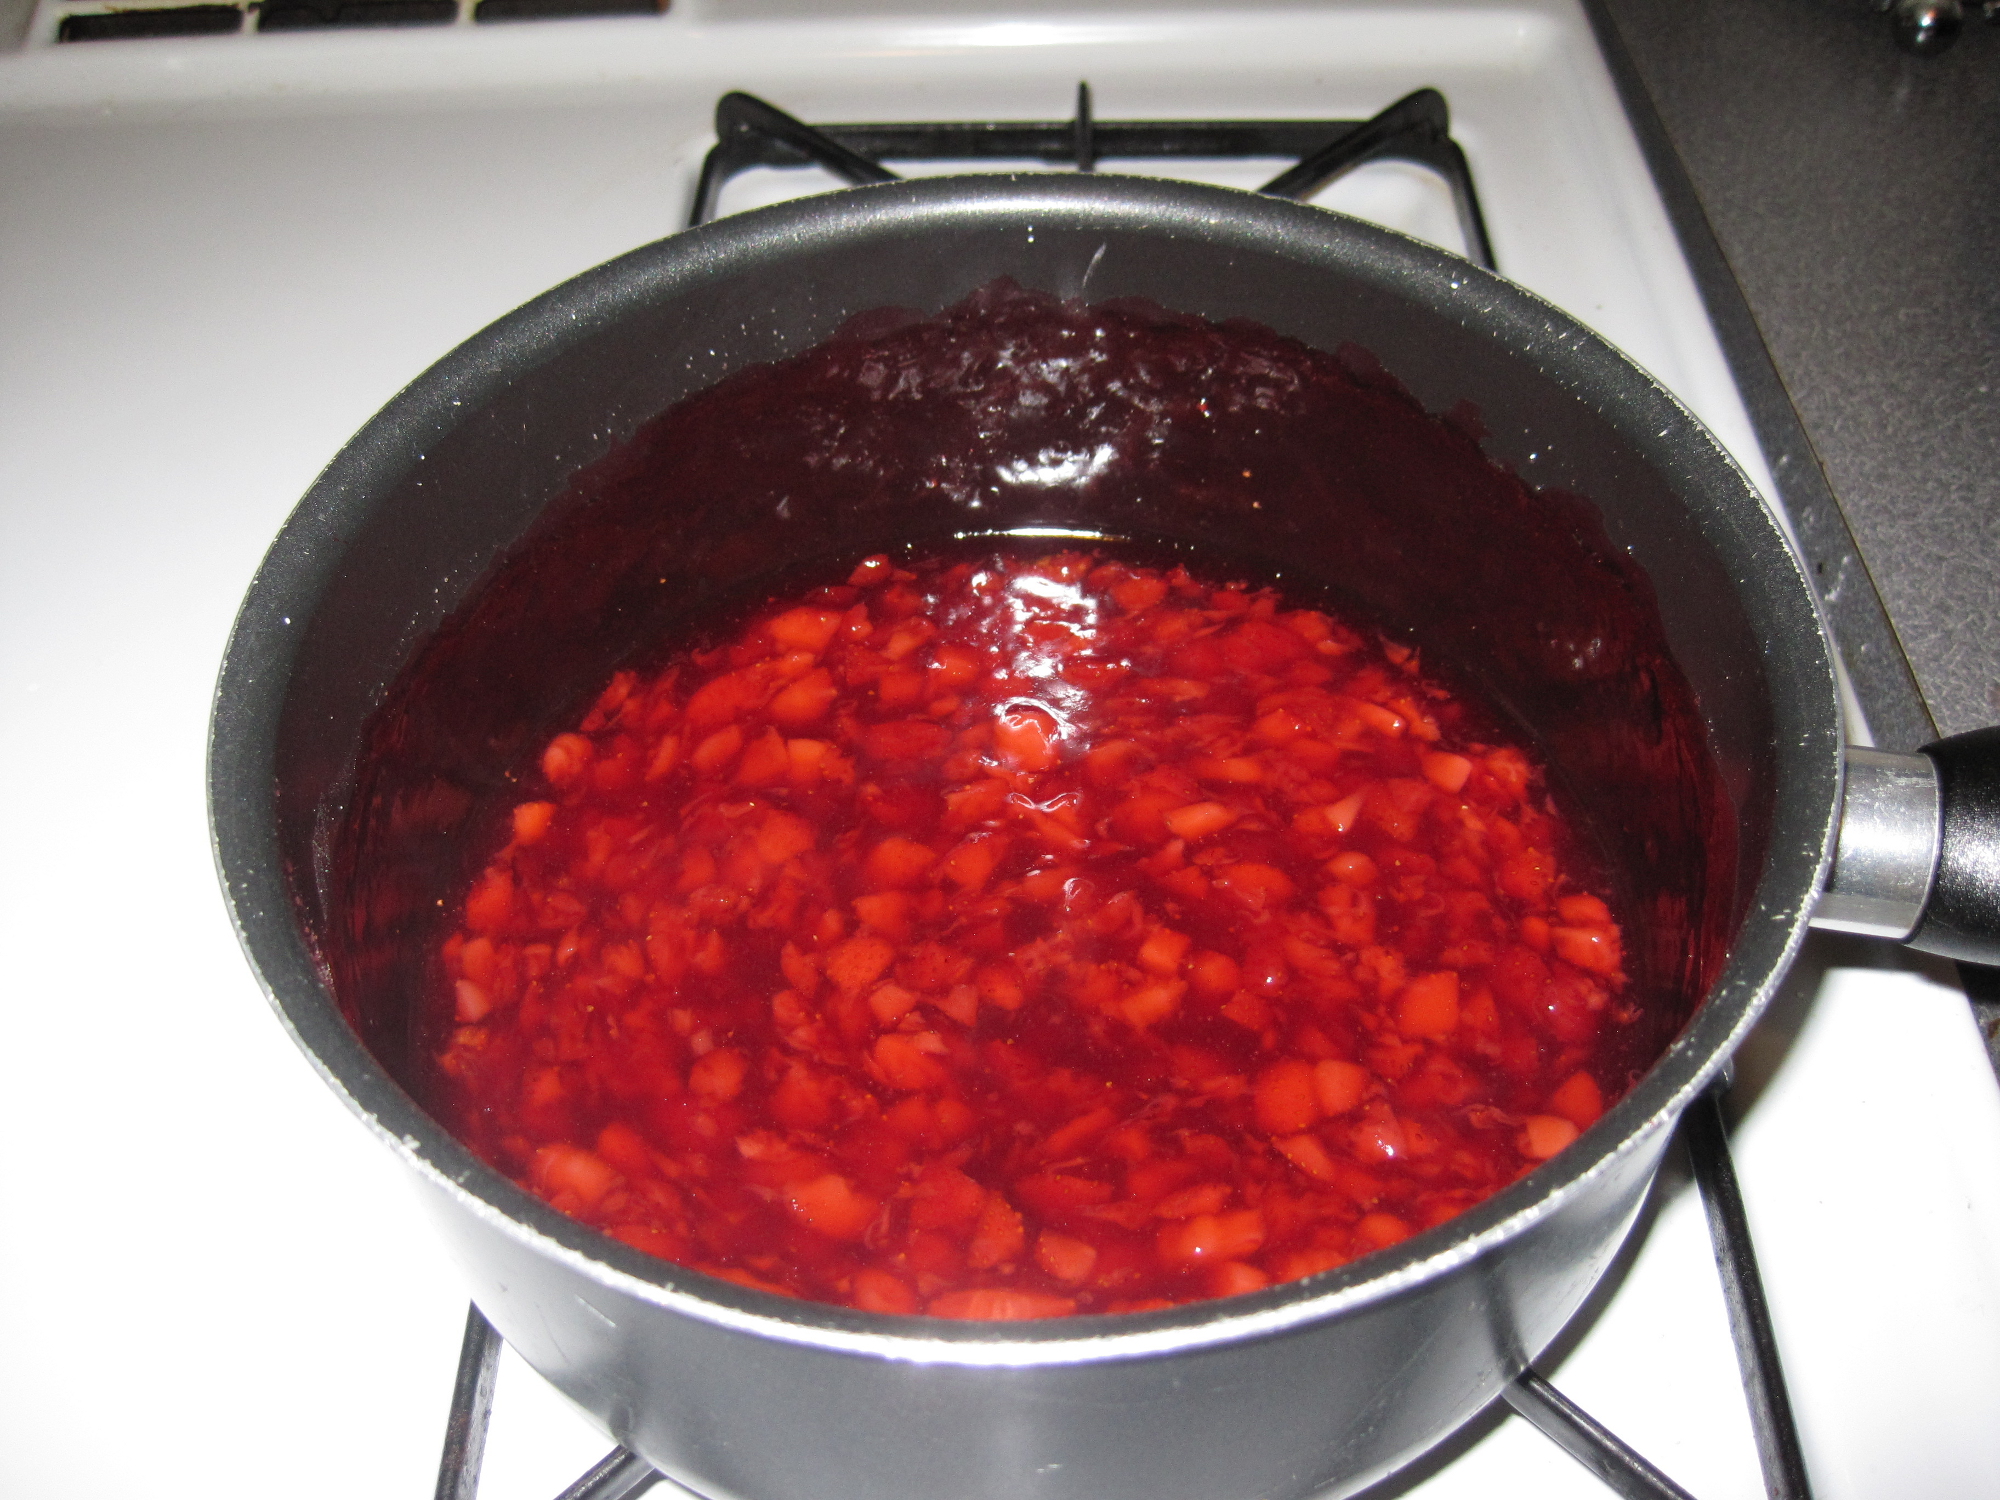
The recipe calls for frozen strawberries, and I think this works best. Freezing fruit breaks down the bonds in the cell walls, and makes for a smoother fruit filling.
- 1 cup water
- 3 TBSP cornstarch
- 2 1/2 cups frozen strawberries, cut into small pieces
- 3/4 cup white sugar
- In a large saucepan, whisk together the water and cornstarch. Add the strawberries and sugar to the water.
- Cook over medium heat for about 10 minutes, stirring constantly, until the mixture is thick and transparent.
- Allow to cool to room temperature before spreading onto cake.
Just a tip for filling cakes: make a wall of buttercream frosting along the edges of the cake by piping frosting using a fairly large tip. Then spoon the filling inside the walls. This way, the filling will not leak out the sides.
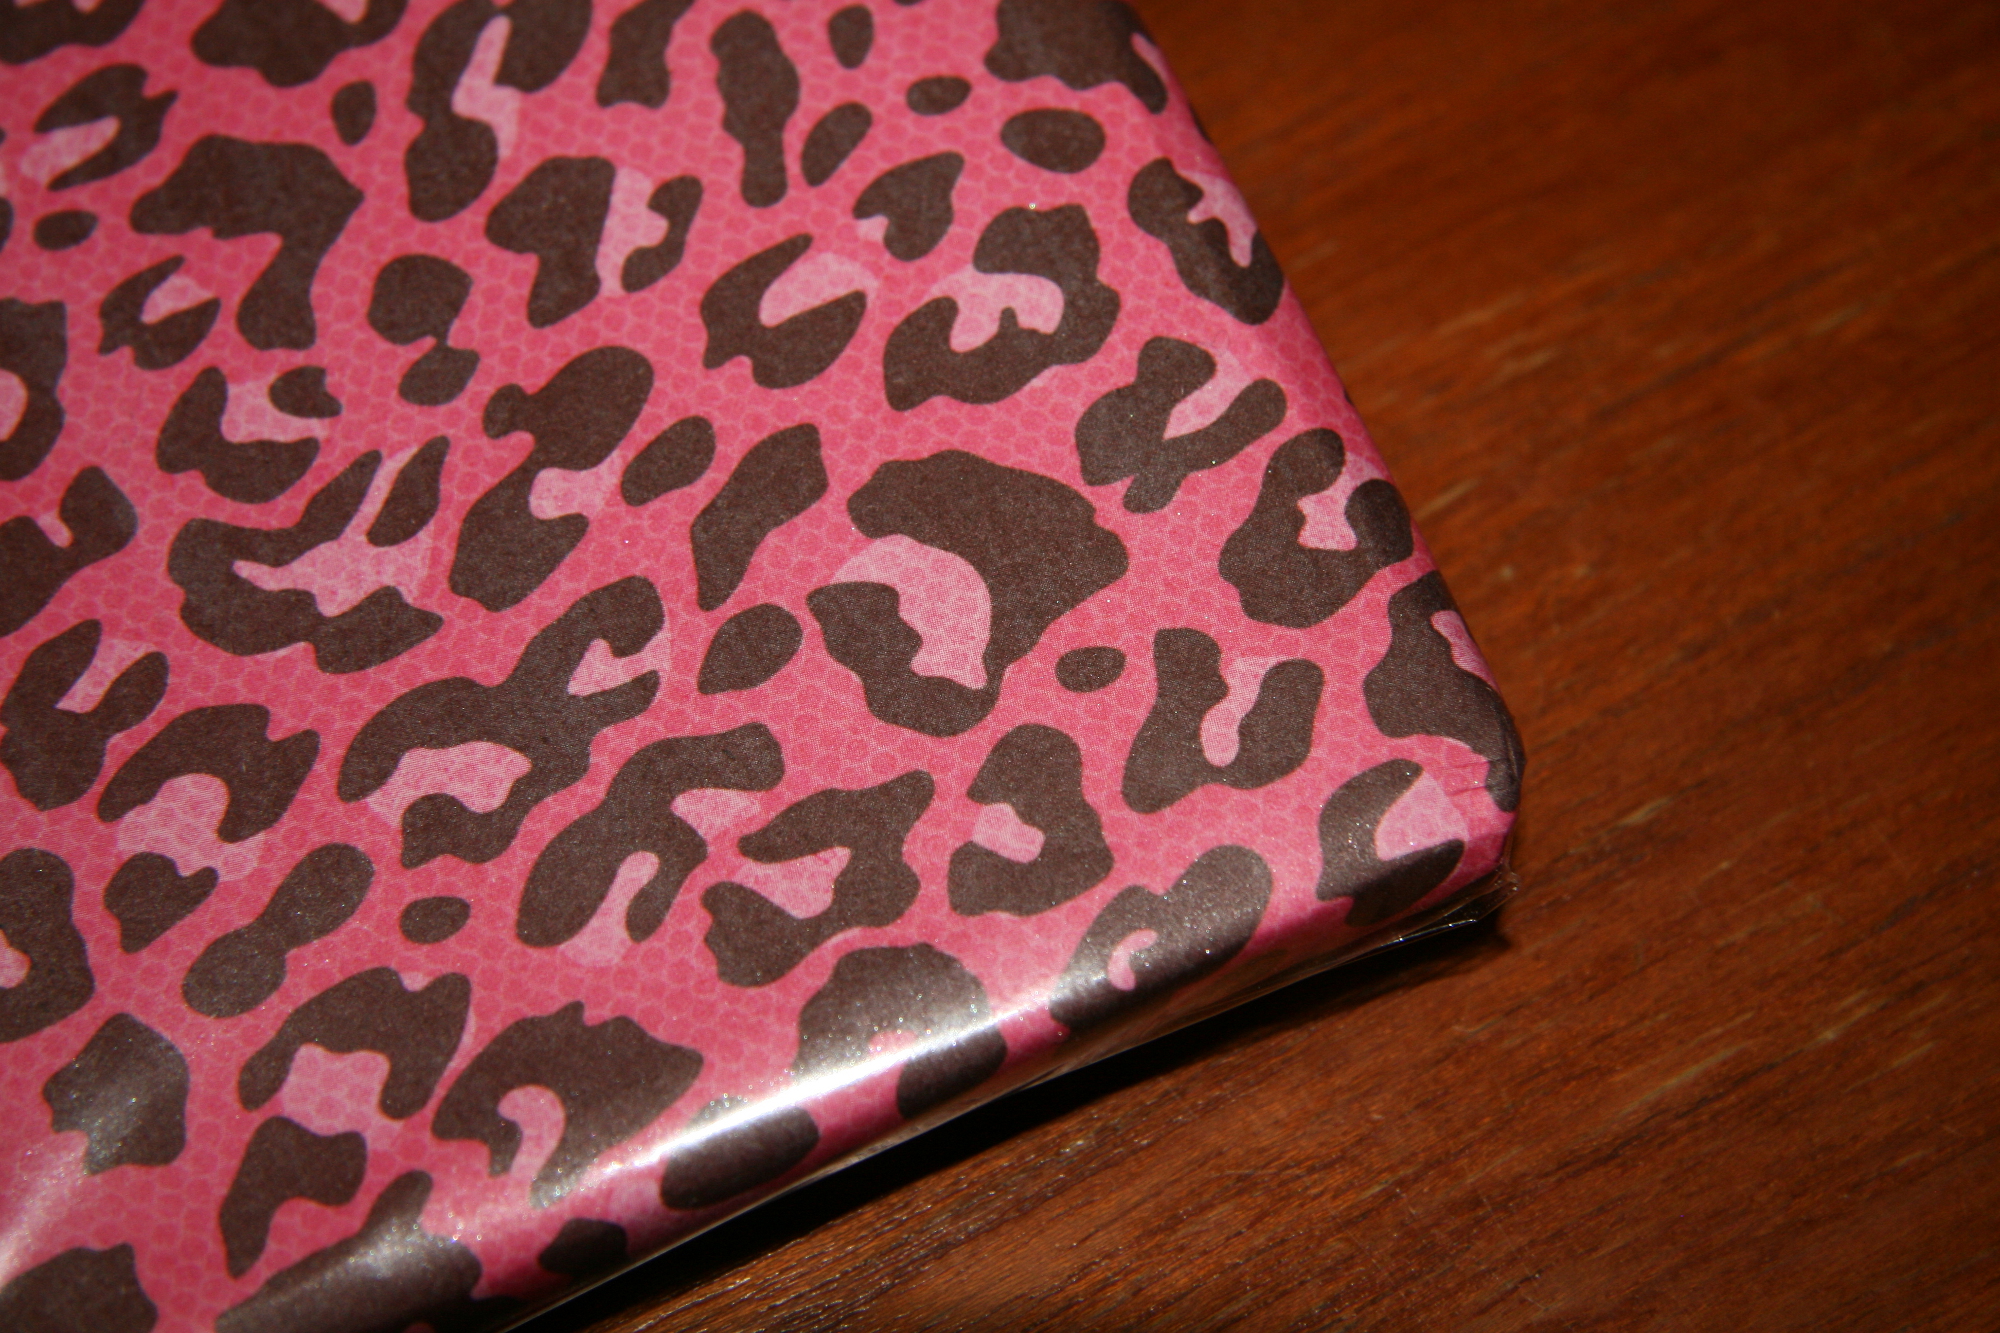
The cake board:
After joining Cake Central, an online cake decorating community, I’ve learned that covering your cake boards can actually add to the design of the cake. If you do it the right way, you can also prevent grease from staining the board. For this cake, I covered the board with scrapbook paper in a pink leopard print, and then covered the whole board with a food safe cellophane. This worked out great, because it complimented the cake perfectly, and I was able to wipe away any stray frosting. So the board looked perfect after I was done decorating.
I glued together two 18″x26″ cake boards to make one thick board. Then I glued on the paper and left some overhang that I wrapped around the edge of the board. Finally, I wrapped the board in the cellophane and taped it to the back of the board. For the corners, I wrapped the paper and cellophane similar to how I would wrap a gift.