
The weekend before Christmas was my sister-in-law’s surprise bridal shower. I definitely wanted to bake something special for it, and originally I was thinking of making Petits Fours. They were my favorite confection growing up and we had them for all special occasions and holidays. Shows how hip I am. Now, the new thing is cake pops. I had heard of them, but had never had one. So, being the scientist that I am, I did some research.
Cake pops are a heavenly, dense mixture of cake and frosting on the inside, and a hard candy coating on the outside. Of course, they are attached to a lollipop stick, and they are about 2 inches in diameter. They can be decorated with sprinkles or sugars, or made into completely unique shapes depending on your creativity. As far as I can tell, they were created by Bakerella, but are also available at Starbucks. If you still don’t know what I’m talking about, here the original cake pop post on Bakerella’s blog.
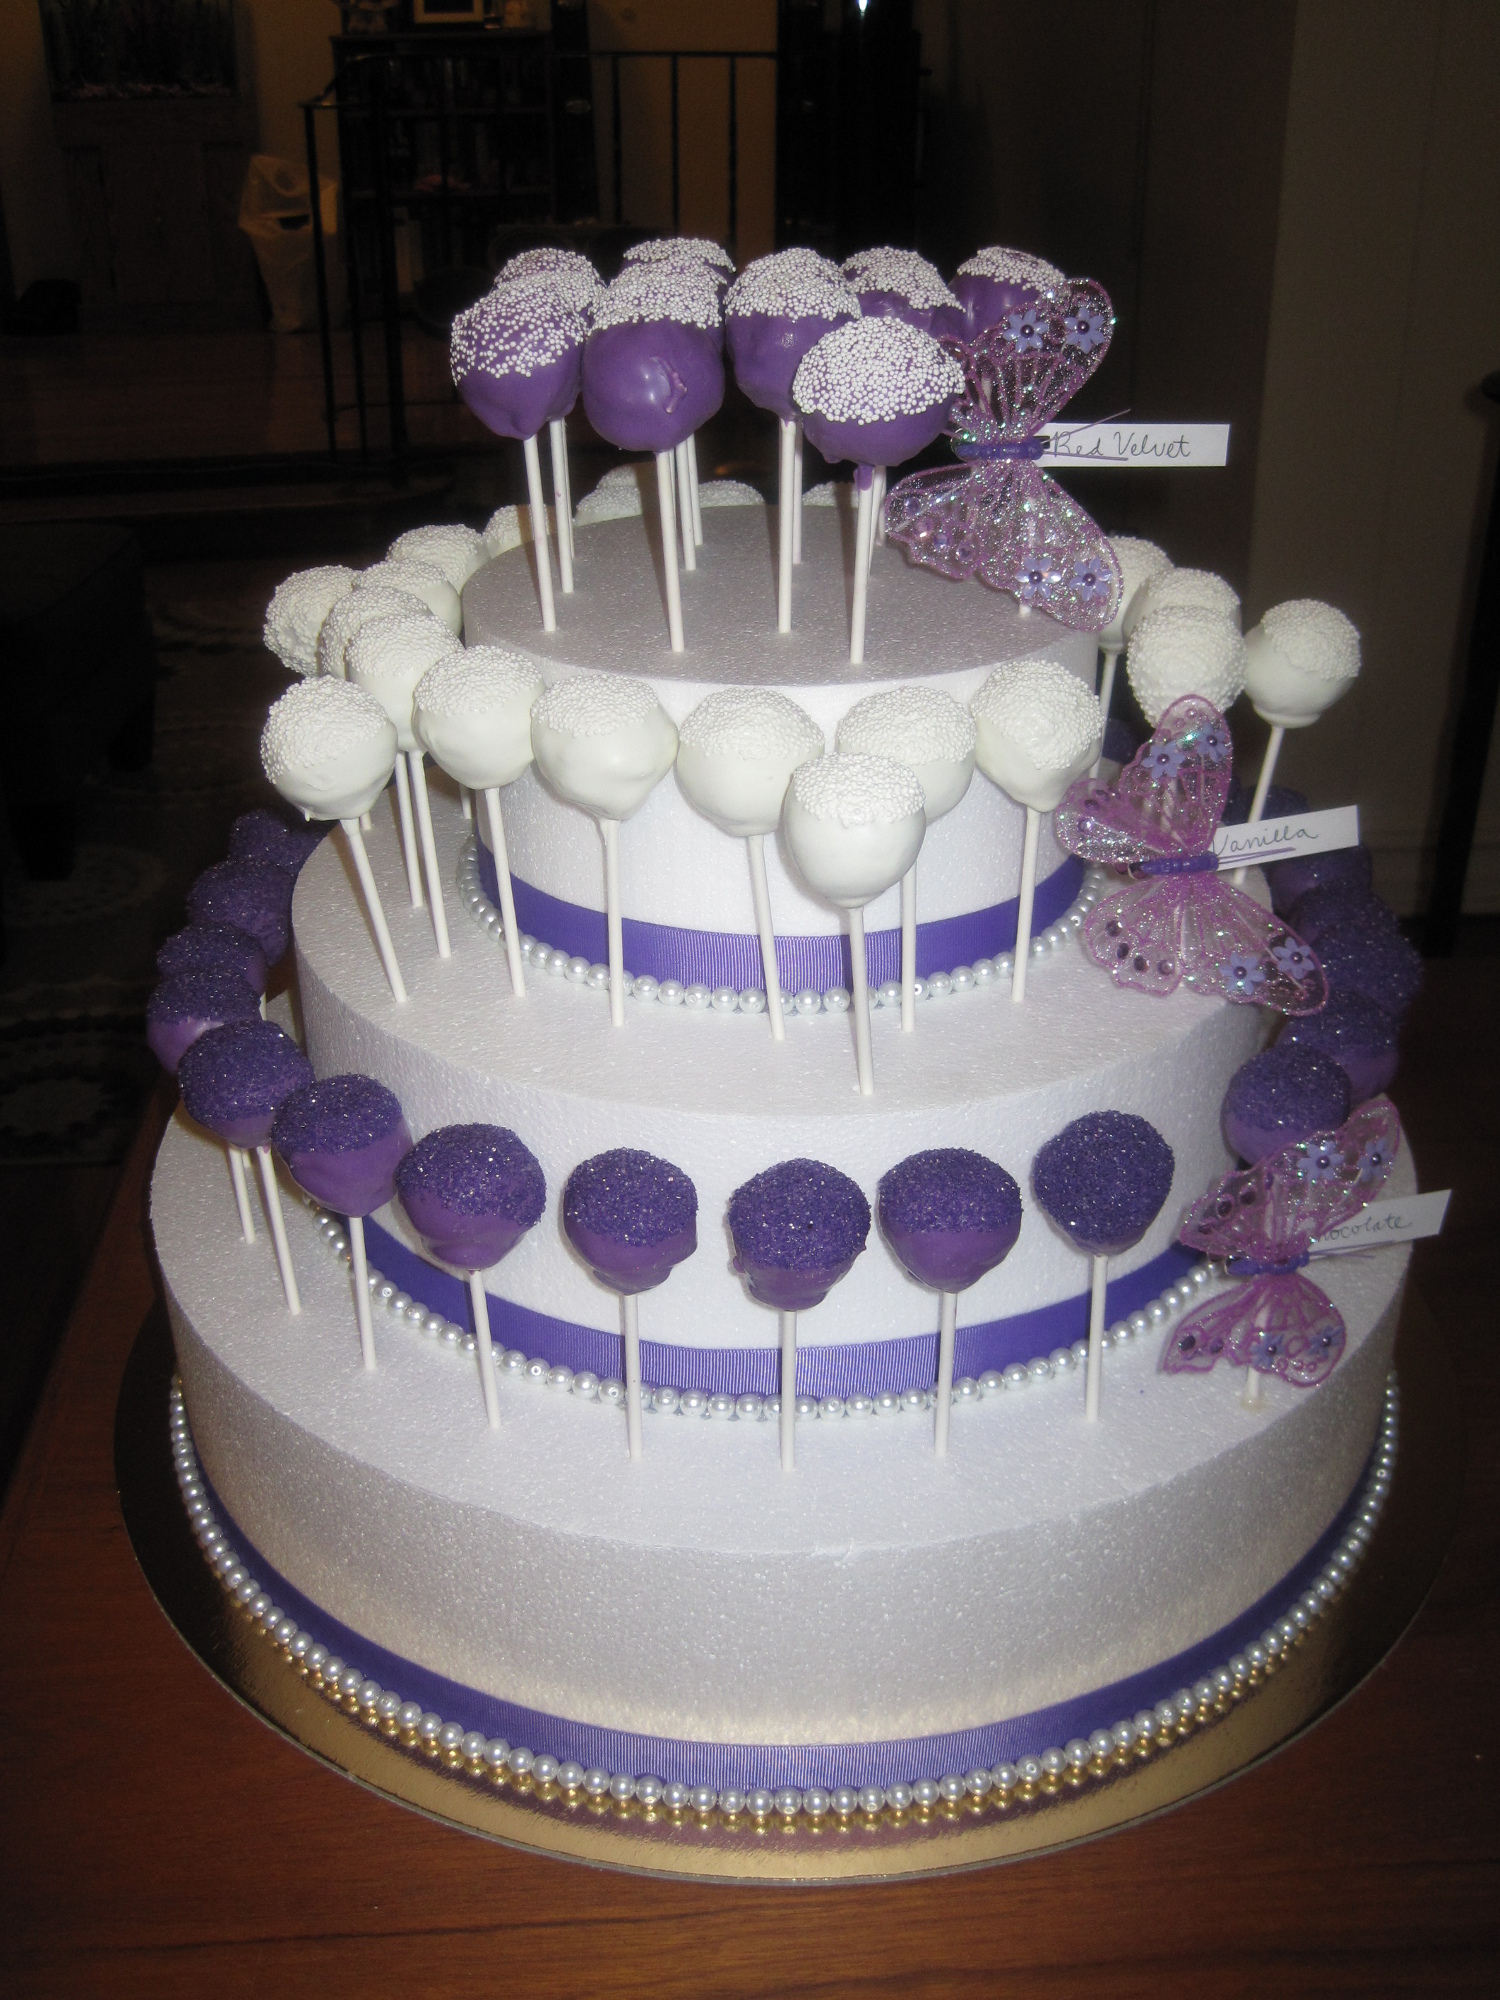
So, my goal was to make a large amount of cake pops, in a bridal theme, and using the colors purple and white to match the color scheme of the shower. I also wanted to incorporate butterflies into the design, as they were integral part of the shower’s theme. I’ll show you my final product first, and then go through how to make them. You’ll get my full account of all my tips, tricks, and mistakes to avoid. And believe me, there are a lot of mistakes to avoid!
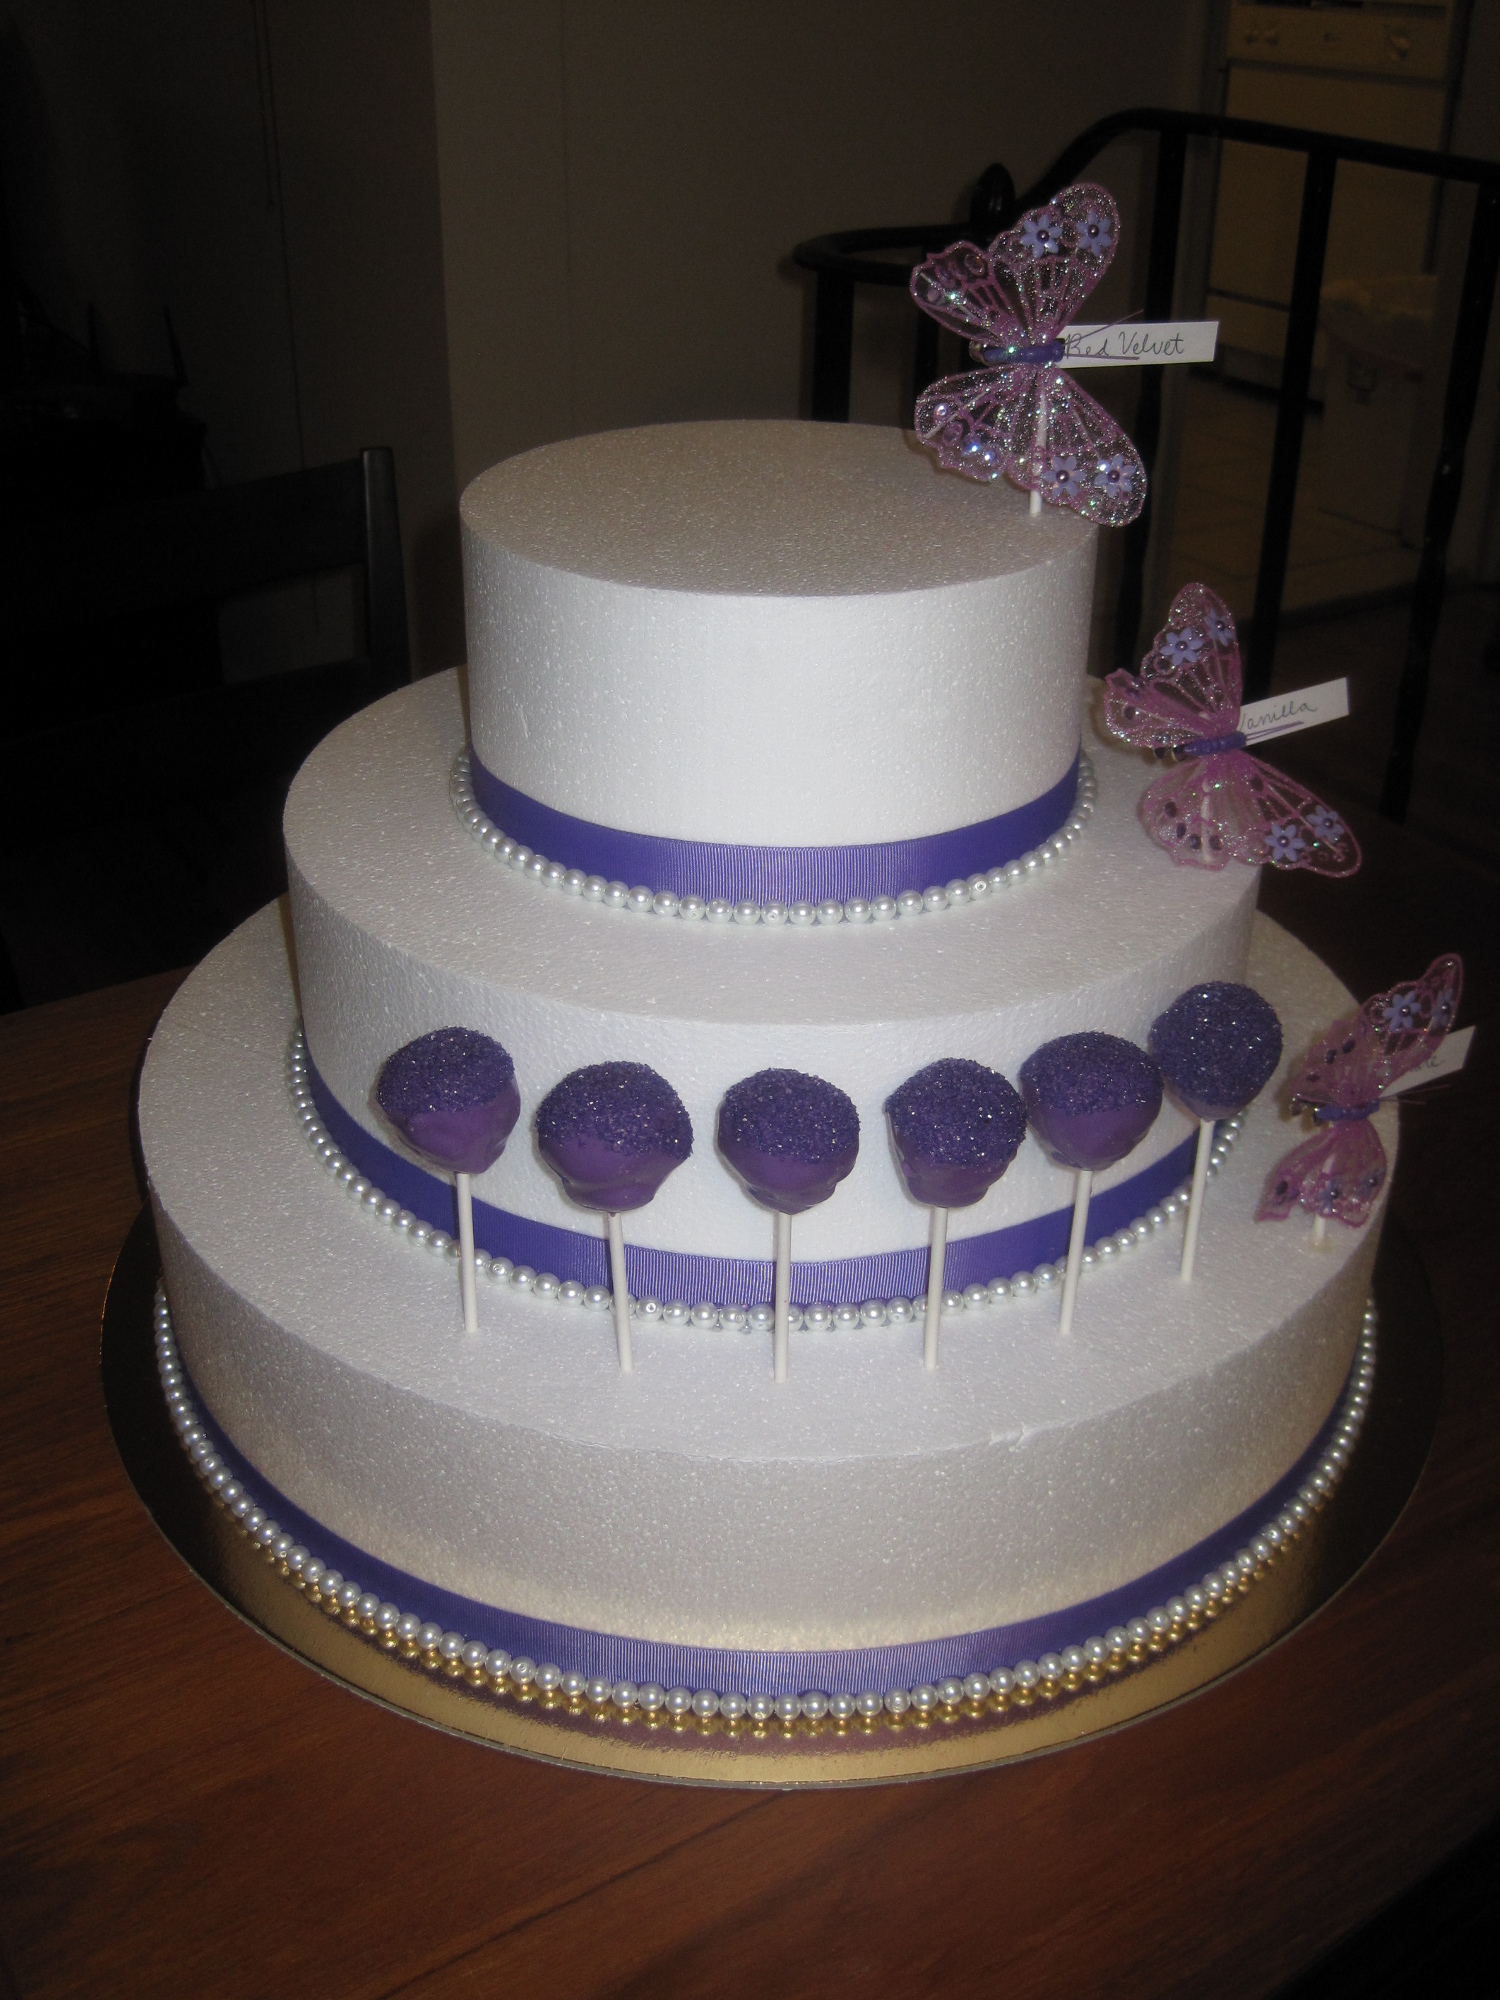
The wedding cake base:
The base was made by using a 20-inch cake board on the bottom for support. Then I added an 18-inch Styrofoam cake dummy for the bottom tier, a 13-inch dummy for the middle tier, and an 8-inch dummy for the top tier. I attached each tier to each other by using double-stick tape on the outer edges and Elmer’s glue in the middle (in the picture it is hard to see the tape, but it is the shiny outer edge of the dummy).
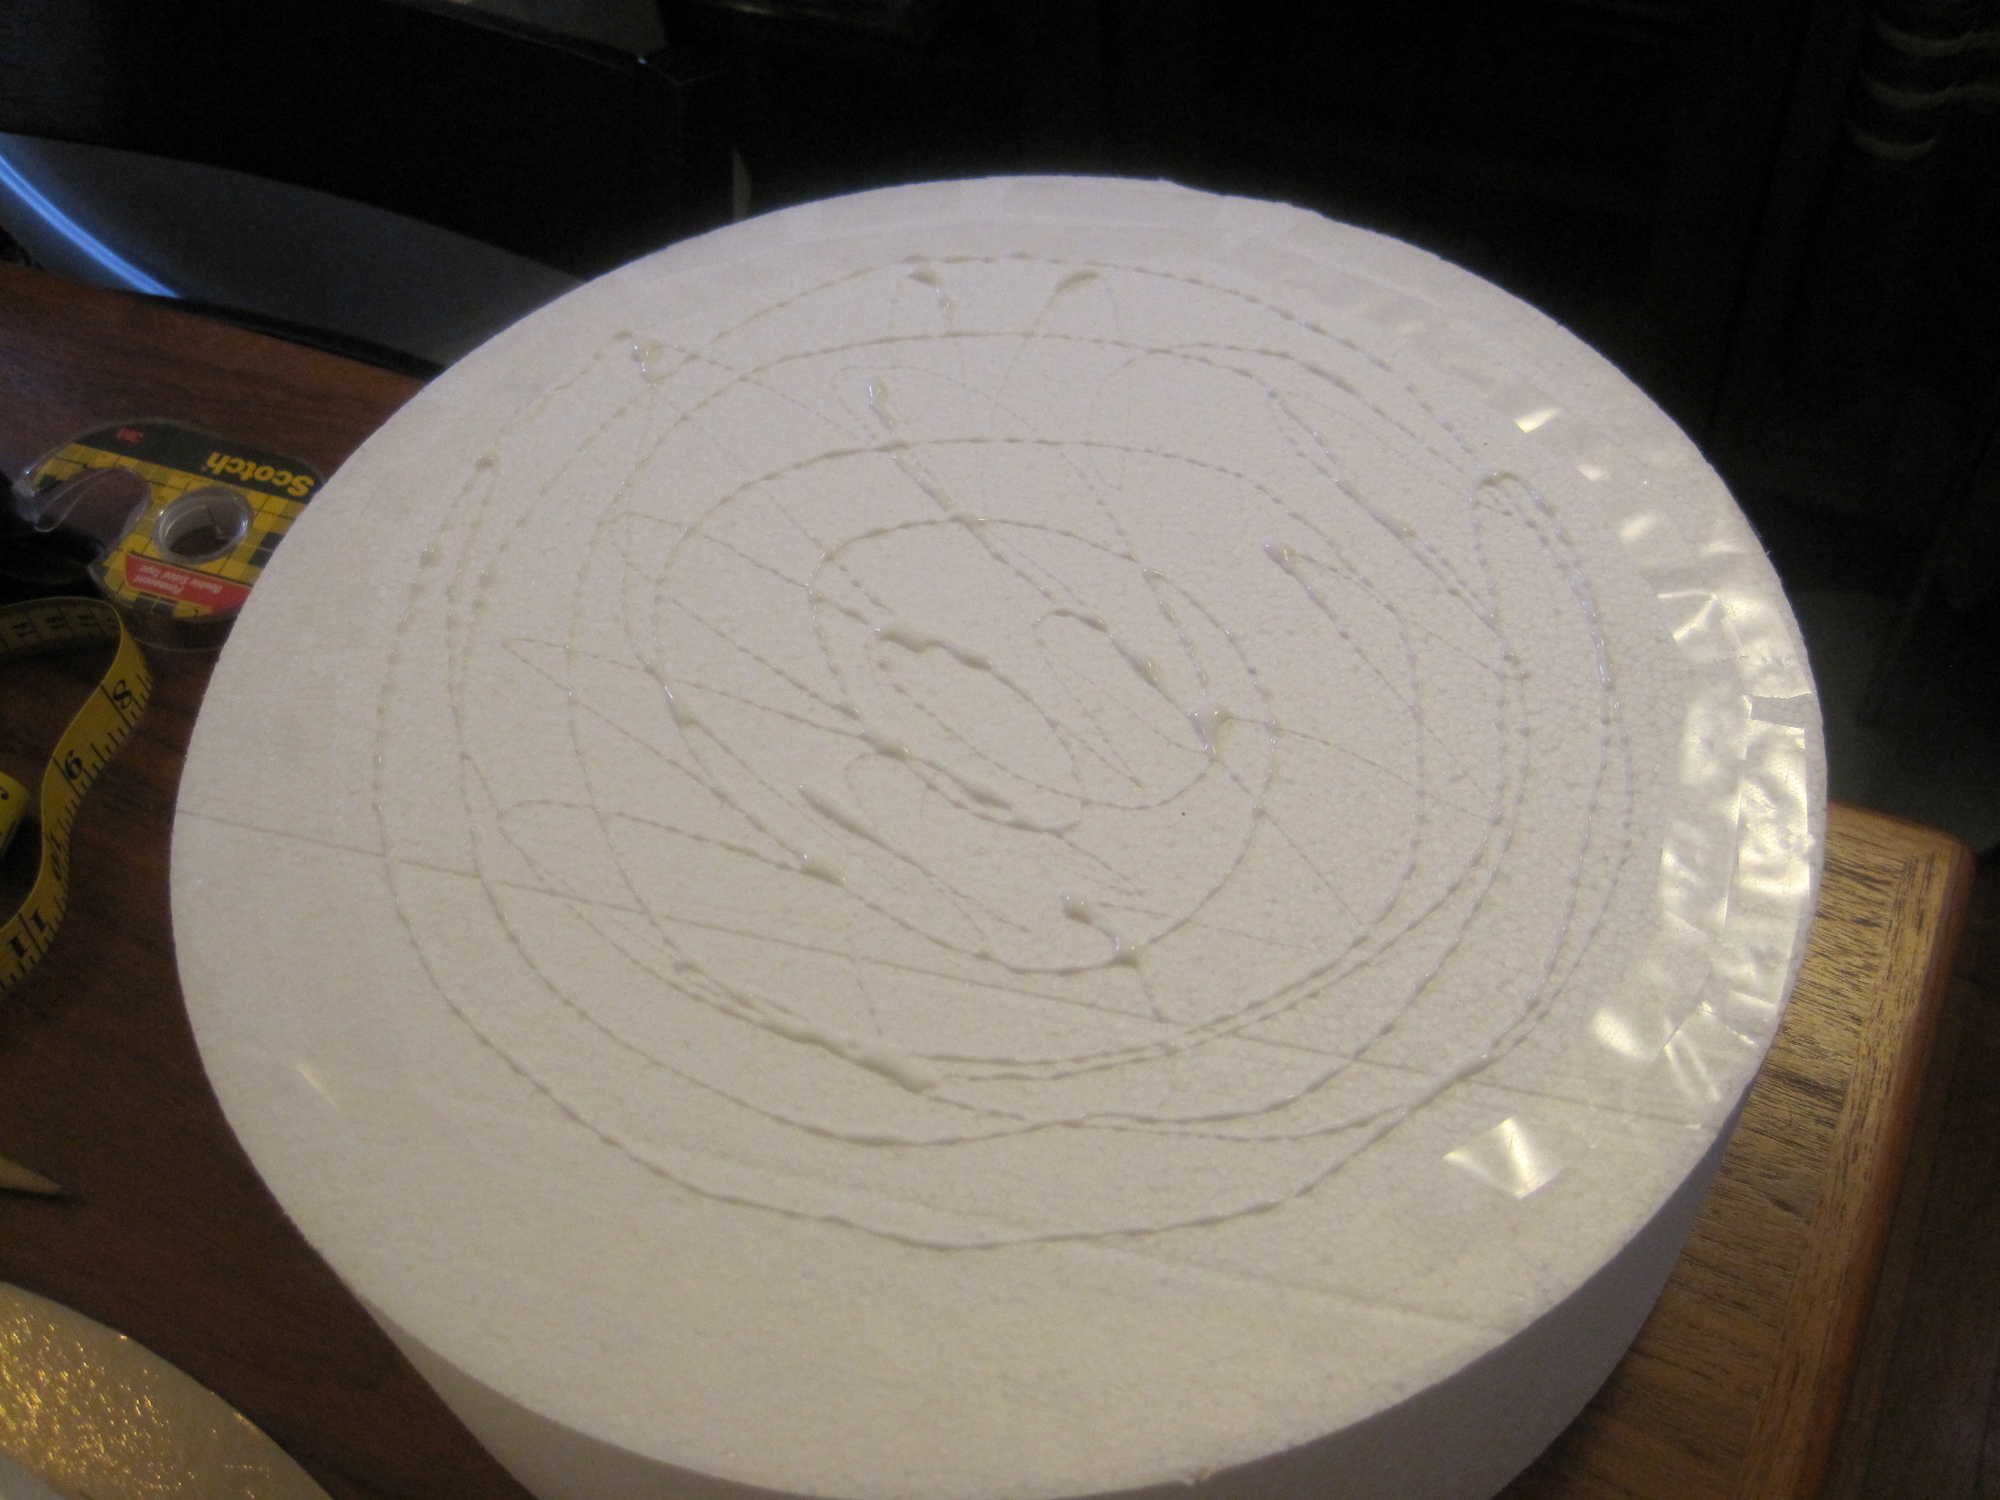
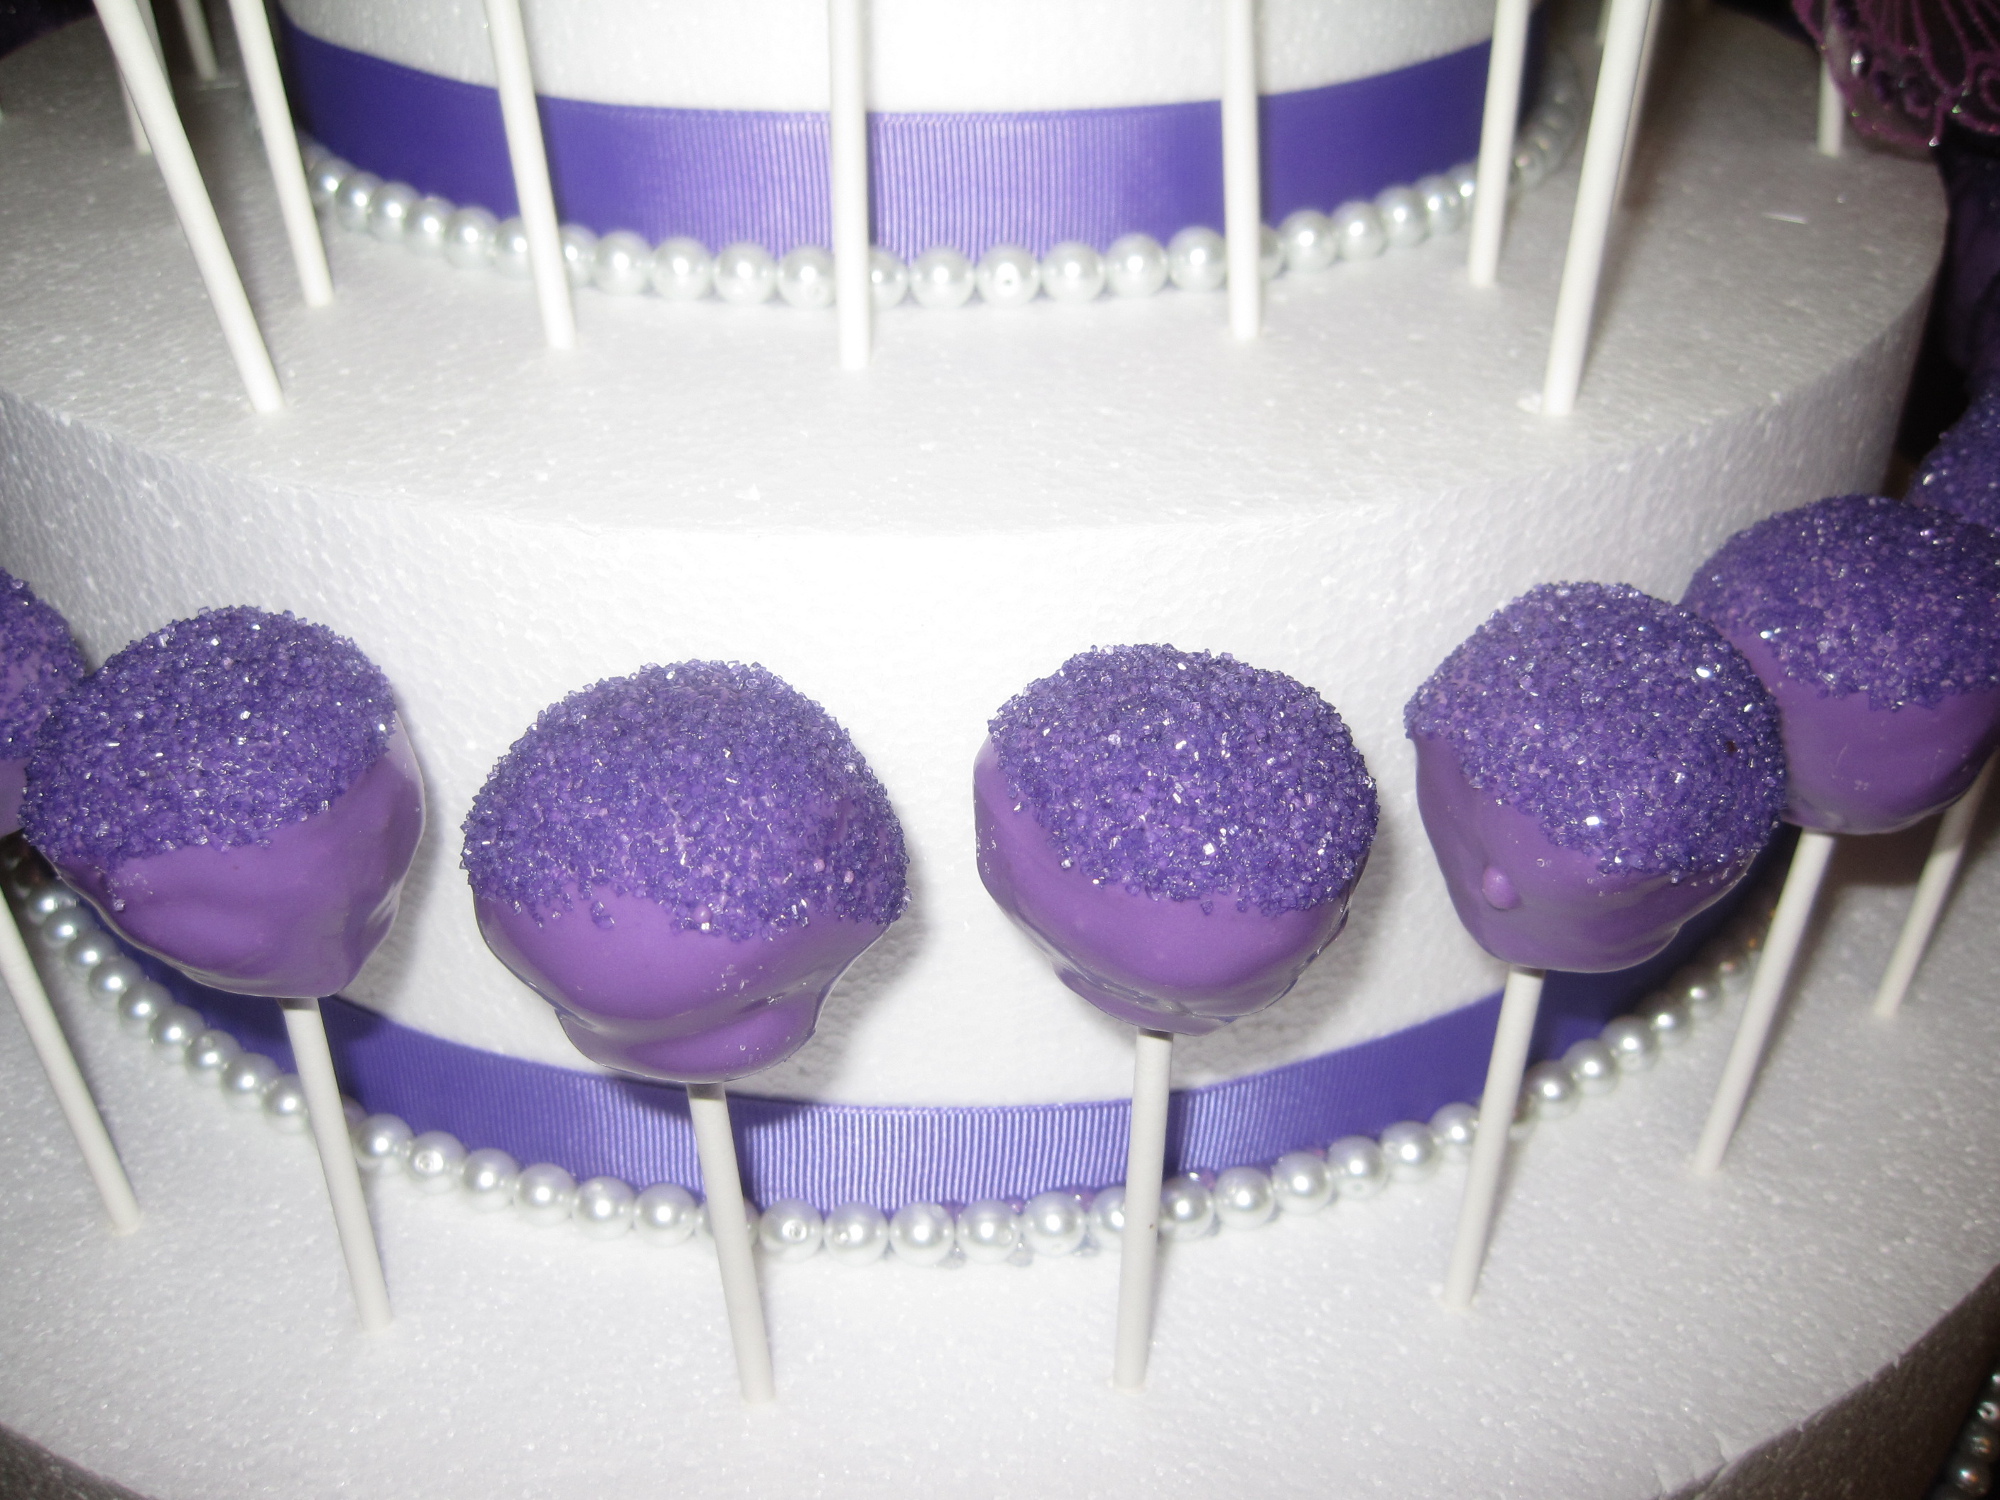
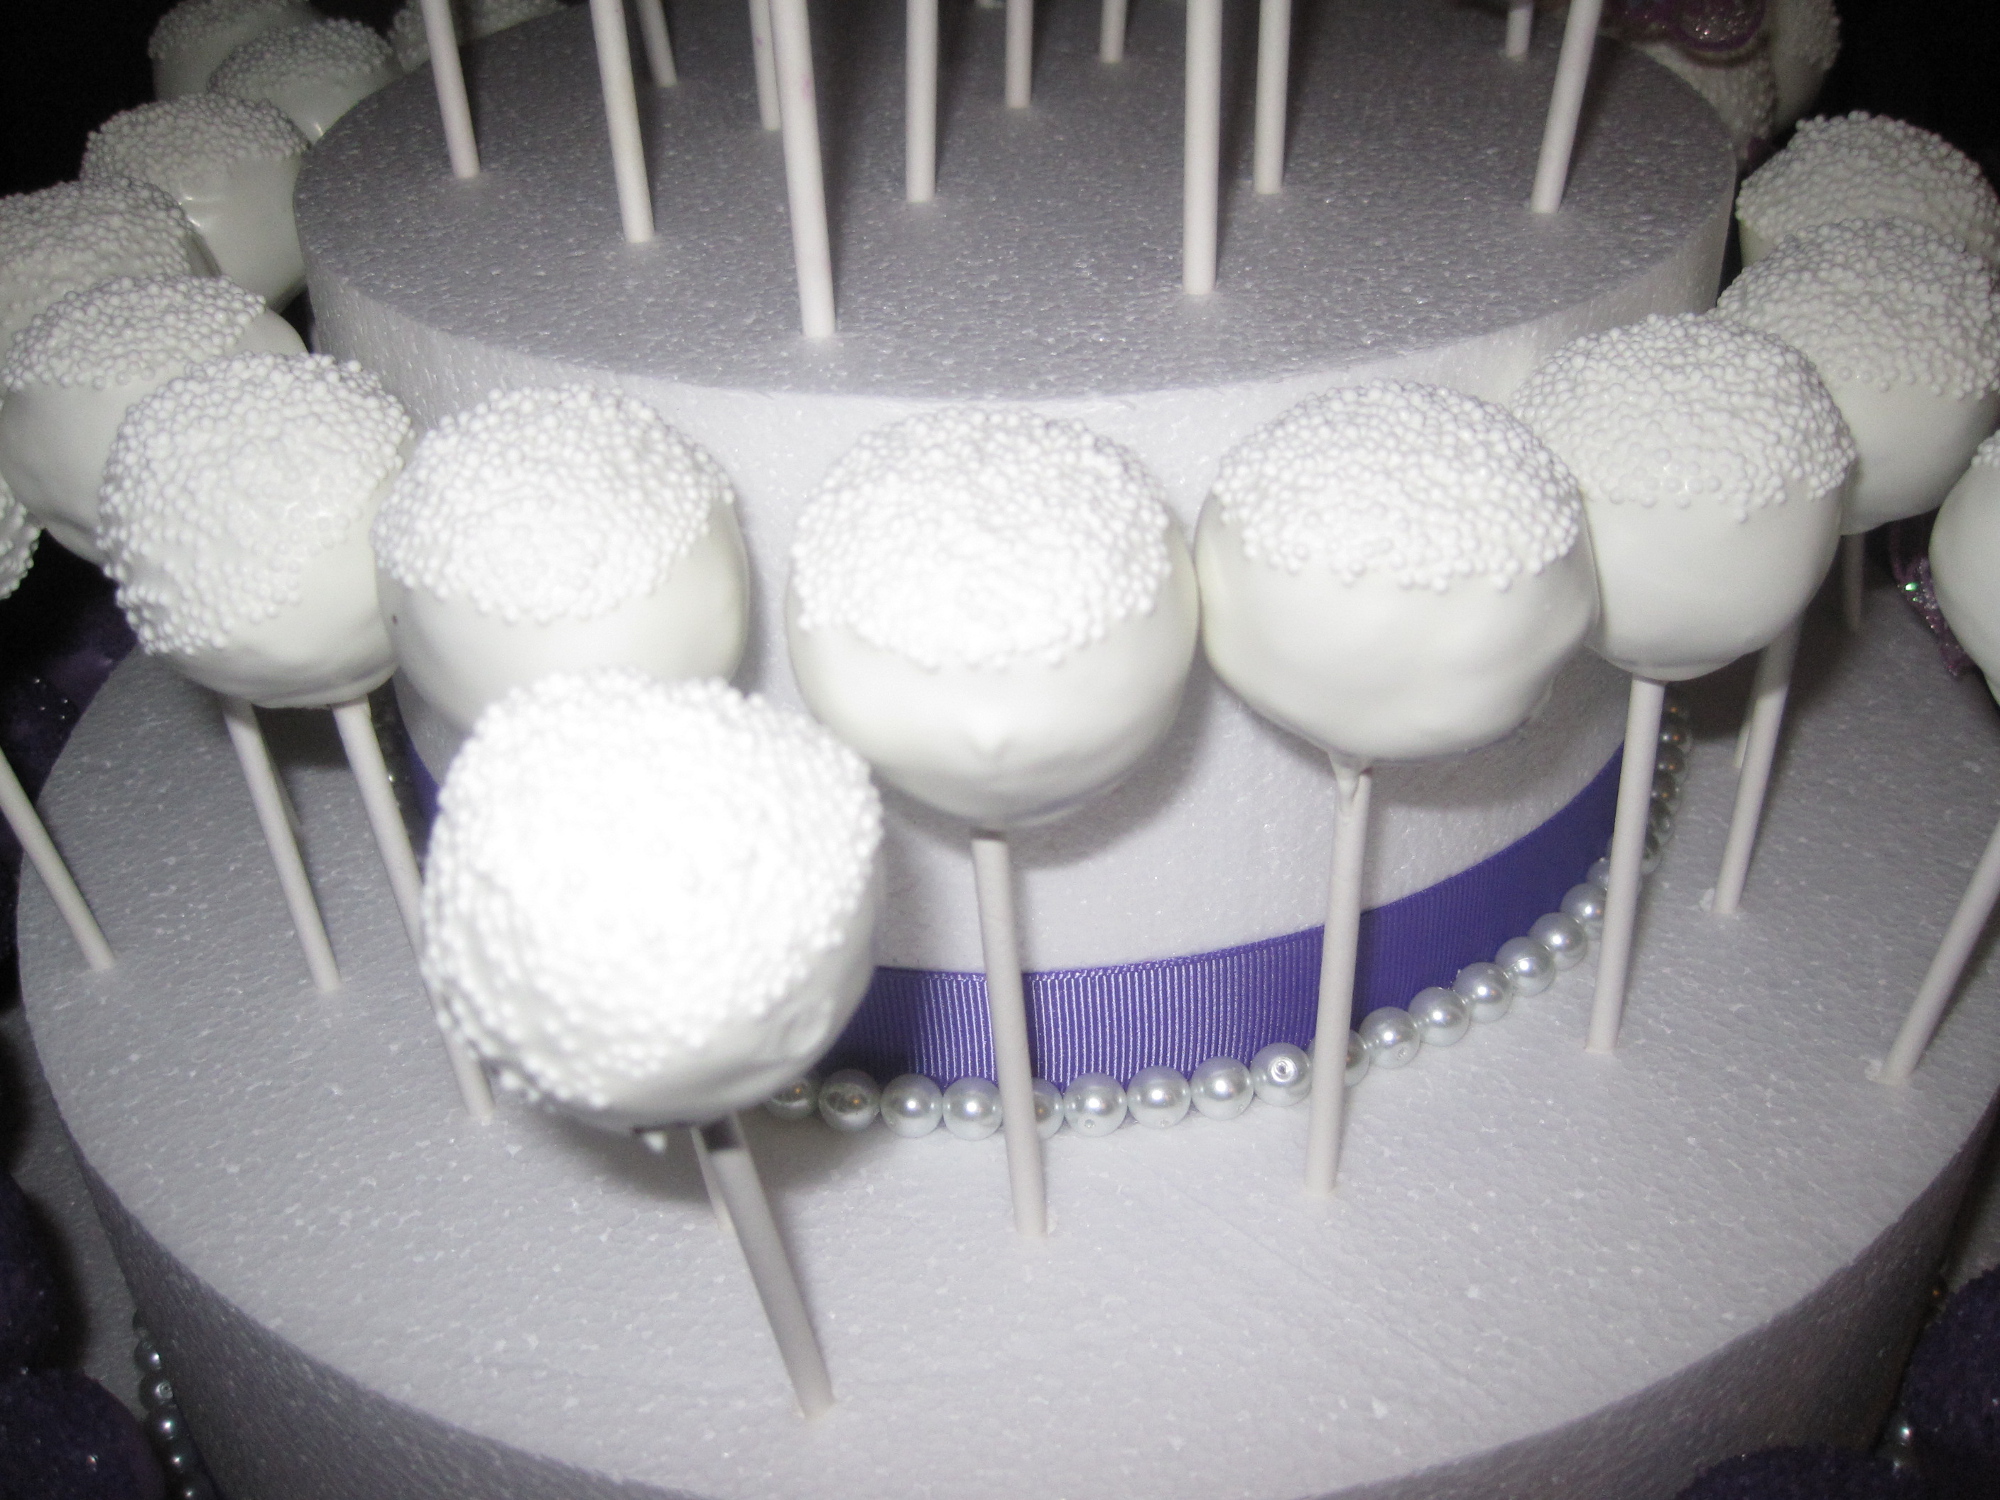
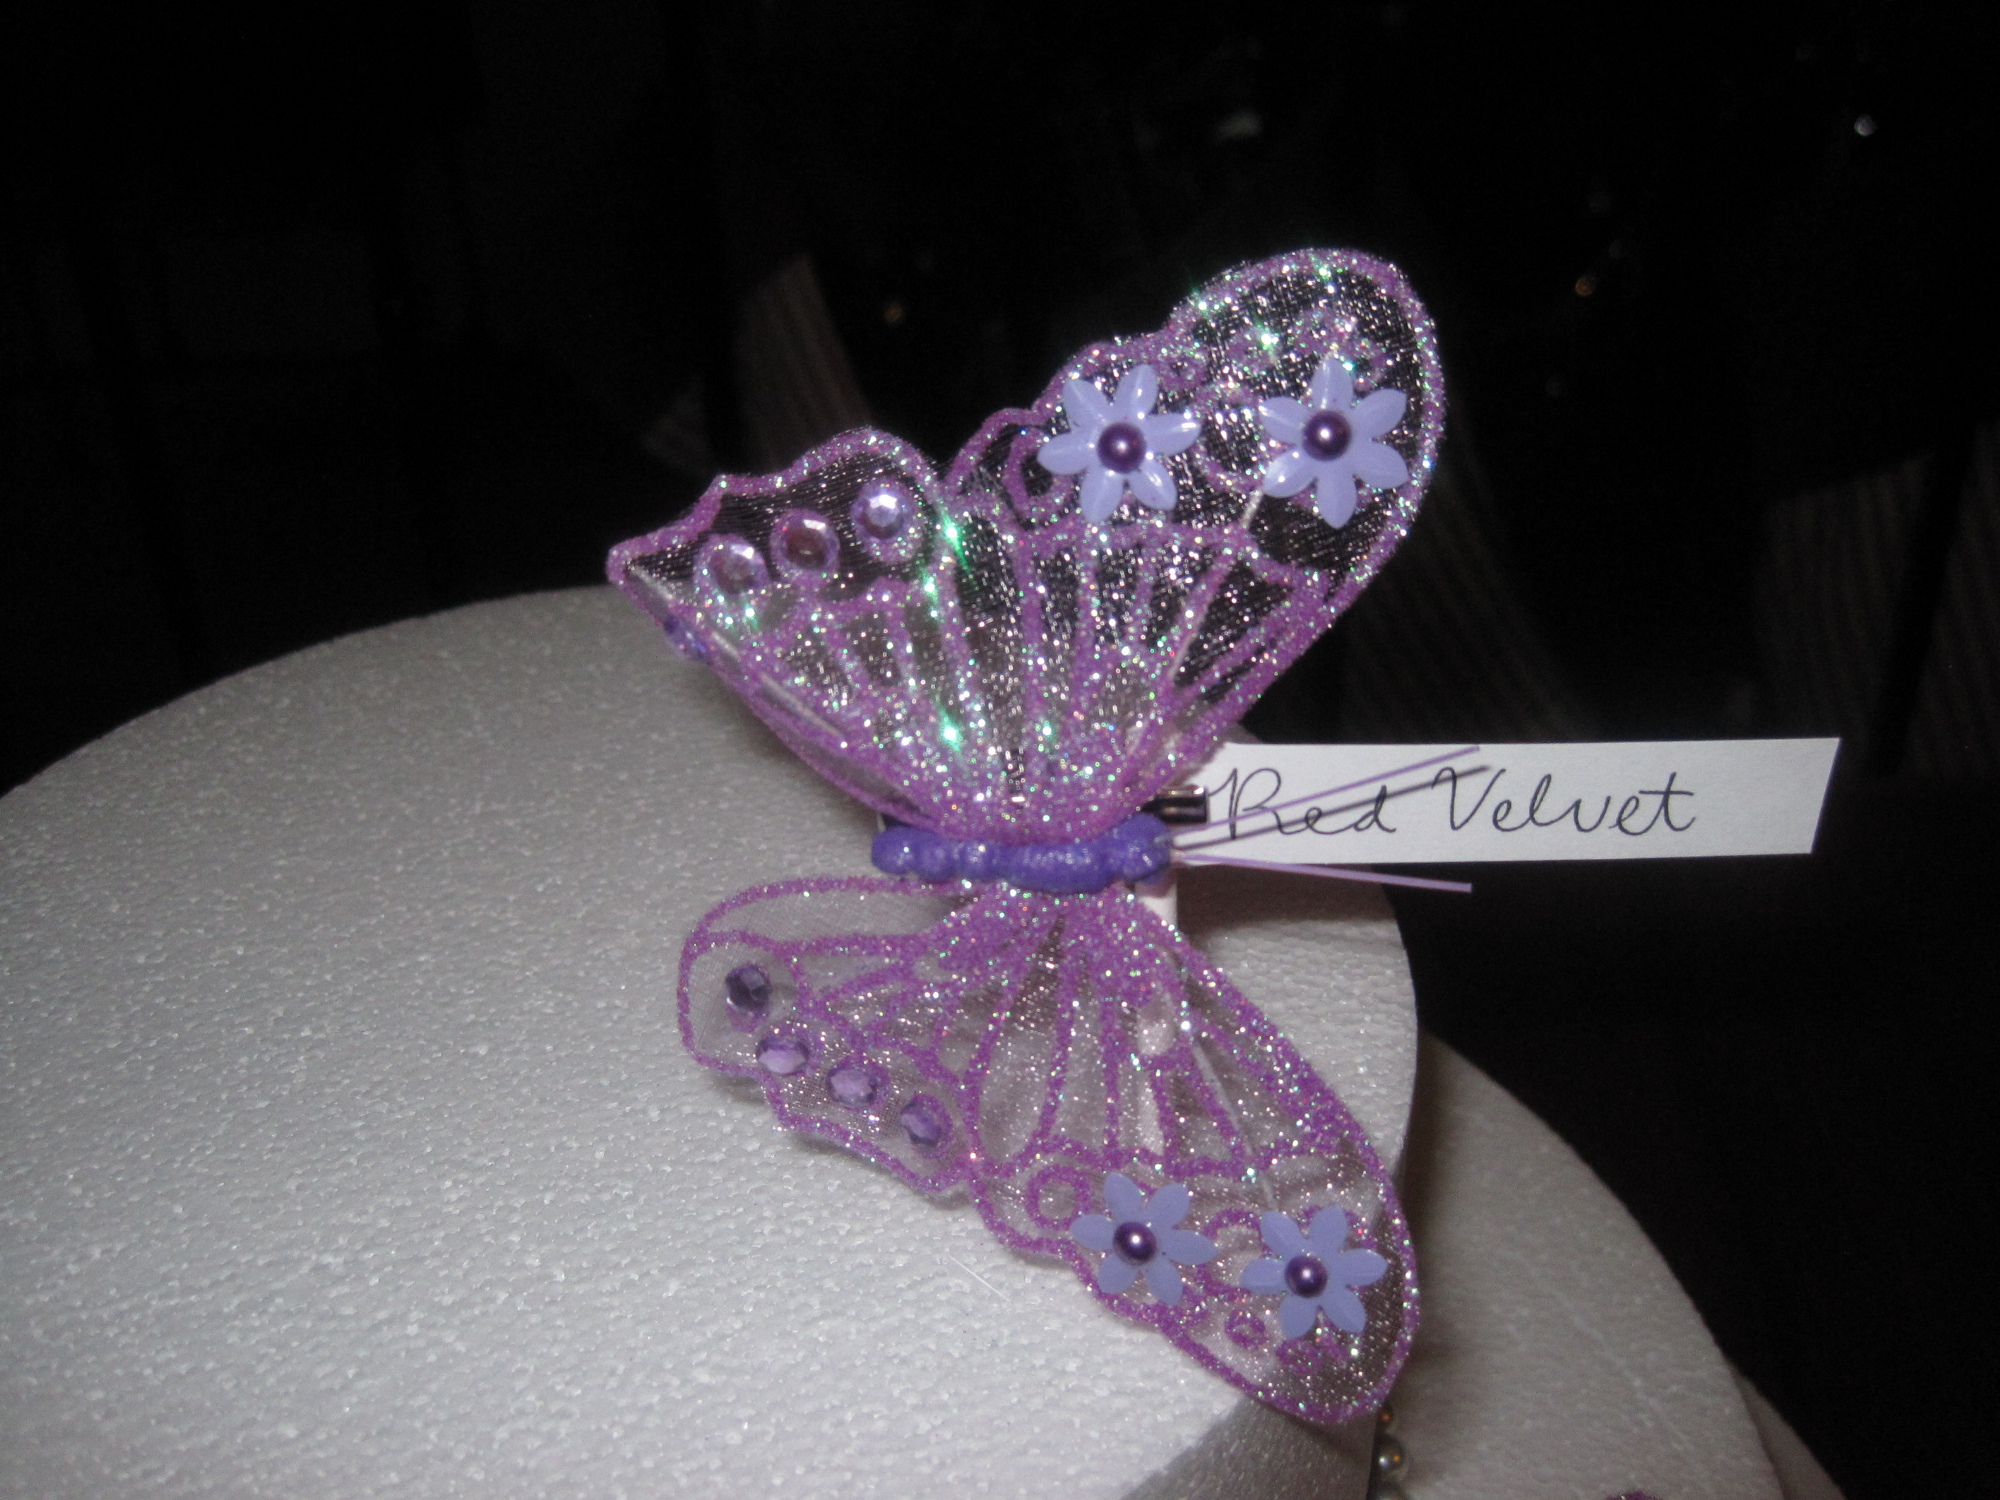
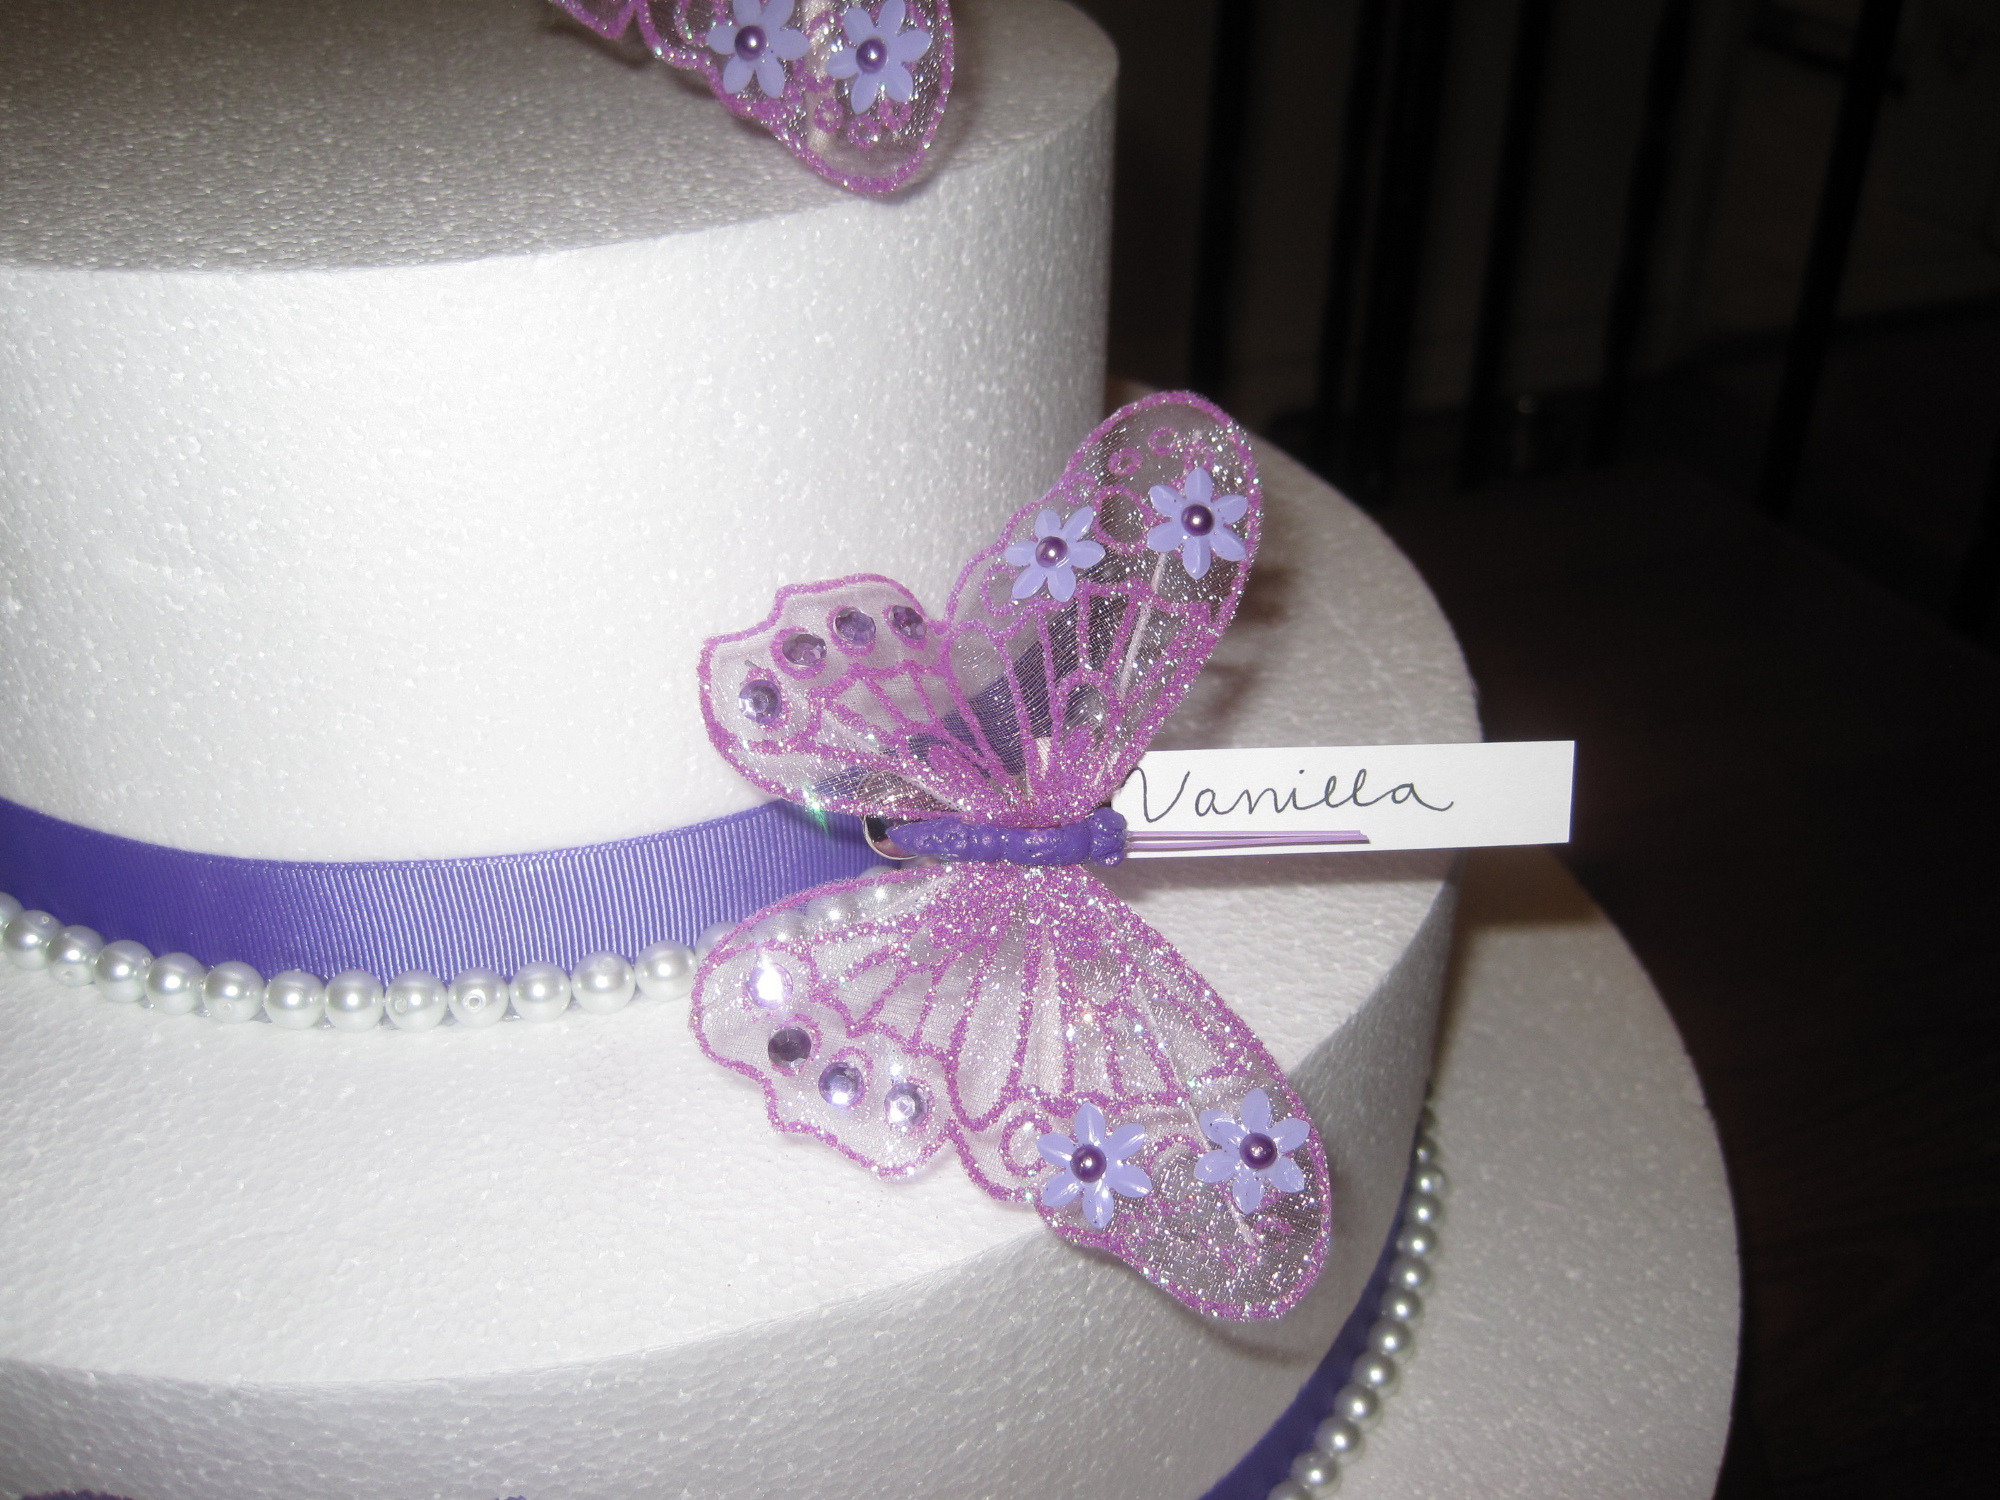
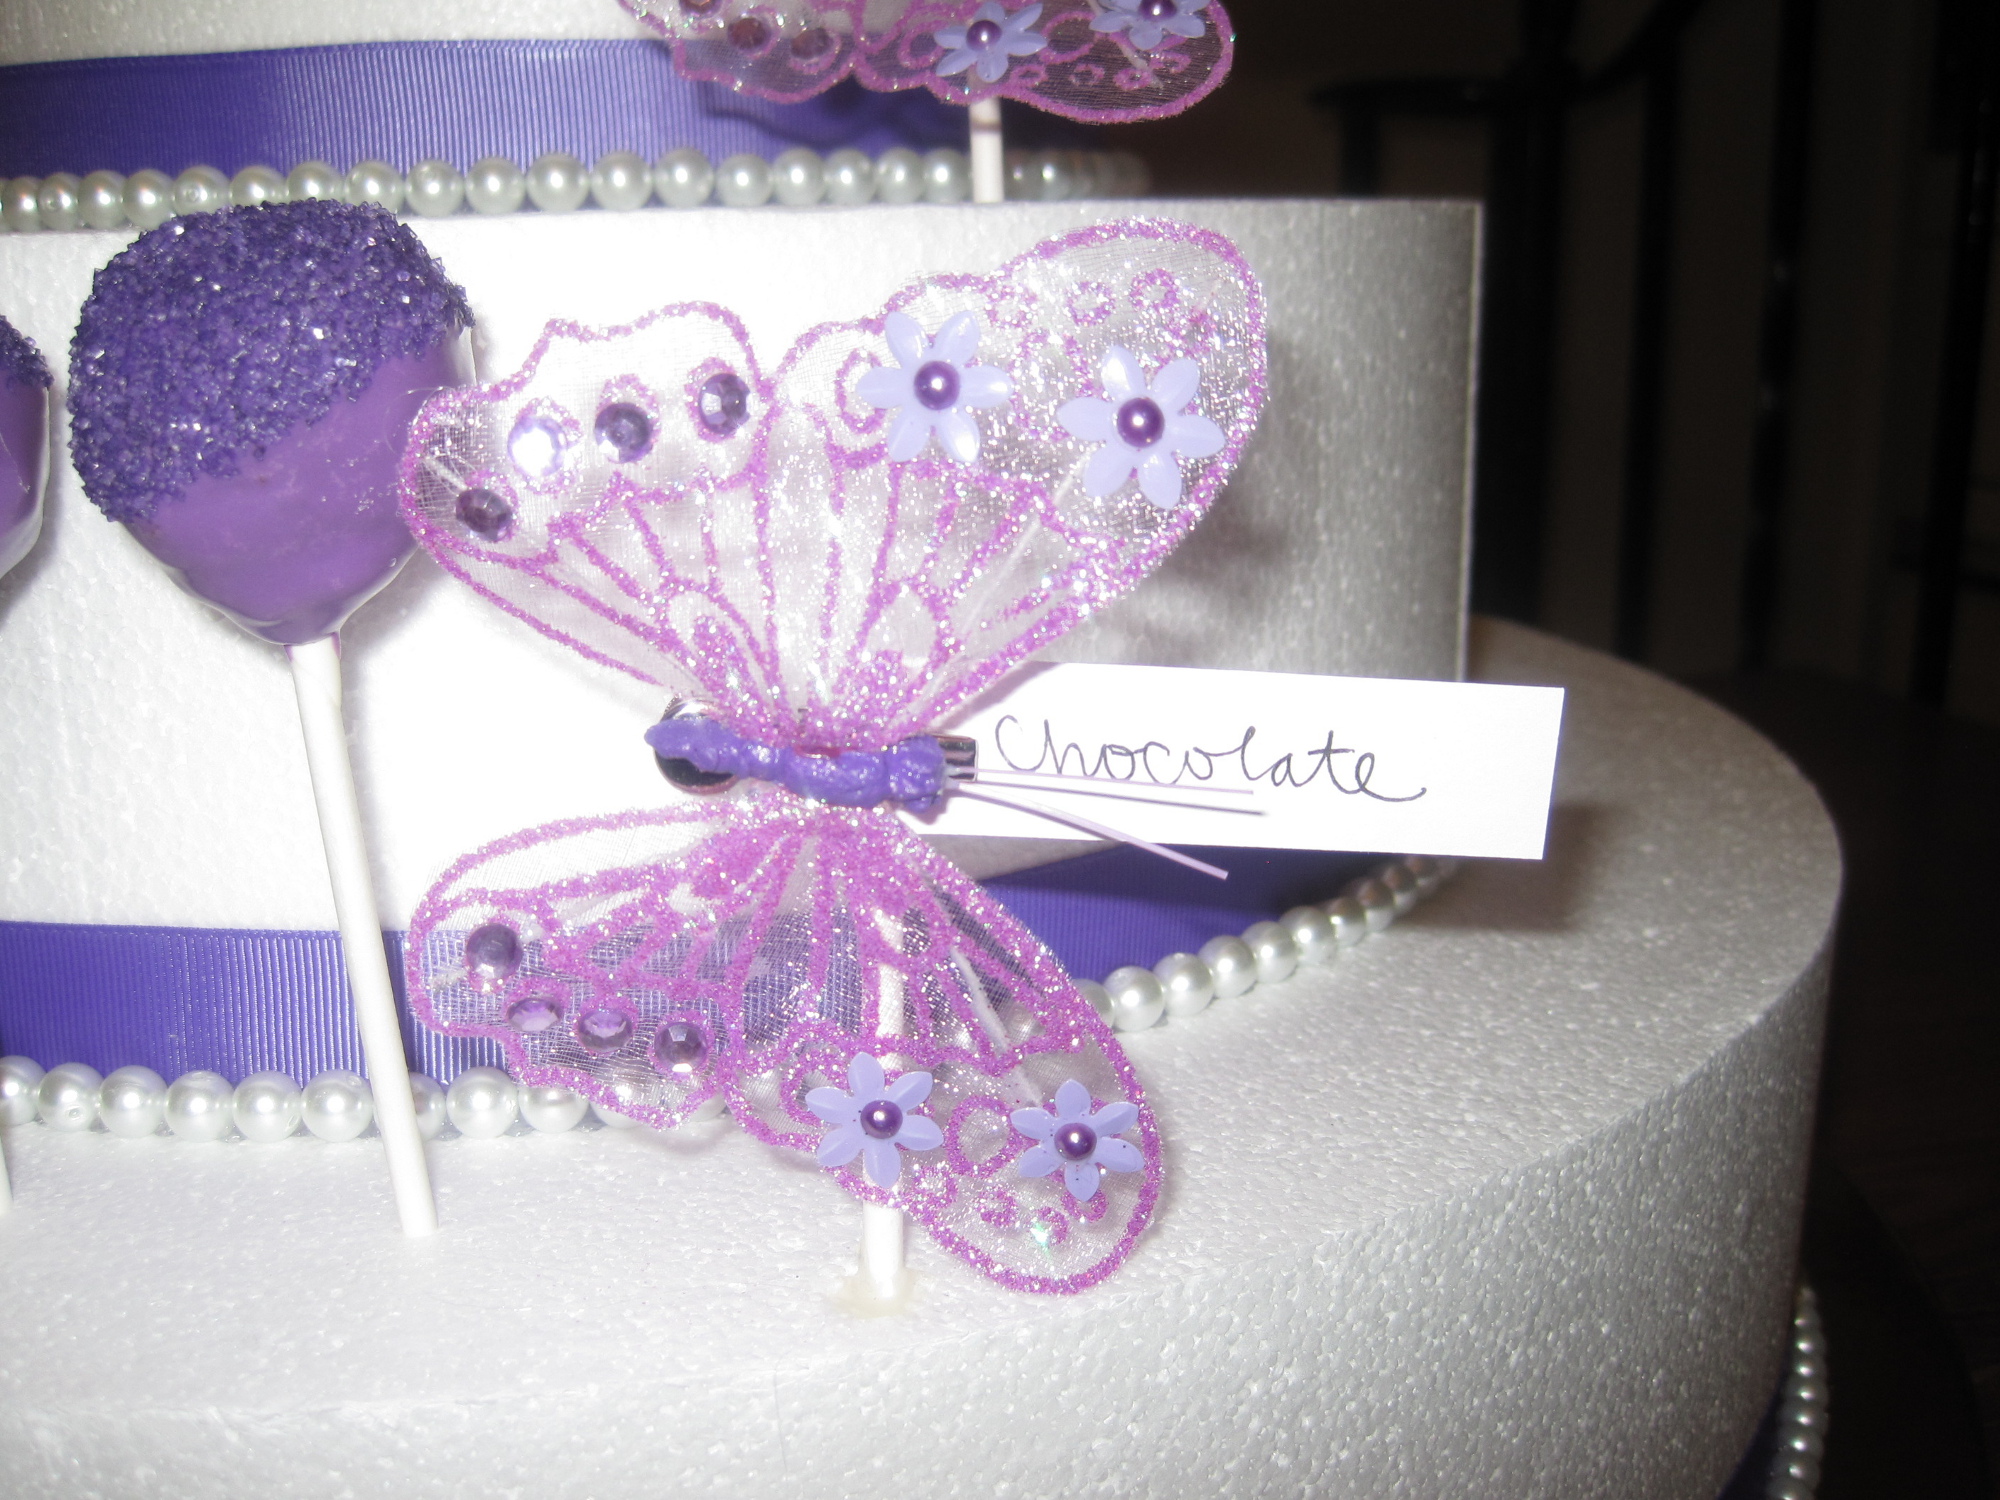
Once I attached all pieces, I used double stick tape to place the ribbon at the base of each tier. Then I used a glue gun to attach single craft pearls to the ribbon. Since each tier held a different flavor of cake pop, I wanted signs to showcase each flavor. I cut a strip of an index card, wrote the flavor name, and used a glue gun to attach this to a lollipop stick. I wrapped the end of the card around the stick and glued it in place. Then, I bought purple butterflies that were attached to alligator clips, and attached them to the sticks.
Then all that was left was to make and attach the cake pops. The cake base held 65 cake pops. I started from the bottom tier and worked my way up. Since it is difficult to stick the lollipop sticks into the Styrofoam, I first made a hole where I wanted to place the pop with the point of a wooden skewer. I made the hole, placed the pop, and repeated all the way around until the tier was filled. Before actually making the next hole, I measured where I wanted the hole to be using a cake pop. That way, the pops didn’t touch one another, and I didn’t waste space by having the pops too far apart.
The cake pops:
Cake pops can basically be any flavor, it’s just a matter of getting the correct cake to frosting ratio. If you use too much frosting, the cake will fall off the stick. If you use too little, the cake will not hold together. The cake and frosting mix should be the consistency of a firm dough. After chilling in the fridge for 20 minutes, the cake balls should be hard.
Bakerella suggested using one box of cake mix and one can of frosting. I have read elsewhere that some people use one box of mix and half a can of frosting. Since I make everything from scratch, I had to experiment. I placed my cake batter into muffin tins (prepared with Wilton cake release) and this way I could determine how much frosting to use per how many cupcakes. Also, this would tell me how many cupcakes I would need to make in order to end up with a yield of 80 cake pops (my original goal).
After some test runs and failures, it turns out that roughly 3/4 cup of frosting per 4 cupcakes produces about the right consistency. However, if your cake contains any oil, I would cut that amount in half when making the cake. In my test run, my chocolate cake contained 1/2 cup of oil, and would not stay on the sticks.
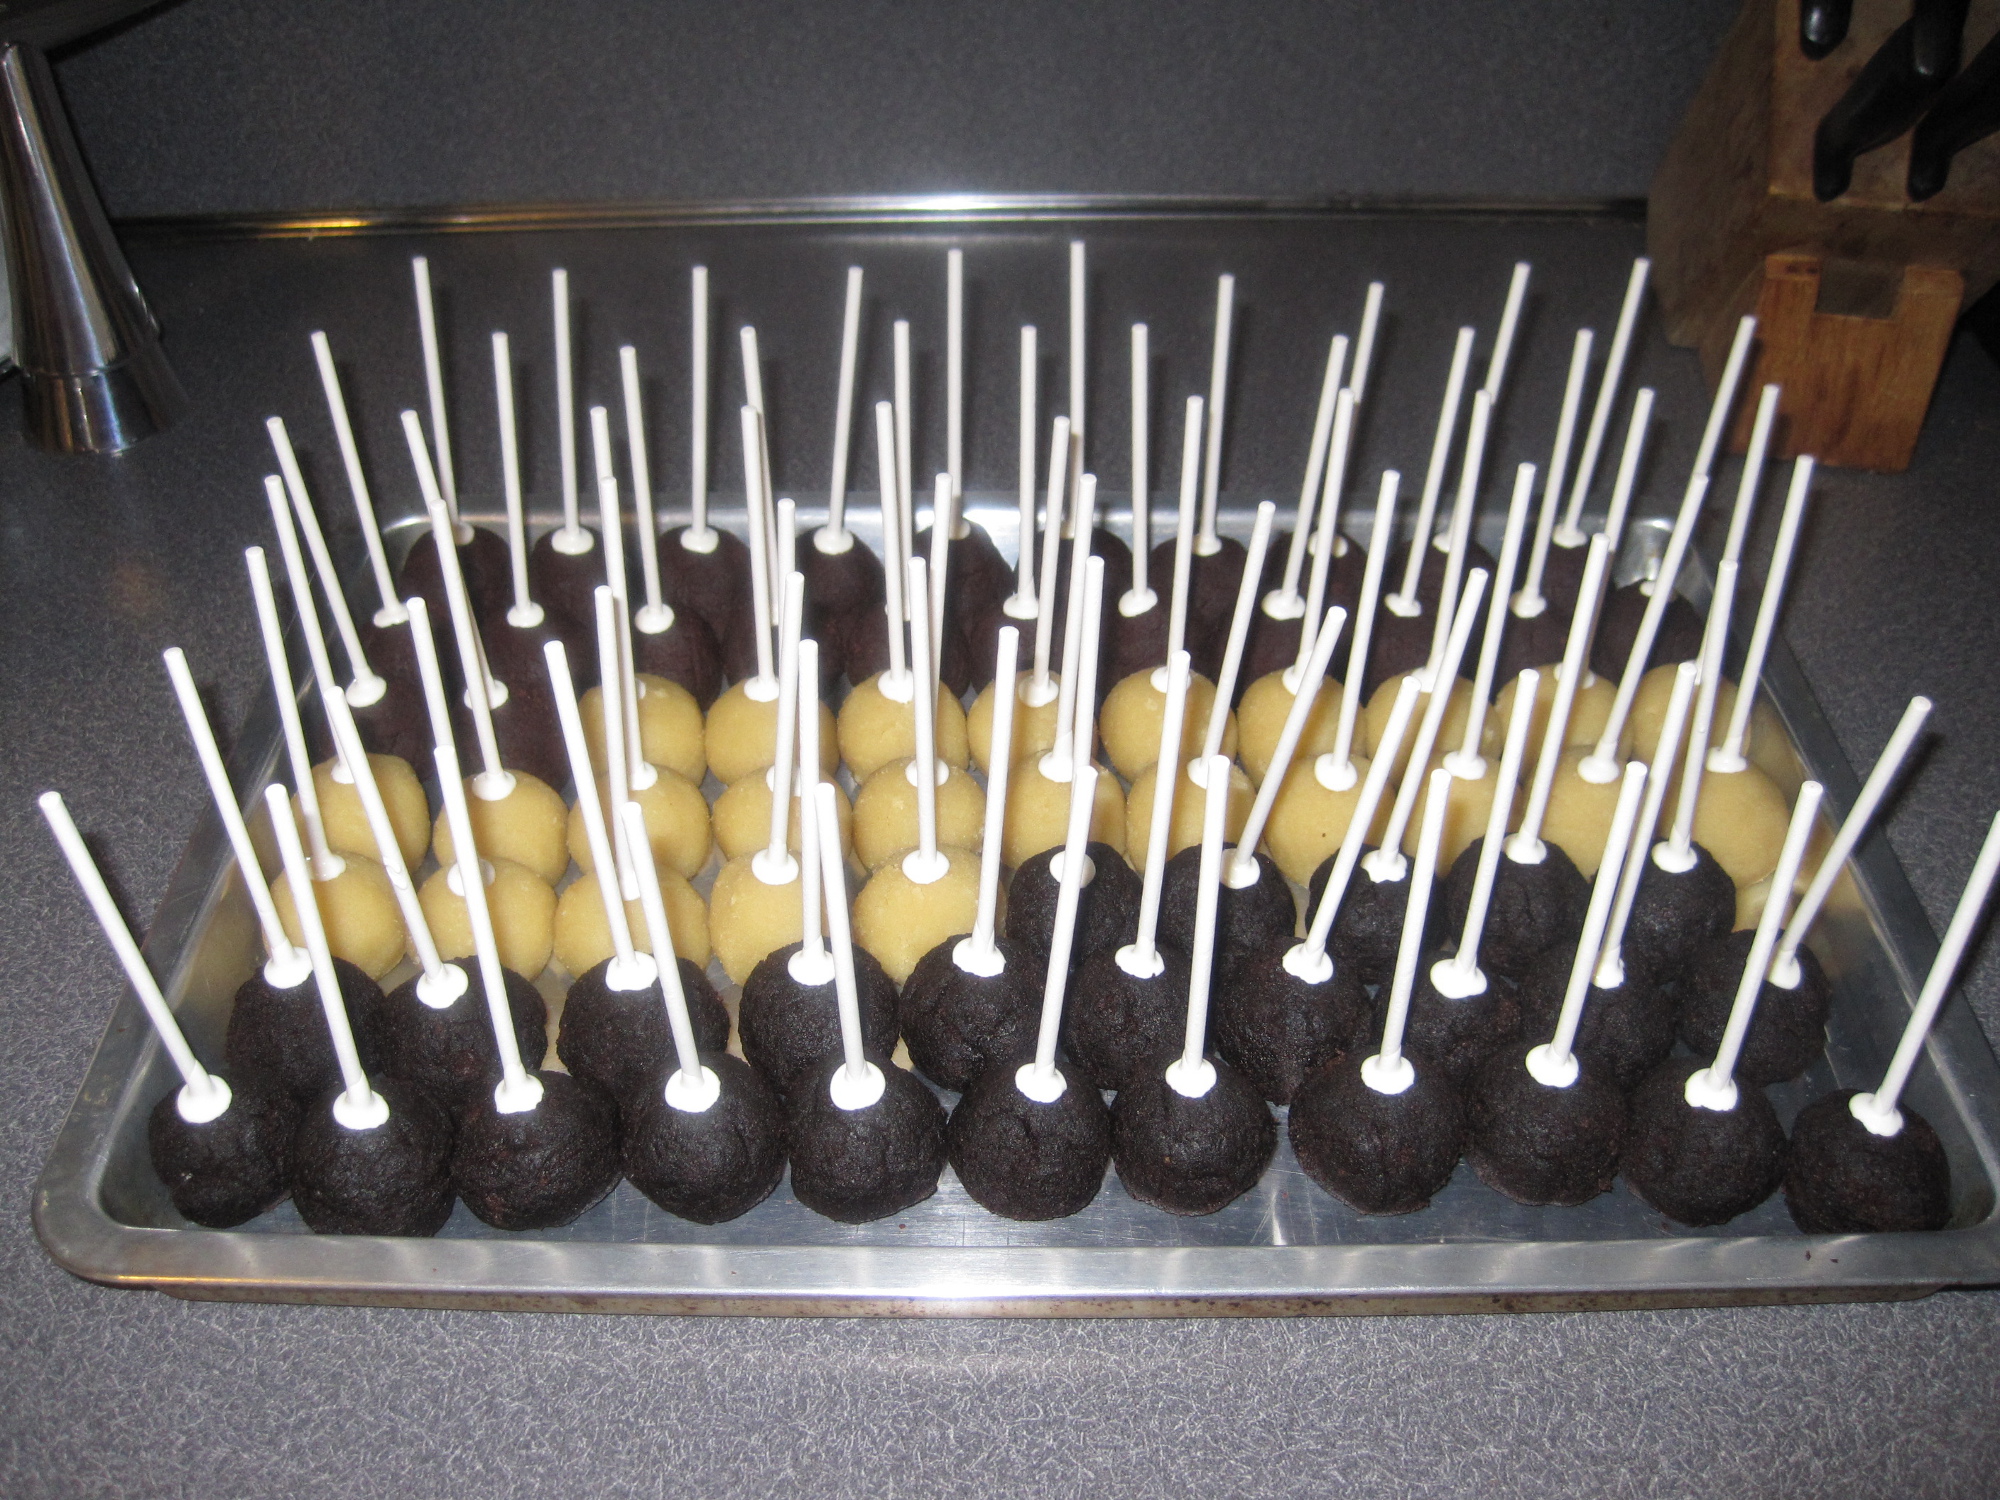
Each cupcake produces 2-3 cake pops, so for each dozen cupcakes I would expect 24-28 pops. I made 3 dozen (one of each flavor) and ended up with about 80 pops.
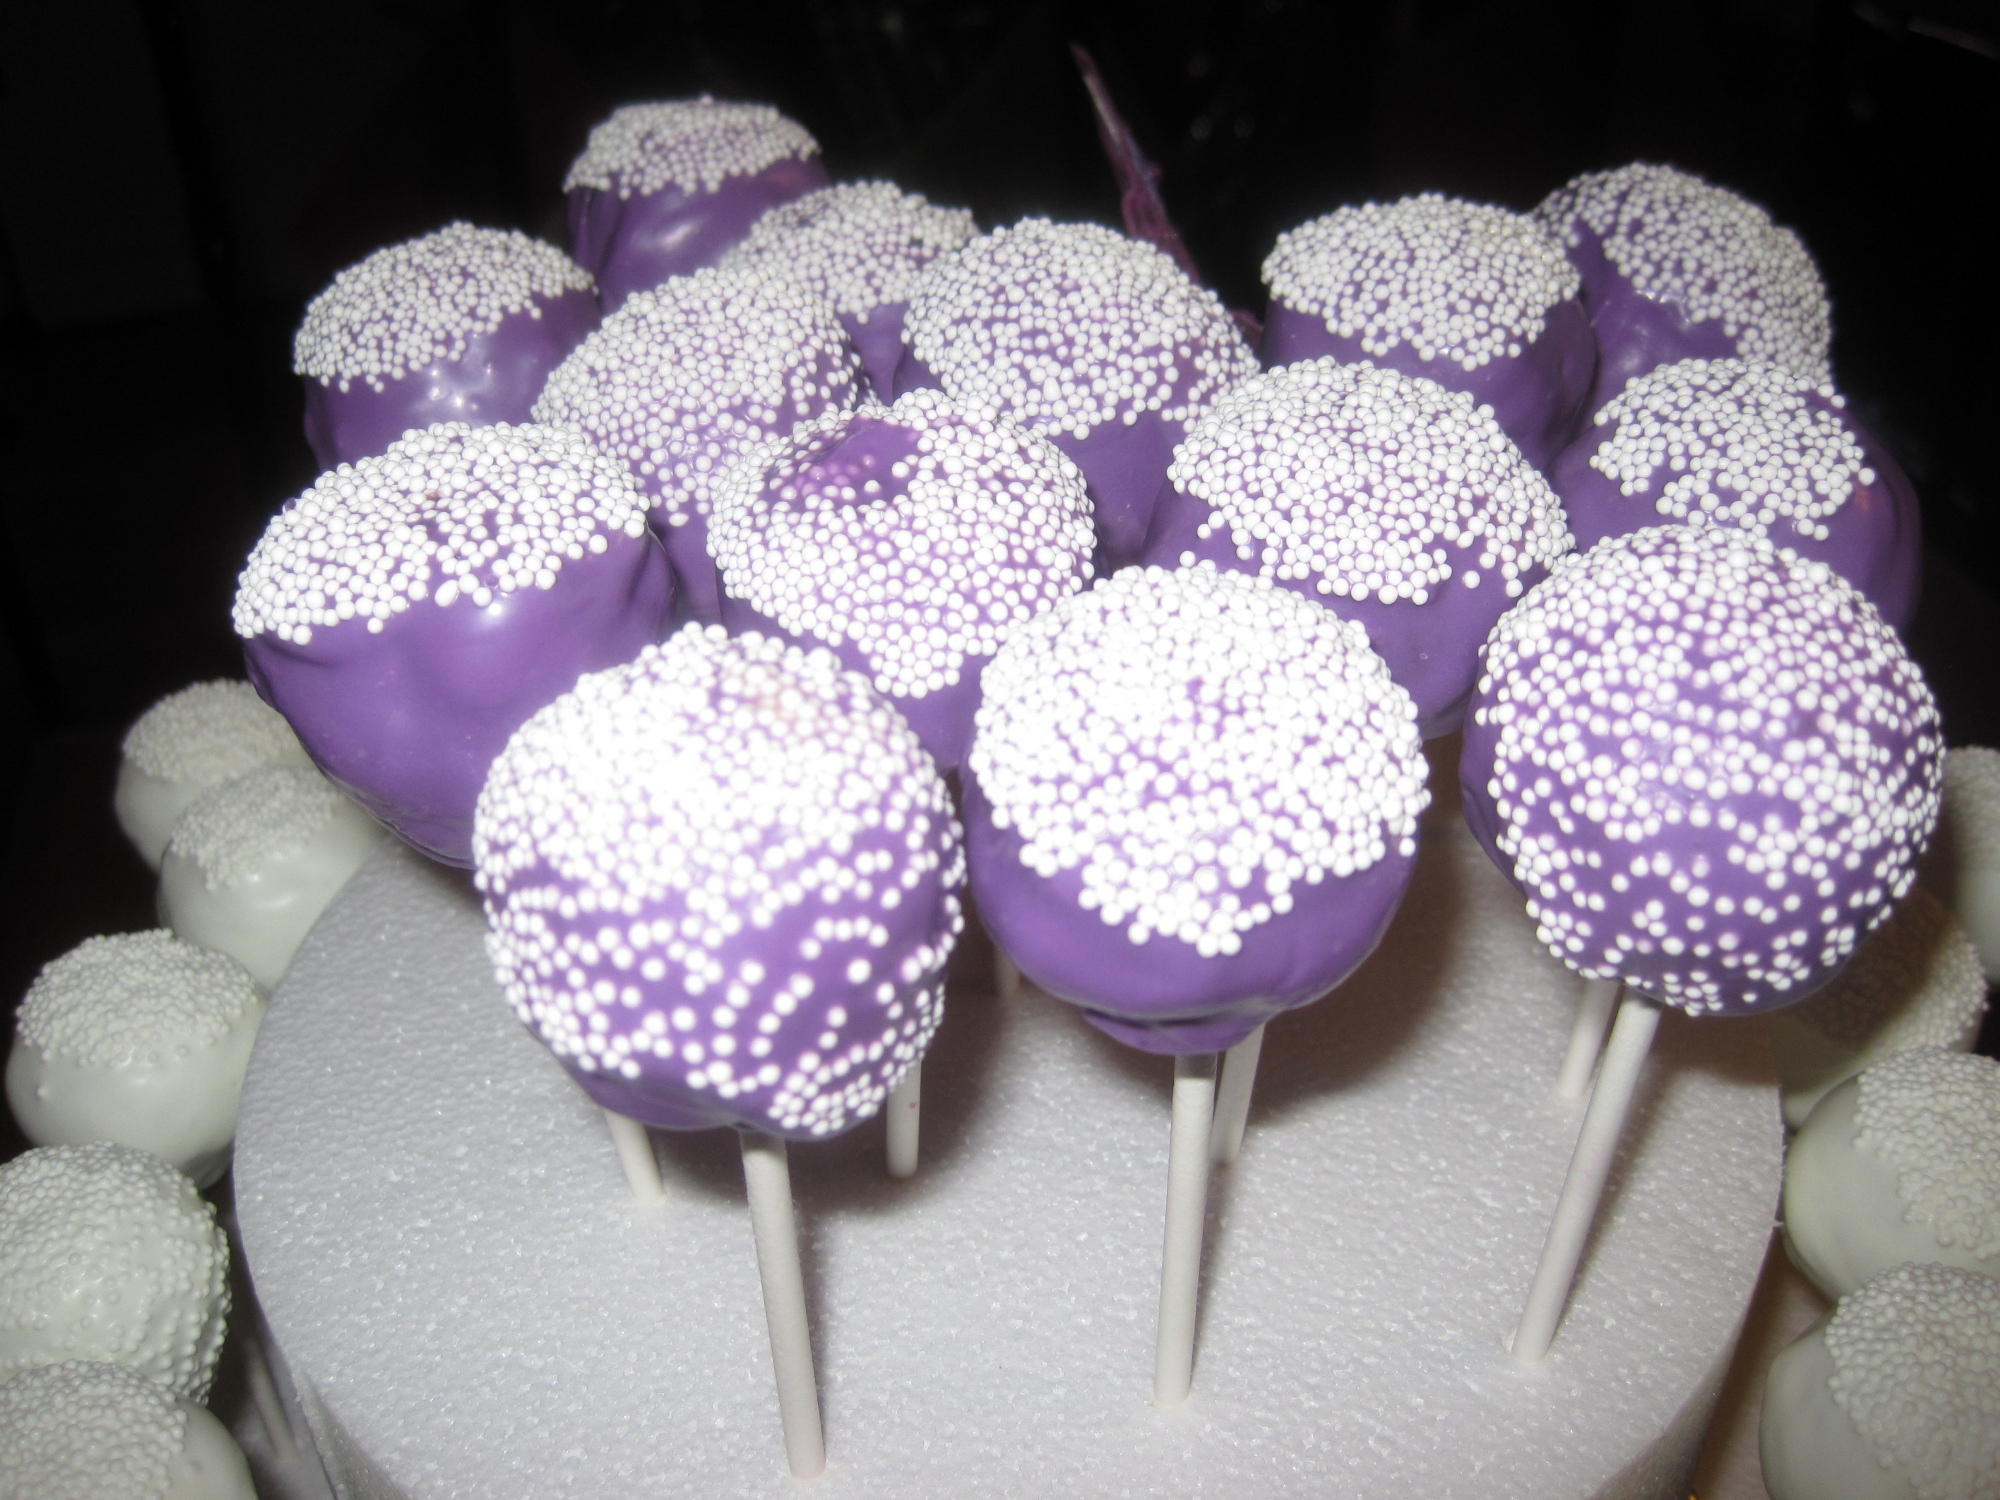
I made 3 flavors of cake pops: red velvet with cream cheese frosting, chocolate with coffee frosting, and vanilla with vanilla frosting. I covered the pops with Merckins candy melts, and then used nonpariels and colored sugar for decoration.
Instructions to make cake pops:
1. Make your cake directed, in prepared muffin tins. Make your frosting as directed (For a dozen cupcakes I would make a full recipe of 3 cups but you most likely won’t need it all). Cool the cake for several hours.
2. Tear up the cupcakes with your hands and place in a large bowl (best if you have a Kitchenaid mixer). Let the mixer beat apart the cake until it is completely crumbled.
3. Add the frosting to the cake (about 3/4 cup per 4 cupcakes) a little at a time. Add a little, turn the mixer on, and check. Keep adding a little more, making sure the mixture remains firm. You DO NOT want it to get too soft. Make sure it is fully mixed into one homogenous mixture.
4. Roll the cake mixture into 1.5 inch balls with your hands or use a cookie scoop. Place on a cookie sheet lined with wax paper and chill for 20 minutes, or until hard.
5. Melt a little of the white Merckins melts in a Pyrex measuring cup. Microwave for 30 seconds, and then 15 second intervals, mixing in between. You can use Paramount crystals to thin it out if the chocolate seems too thick (about 1 tablespoon per pound of chocolate).
6. Dip the end of the lollipop stick into the chocolate and place less than halfway through the cake ball. Give it a little twist. This should result in a button of white chocolate around the lollipop stick. Place in fridge for 10 minutes until the white chocolate is dry.
7. Make sure you let the pops warm to room temperature before dipping. Otherwise, the chocolate may crack. Melt enough chocolate in a measuring cup so that you can submerge the pop without touching the sides or bottom of the cup.
8. Dip the pop in the chocolate and then gently tap the end of the stick on the side of the cup, letting the excess chocolate drip off. Wait about 20 seconds for the chocolate to dry, then dip in the sugar or nonpariels for decoration. If you do it too soon, it may dislodge the chocolate.
9. Stick the pop upright into a piece of Styrofoam in the fridge and let it dry before putting away. Once they are dry, they can be placed in a Tupperware container in the fridge. Just make sure the container is closed so that when you take them out they do not sweat.
Some tips:
My test run pops actually came out better than the ones I made for the shower. Since my first batch of chocolate pops fell off the sticks, I was so worried about using too much frosting that I ended up using too little. The cake didn’t stay together too well, and once I started tapping the stick to get rid of excess chocolate, the cake would fall off. Luckily, my husband had the idea to put some melted chocolate in a squeeze bottle and reinforce the sticks. This helped a lot, and I only ended up with a few casualties. So this is something you can do if you have the same problem. Basically, reinforce around where the chocolate button is, extending out onto the cake. Let it harden in the fridge before dipping. This will prevent the cake from separating from the stick.
Another tip is to not worry about dripping. If the chocolate drips down the stick, just wait until it is fully dried. Then you can take a damp paper towel and wipe the stick clean. If you try cleaning it while it is still wet, you will end up with a mess.
Lastly, decorating with sprinkles or sugar really helps to cover up imperfections. So if your chocolate is lumpy and you can’t get it to the right consistency, dip the whole thing in sprinkles. It will not only look cute, but no one will be able to tell that you ever had a problem.
Happy baking!!

great post. I have no patience to make cakes from scratch or experiment the way you did.
However, I do find if the balls are let out to room temperature and then dipped, it makes the dipping difficult. The balls work really well for dipping when chilled.
the tower is beautiful!
These look so good! I’ve never actually tried one before. I”m sure yours are way better than Starbucks!